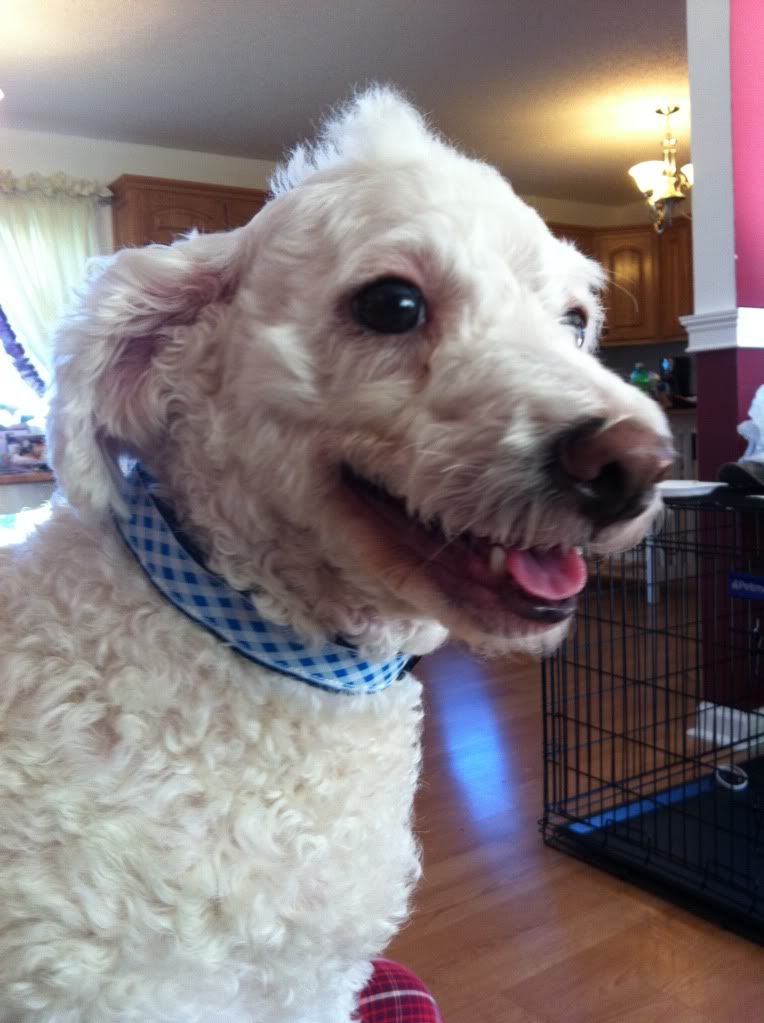
I thought it'd be fun to share some pet friendly gifts for the holidays since I'm sure most of you have a furry critter in your life! It's no secret that Pipkin and Georgia are basically our children and we love them so much. Puppy presents are some of my favorite to pick out each year and this one is no different! Here's a few things I think would make rad gifts!
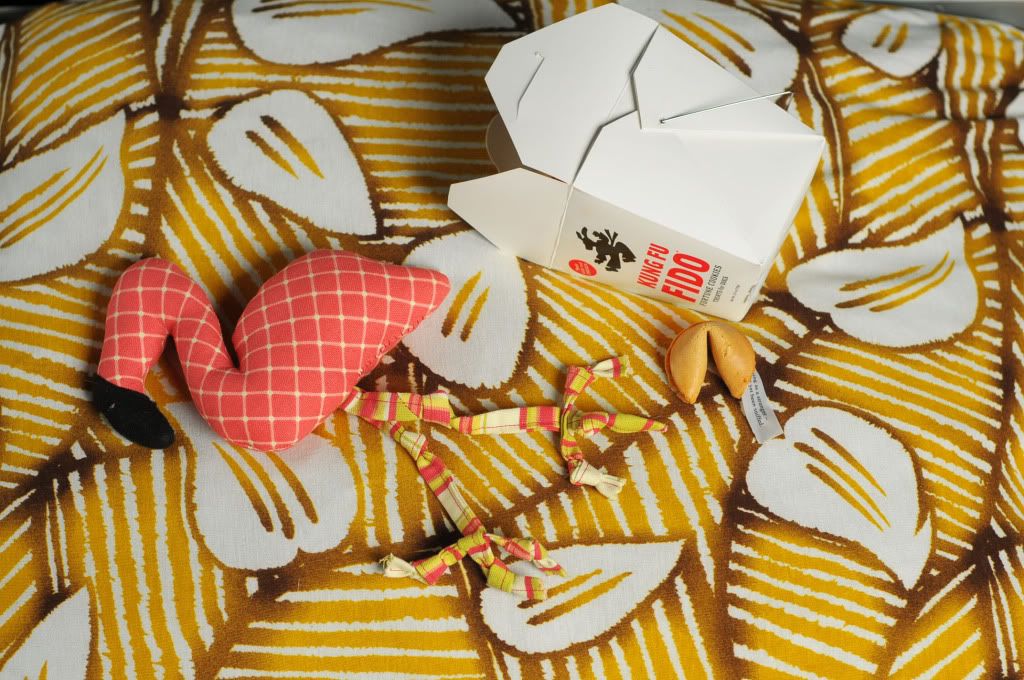

I received a package from Lucy over at Fair Ivy several weeks ago and it's like a fun little grab bag of sorts! The items are handmade and always exciting and different. I opted for the Fur Ivy package for the girls and they're loving the contents. It arrived and I opened to find a fun flamingo doll and some pup-friendly fortune cookies (Kind of felt like fate since Mike and I have a fortune cookie ~thing). Fur Ivy boxes are now on sale for a crazy low price, 40% off! You can read more about the Fur Ivy packages here (or their other packages: Fair Ivy, Fred Ivy and Fun Ivy). There's one version for dogs and one for cats, too!

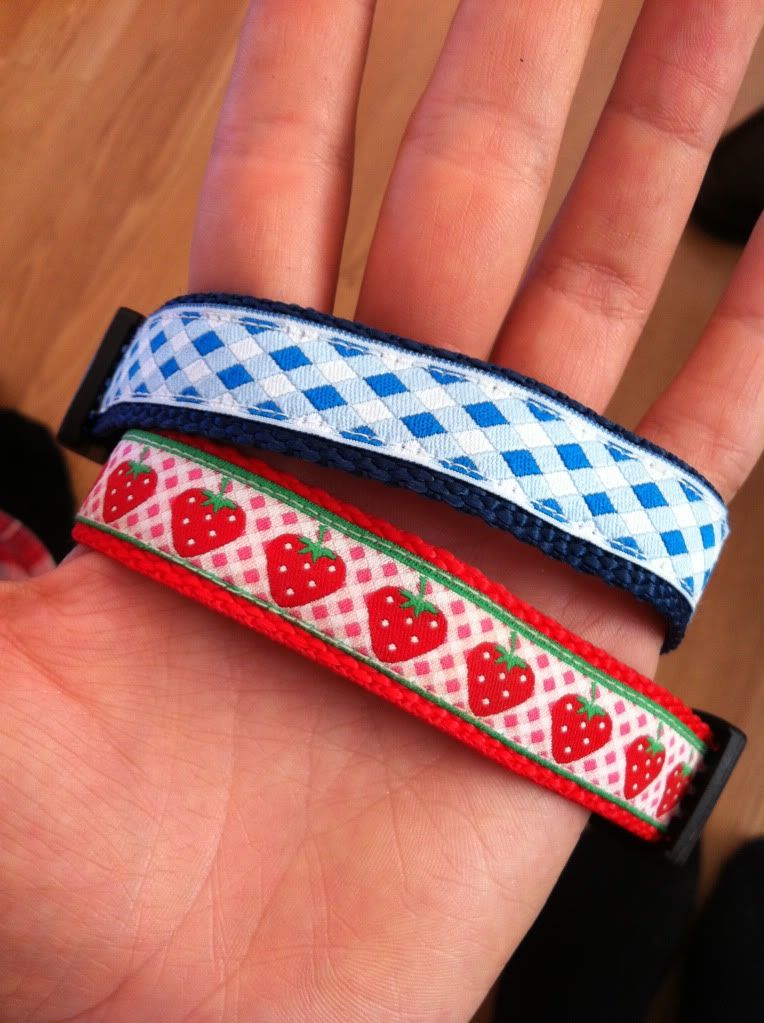
Another fun idea is a super cute new collar! My girls don't wear collars (fat necks! They're the harness type) but Alejandra from Doe A Deer sent these over for my mom's two dogs: Charlie and Lacey! I am absolutely in love with this sweet strawberry print! I really love the pop of colors, too. They're incredibly well made and ship quickly! See more size and pattern options here!


Homemade pet treats are a super fun idea, too! I love these doggie donuts! Aren't they adorable? You could also get some catnip-filled strawberries for your favorite felines!
♥ ♥ ♥ ♥ ♥ ♥ ♥ ♥ ♥ ♥
And if you're feeling really up to it, you could even build them a custom vintage suitcase bed for napping! I love the look of them but could never justify the pricetag associated, so Mike and I headed to Lowe's to build our own! We weren't sure we'd be successful so we used a huge janky Samsonite suitcase we had stored away (so Georgia could fit!). We wouldn't be heartbroken if it didn't work and we lost the suitcase. Anyway, it was a super super easy project. You do need a drill, but you can have the wood pieces cut at a home improvement store, so you don't need to worry about that! It probably took all of 15 minutes to actually make. If you're interested in the process, peep below!
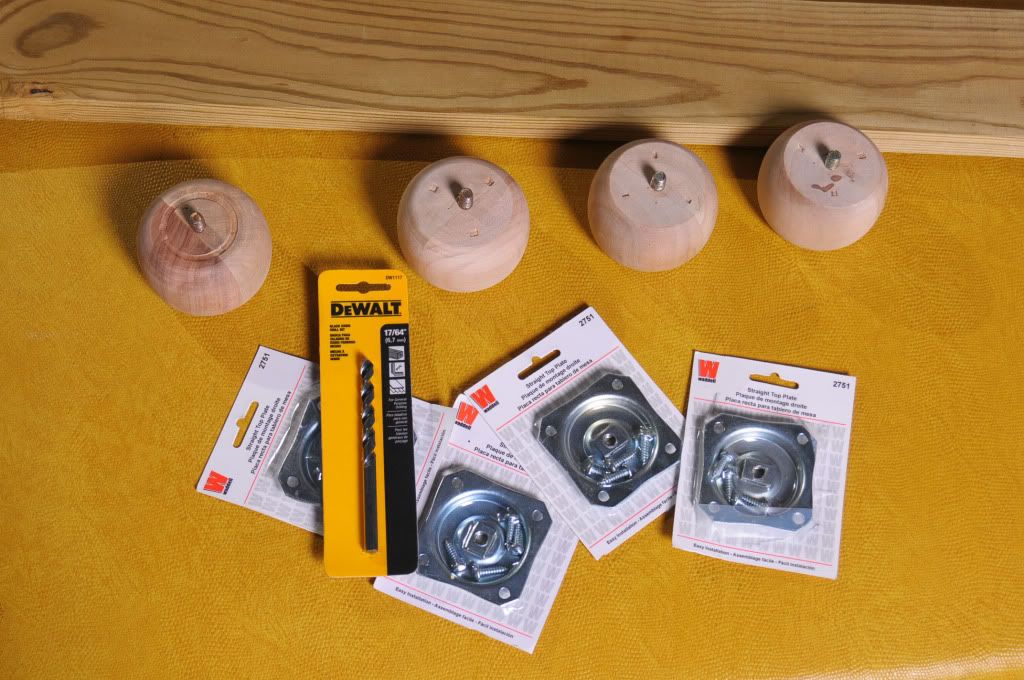
What you'll need:
- Vintage suitcase
- 1x4 wood cut to size (2 slats to fit the width)
- 4 internally threaded furniture legs
- 4 leg braces with screws (found next to the furniture legs)
- Properly sized drill-bit (We used a 7/64")
- A pillow insert for the "bed"
- Drill
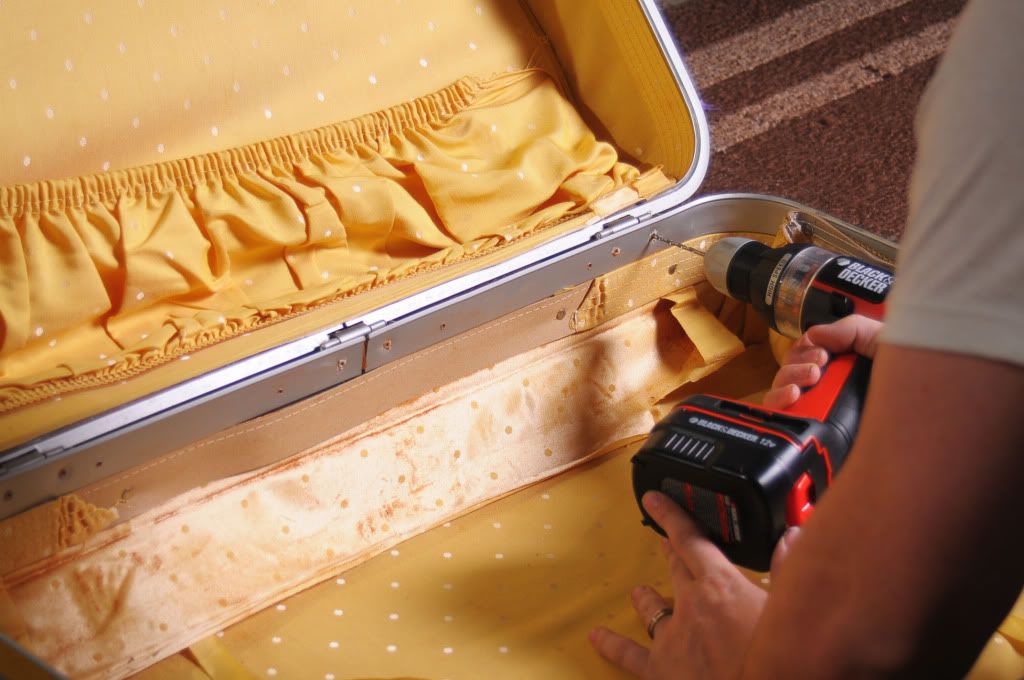
First you need to unhinge the top of the suitcase from the bottom. Some suitcases are as simple as a screw, and some (like ours) have rivets that you can just drill right through to pop the top off. Many Samsonites are built this way. It takes a little arm pressure, but it's easy! Remove and discard the top portion of the suitcase.
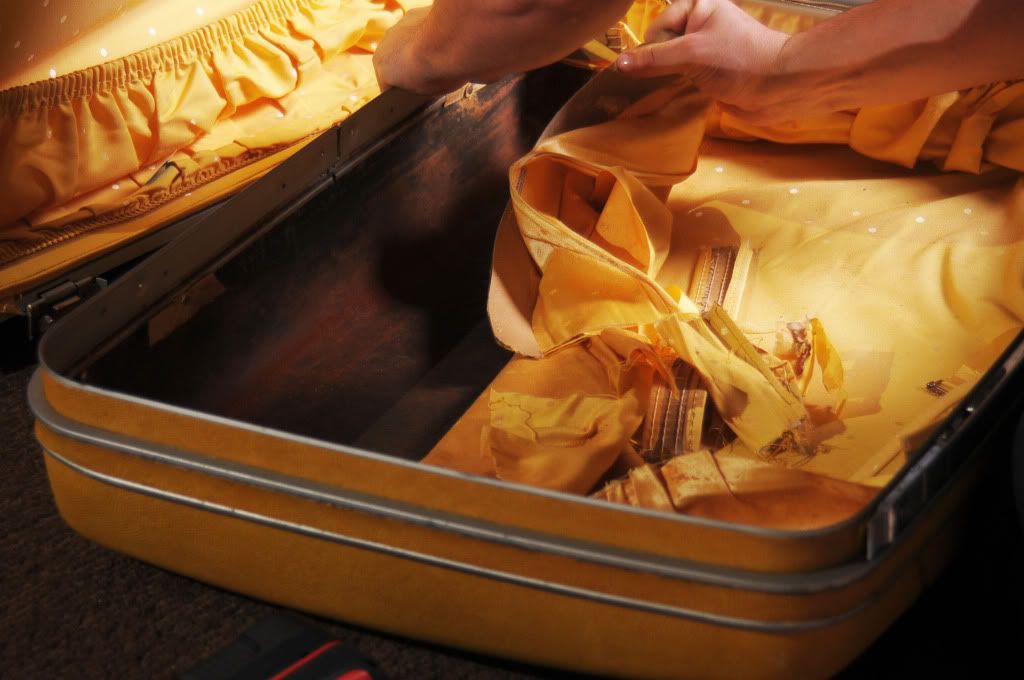
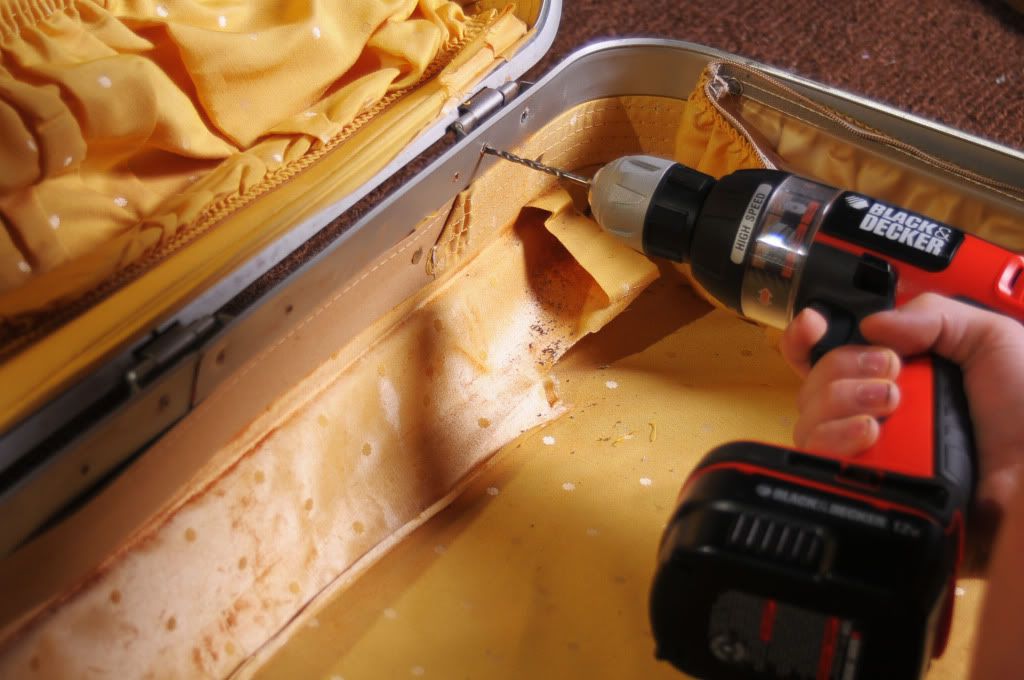
Then rip the lining out of the suitcase. Some people may choose to leave it, and that's fine. We wanted to be able to see where we were drilling.
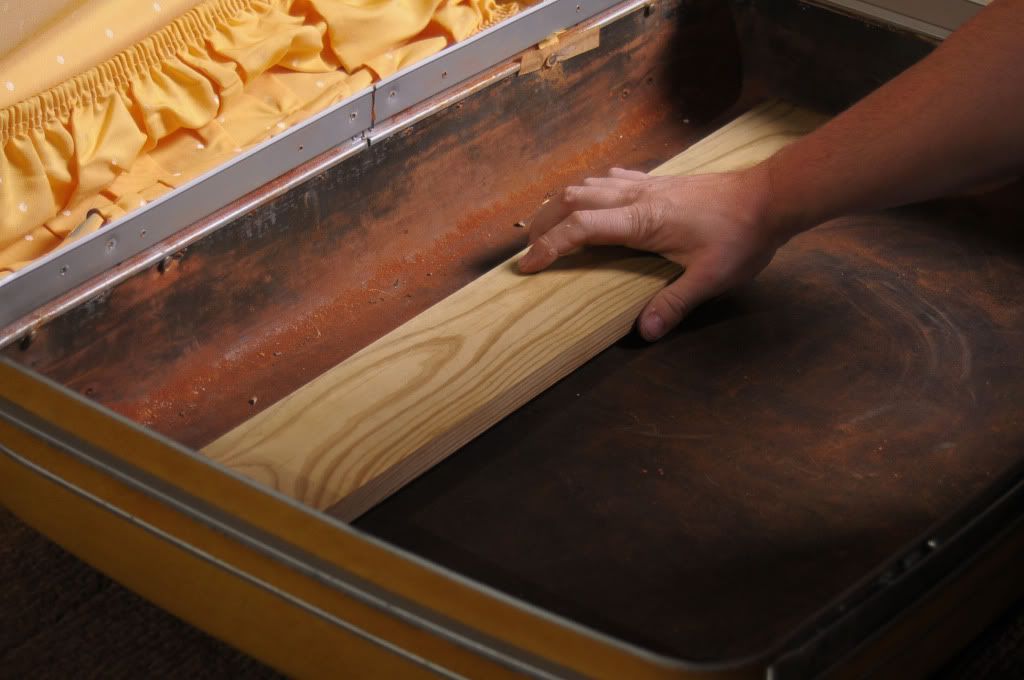
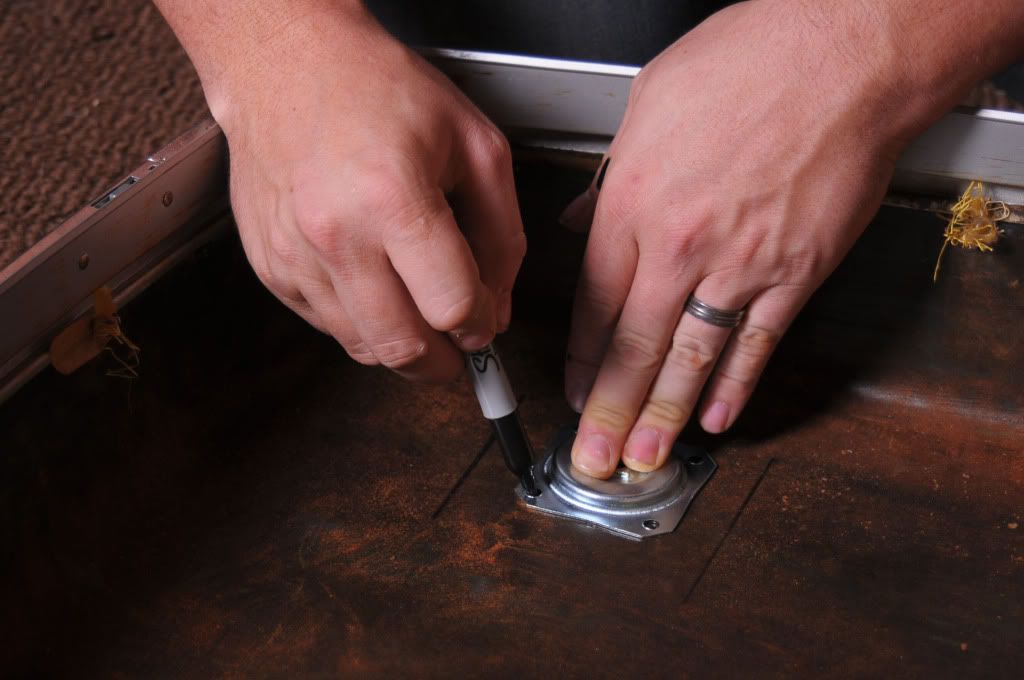
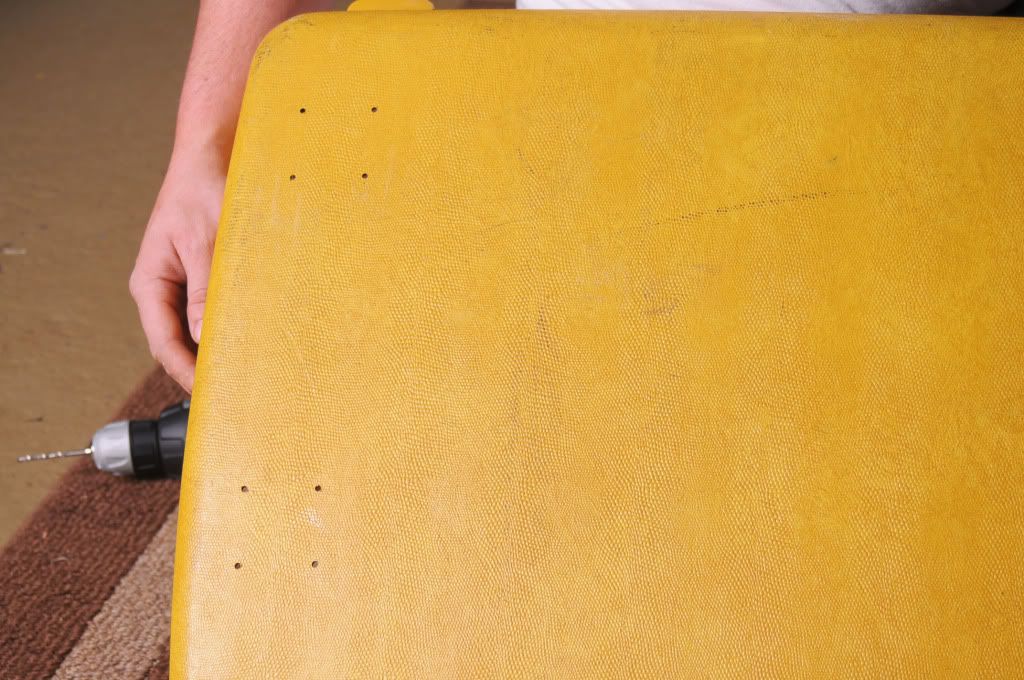
Place your cut boards into the front and back of the suitcase to help keep it stable. Figure out where you want them to go and mark it with a permanent marker or chalk. Then place your braces inside those lines to mark where the screws will go. This is where you will drill through. The back should have 16 holes when you're finished with this step.
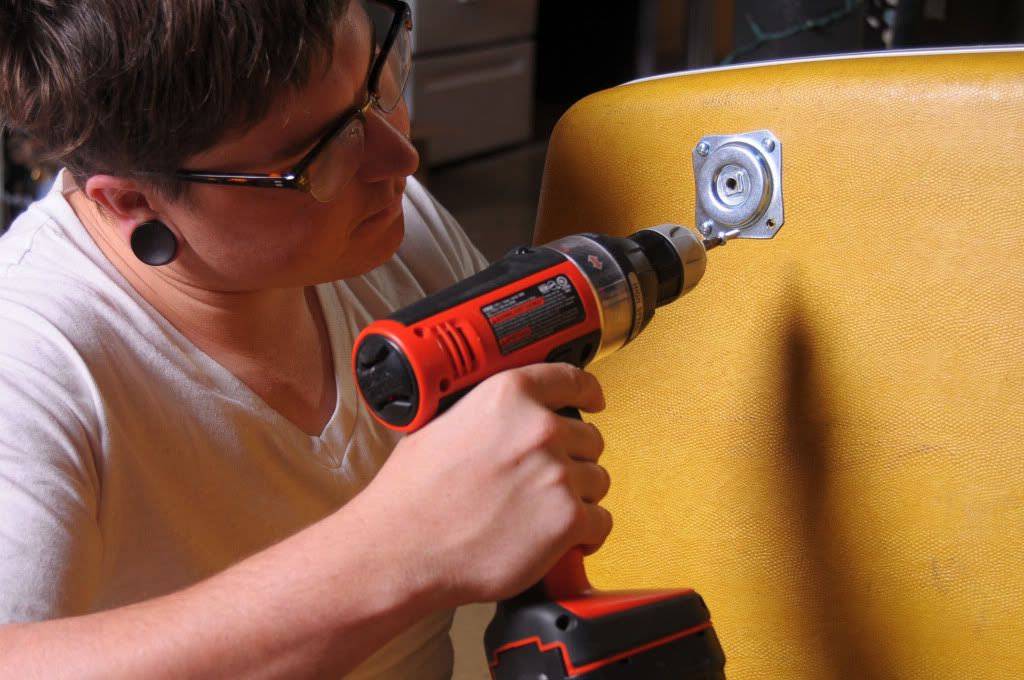
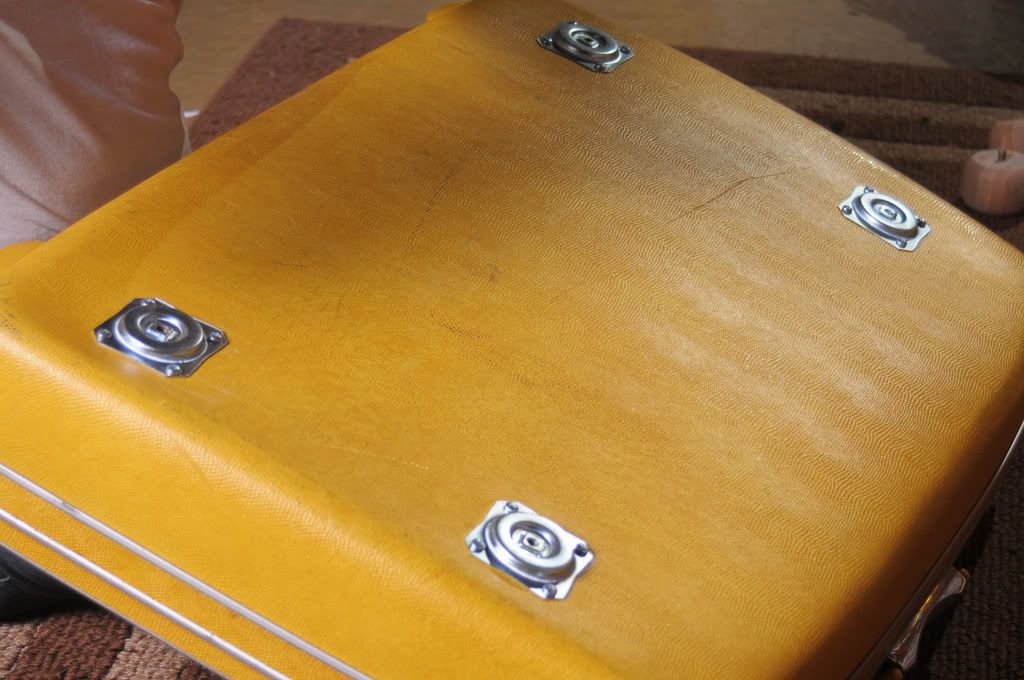
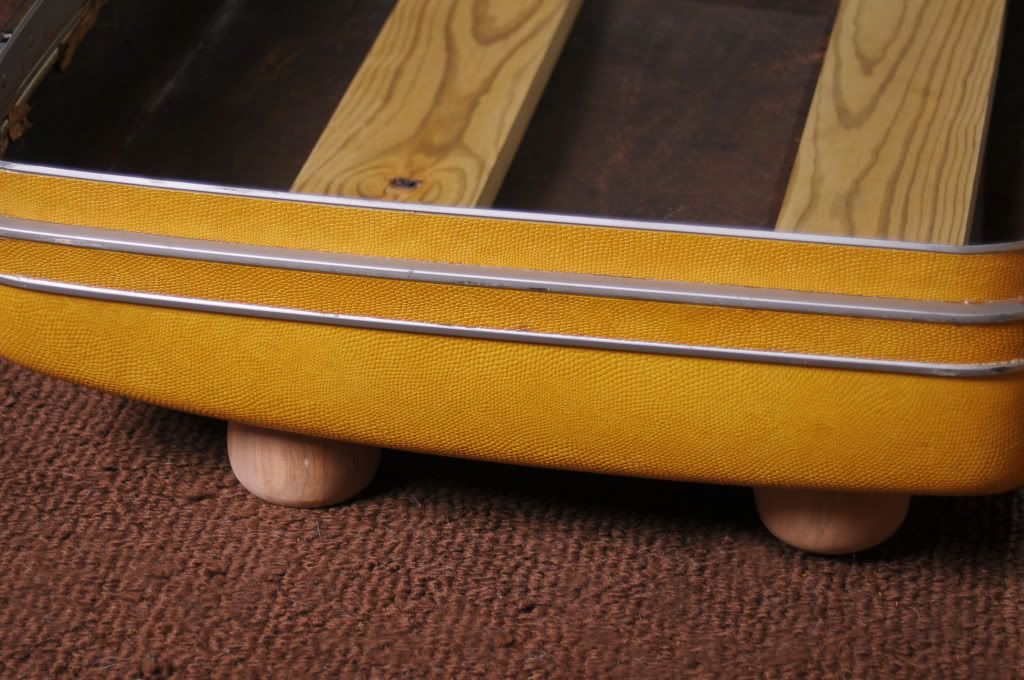
Now you can use the screws that came with the braces to attach them to the outside of the suitcase. Attach all 4 of them and then screw the furniture legs into the braces. ETA: We actually had to screw through the middle section of the brace, too. So we ended up with 20 holes! Depending on how long the thread is on the legs, you may need to screw through there, too!
Then you can sew a simple rectangle, stuff it with filling and call it a day! You now have a sweet pet bed! (Don't mind mine... It's lumpy and poorly sewn, but you get the idea!)
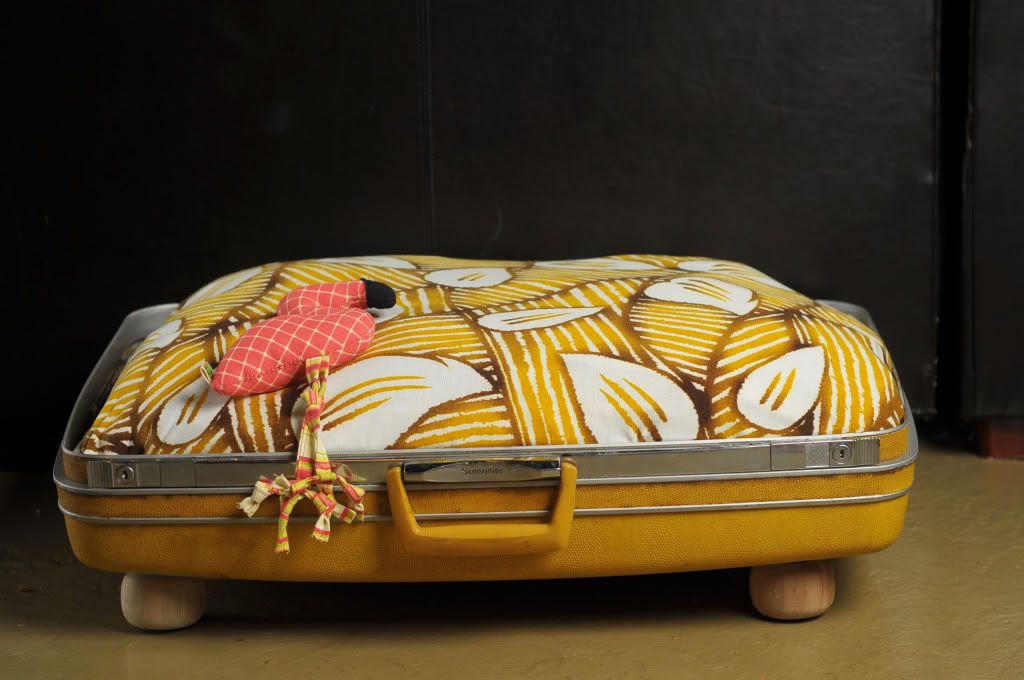
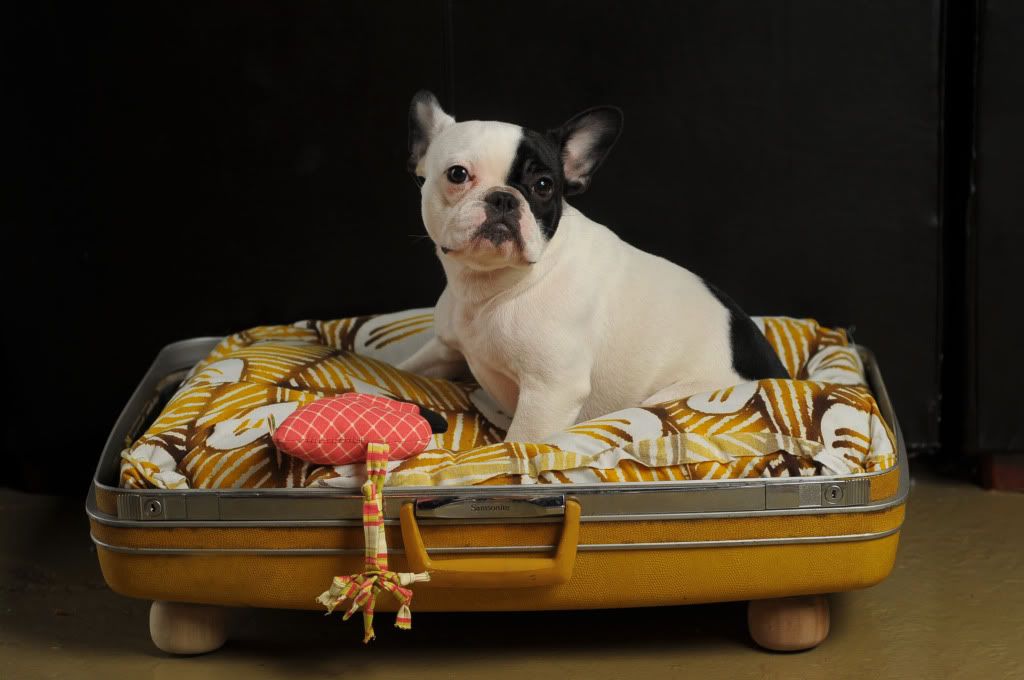
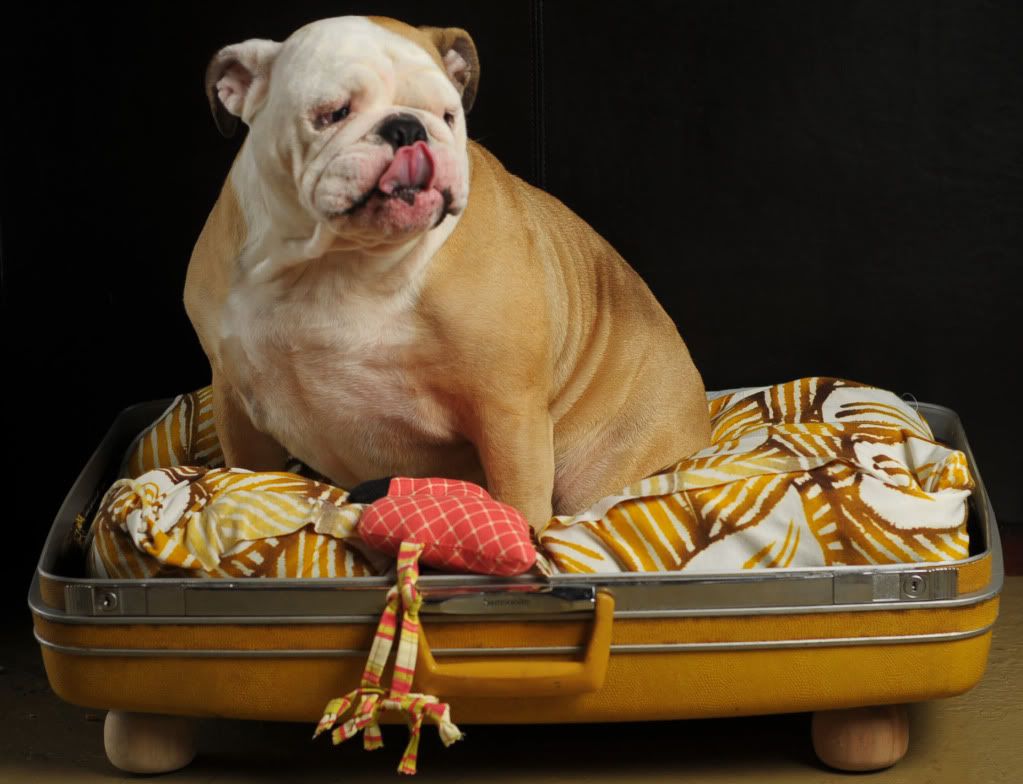
The furniture legs can be really expensive at the home improvement stores, so if you have some time, look them up online and order them! These simple wheel-like legs were $3 a piece (most were $8!) and that can add up quickly! You could even repurpose old furniture in your house or something from the thrift store! The final product cost us less than $20, but if we had been more creative then we could've done it for under $10! I'm planning on making some cuter ones but this one will do for now! (They both actually really love it!)
Give all your pets lots of hugs from me! xo
Do you celebrate the holidays with any of your pets? Do you like to make/get them gifts or hang stockings?
No comments:
Post a Comment