Showing posts with label holiday. Show all posts

Wednesday, 4 January 2012

Elegant New Year's Eve Table Setting: Welcome to the 175th Tablescape Thursday!

Can you believe this is our 175th Tablescape Thursday?  Wow!  That's a lot of fabulous tablescapes when you consider how many are linked here each week.  Thank you, thank you, thank you to all you talented ladies and gents who share your amazing eye for detail and beauty.  It's so wonderful to visit your blogs.  The world just melts away for a while as I lose myself in the wonderful table settings you create.

My friend, Bonnie, graciously shared the table she created for her New Year's Eve celebration with friends.  I fell in love with it the minute I saw it.   I have this thing for clocks so this table setting is one of my faves.  The chandelier got a touch of whimsy or should I say, it's "chimerical."   (See the earlier post today.)  Do you see the pocket watch draped above?


What a festive way to welcome in 2012!  Love the black, gold and cream color scheme.


Clock salad plates are from Pottery Barn, last year.  Love these!


What a great idea...using a bow tie as a napkin holder.  Perfect for a New Year's Eve celebration.


Bonnie used masks as well.  Fun!


I'd love a set of these clock-face plates but a quick check on eBay produced nada.  Waaaaa.


The vintage look of the clock plates goes so well with the centerpiece.  (Pssst: Sharlotte at Sharlotte's Reflections made her own vintage clock-face plates since she wasn't able to find the PB plates.  Click on her blog name to visit and see how she did it.)


Bonnie, thanks so much for sharing this wonderful table!  What a grand way to kick off the new year!


Resources:
Dinner plates - Butler's Pantry
Clock Salad plates - Pottery Barn, last year
Glasses, placemats - Target
Linens, Chargers & Flatware - Marshall's
Napkin rings; Bow ties for the gents, Masks for the Gals - Avery's, many years ago

Looking forward to all the wonderful tablescapes linked for this Tablescape Thursday!

To receive the latest posts, as well as updates about blog parties, subscribe via an RSS Reader or have BNOTP delivered right to your Inbox.  You'll find links to subscribe via RSS and e-mail on the sidebar to the right.  Thanks for reading; so glad you are here!

Reading this post via e-mail or RSS feed?
*If you are reading this via email or RSS feed, to view all the tablescapes linked for Tablescape Thursday, click HERE.

Please Read:
If you are participating in Tablescape Thursday, please be sure to add your permalink below, and not your general blog address. To get your permalink, click on your post name, then just copy and paste the address that shows up in the address bar, into the "url" box when you link up.

You'll need to include a link in your post back to the party in order to link up and participate.  That's so visitors to your blog will be able to find the party and  the other Tablescape Thursday participants.

If you would like to use the Tablescape Thursday logo button in your post, just copy and paste it to your computer and upload it to your post as you would any photo. Or, grab the html code you'll find under the "Parties" heading at the top of this blog.

Please, don't add your post name/blog name ALL IN CAPS...it tends to create big spaces between the rows of links. Thanks!

Let's try something fun today! Please visit the person who linked before you and after you...that way everyone will get some visits. Hope you'll visit more, of course.


Welcome! Thanks for coming to the party!

Saturday, 3 December 2011

Pet Holiday Gift Guide + Suitcase Bed DIY

I thought it'd be fun to share some pet friendly gifts for the holidays since I'm sure most of you have a furry critter in your life! It's no secret that Pipkin and Georgia are basically our children and we love them so much. Puppy presents are some of my favorite to pick out each year and this one is no different! Here's a few things I think would make rad gifts!

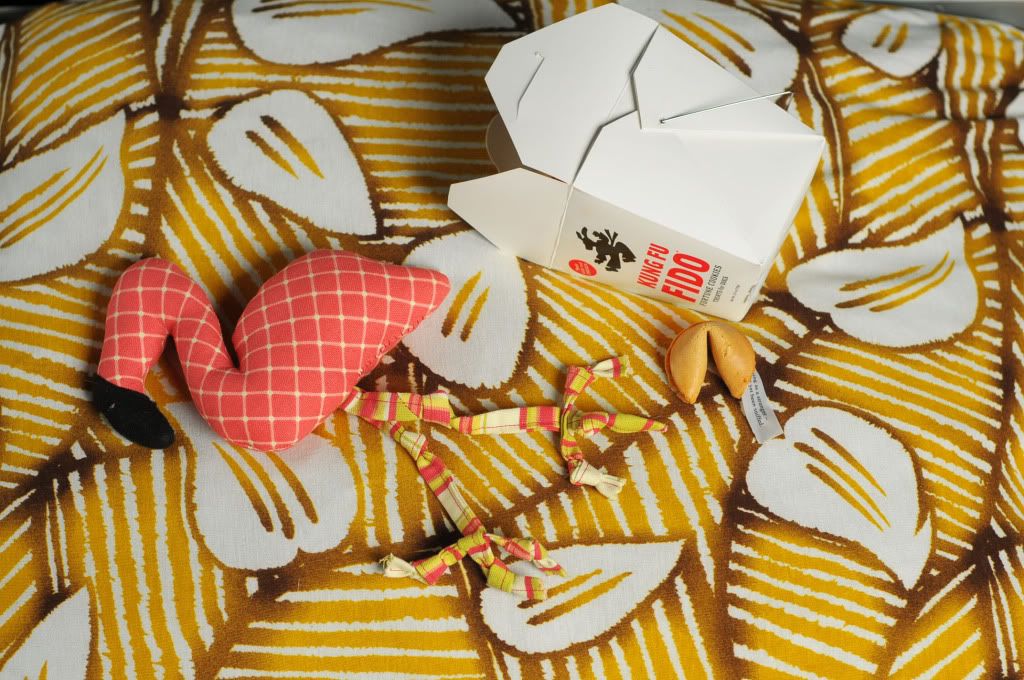
I received a package from Lucy over at Fair Ivy several weeks ago and it's like a fun little grab bag of sorts! The items are handmade and always exciting and different. I opted for the Fur Ivy package for the girls and they're loving the contents. It arrived and I opened to find a fun flamingo doll and some pup-friendly fortune cookies (Kind of felt like fate since Mike and I have a fortune cookie ~thing). Fur Ivy boxes are now on sale for a crazy low price, 40% off! You can read more about the Fur Ivy packages here (or their other packages: Fair Ivy, Fred Ivy and Fun Ivy). There's one version for dogs and one for cats, too! 

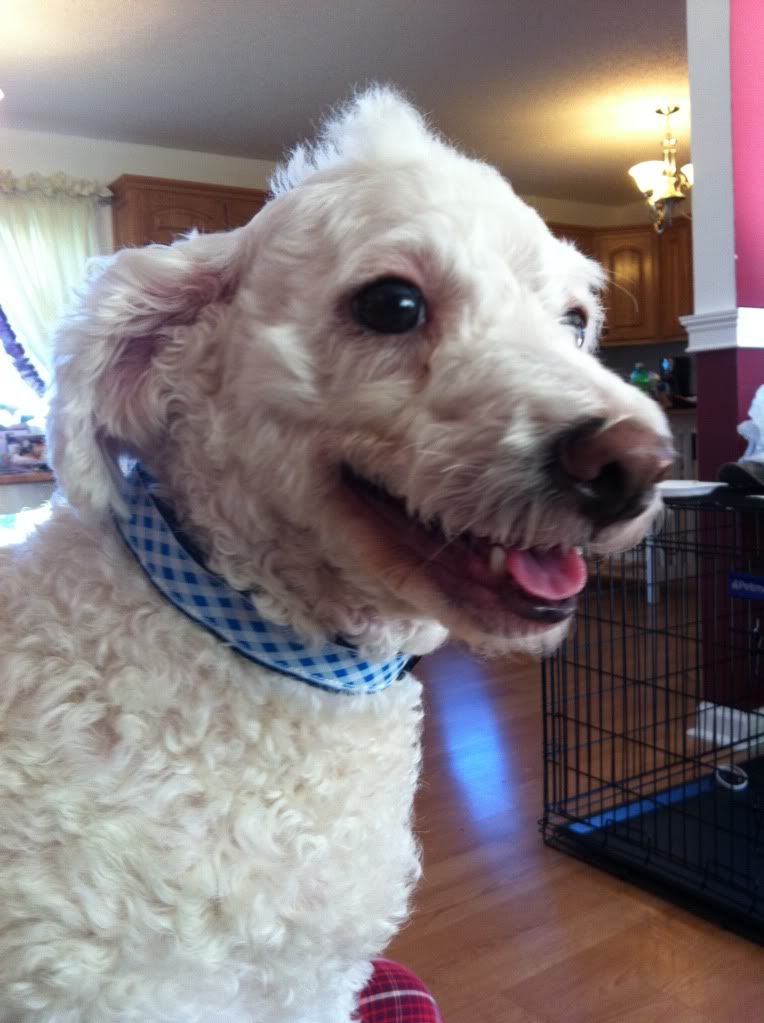
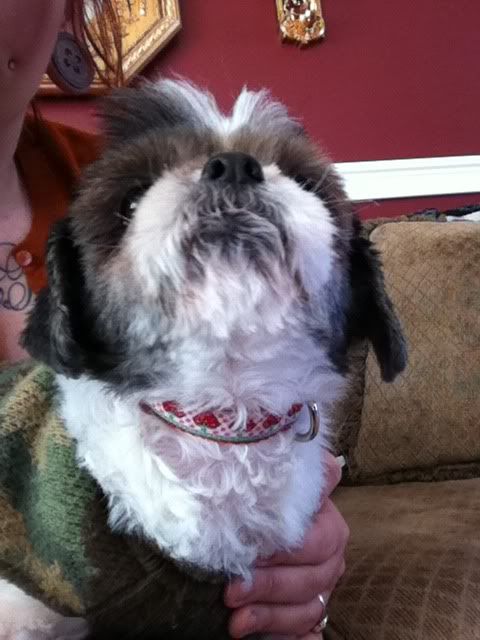
Another fun idea is a super cute new collar! My girls don't wear collars (fat necks! They're the harness type) but Alejandra from Doe A Deer sent these over for my mom's two dogs: Charlie and Lacey! I am absolutely in love with this sweet strawberry print! I really love the pop of colors, too. They're incredibly well made and ship quickly! See more size and pattern options here

Homemade pet treats are a super fun idea, too! I love these doggie donuts! Aren't they adorable? You could also get some catnip-filled strawberries for your favorite felines!

♥ ♥ ♥ ♥ ♥ ♥ ♥ ♥ ♥ ♥ 

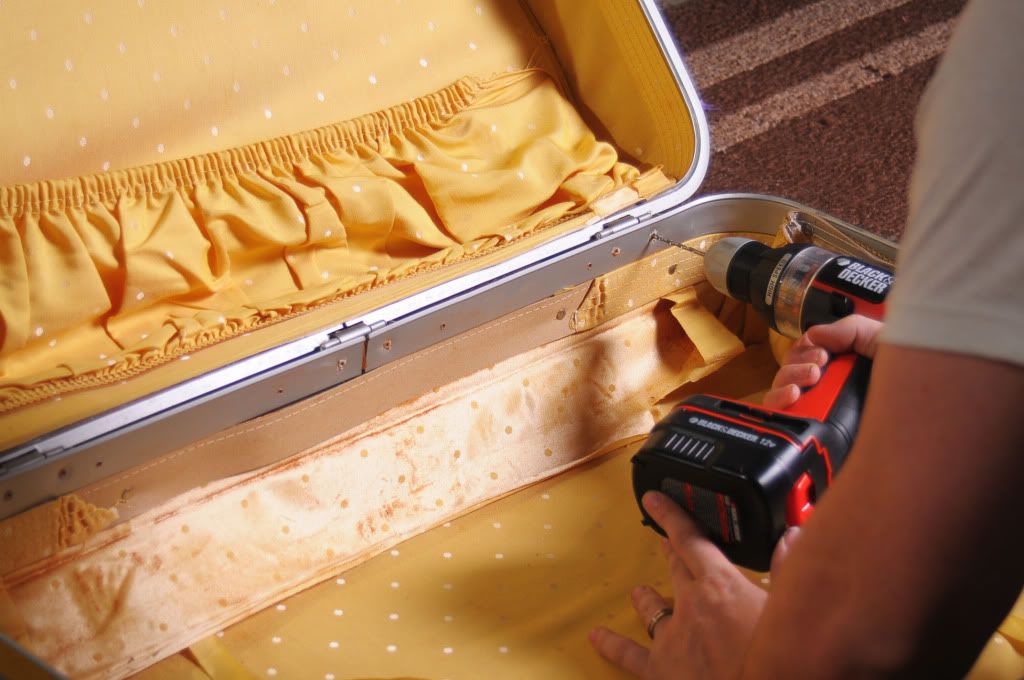
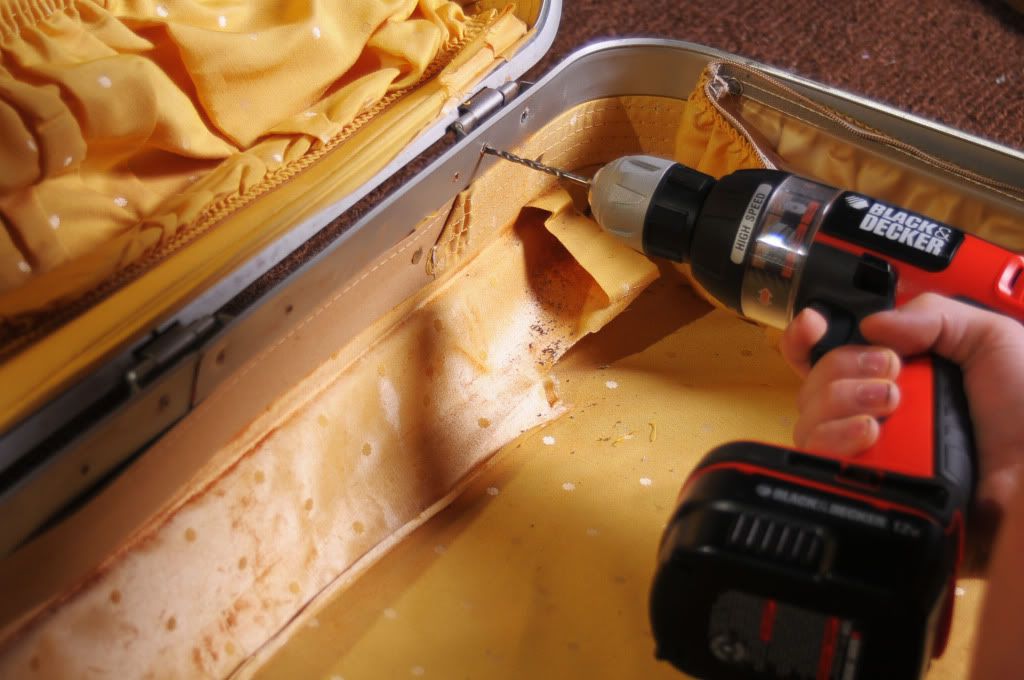
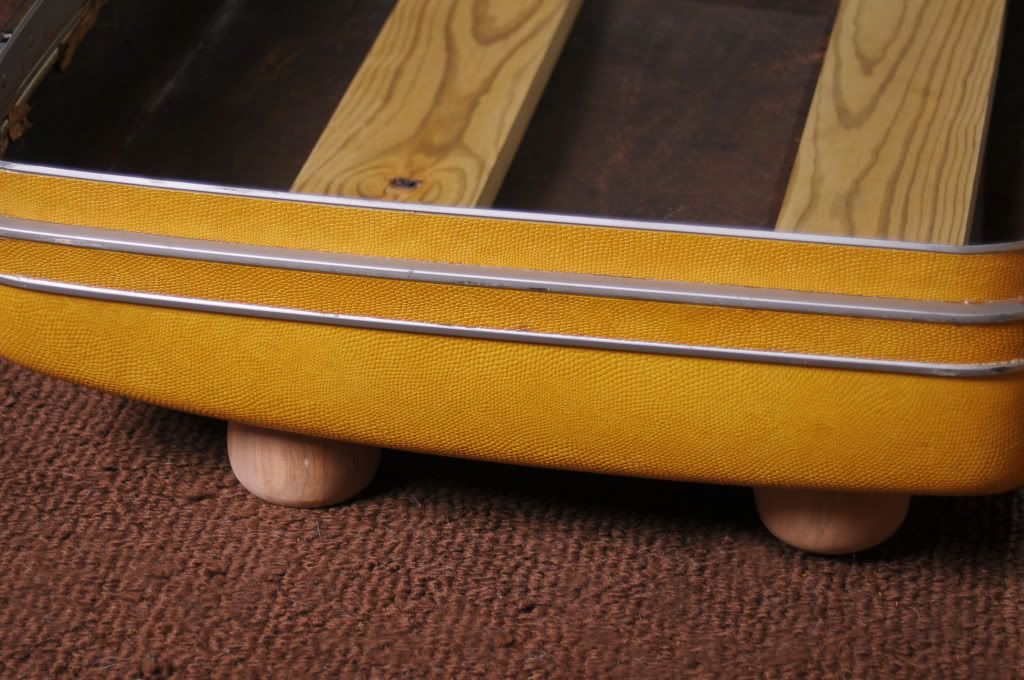
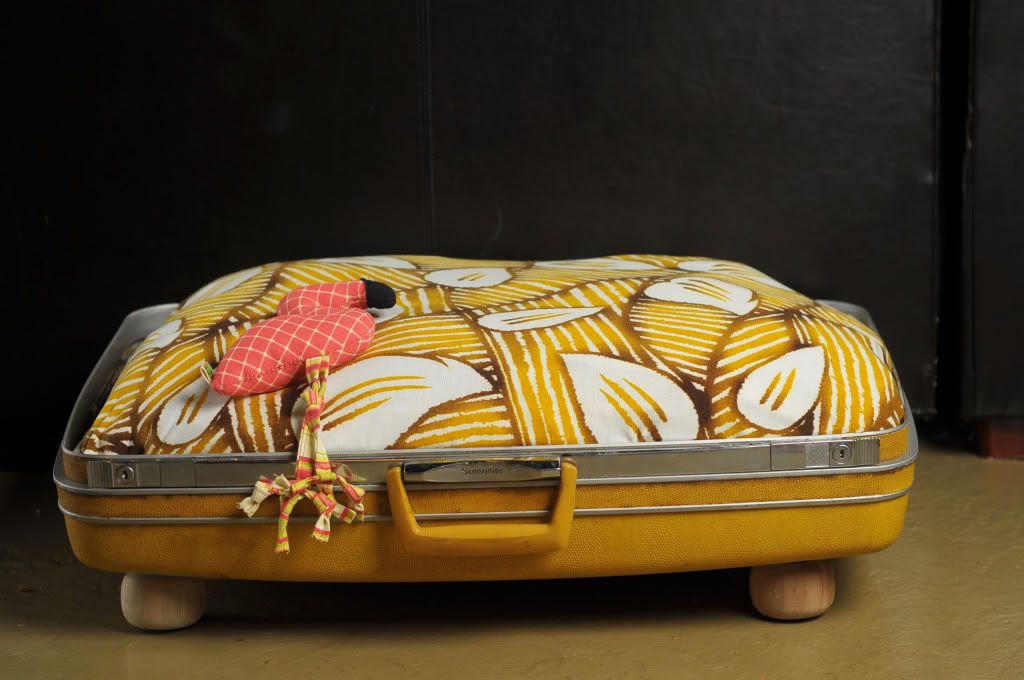
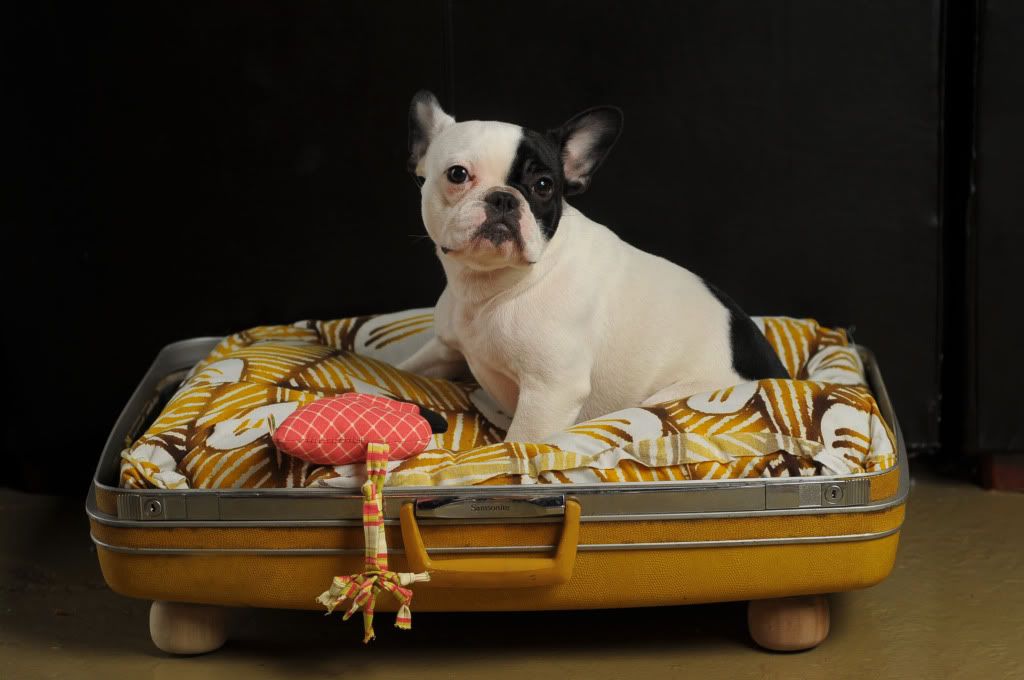
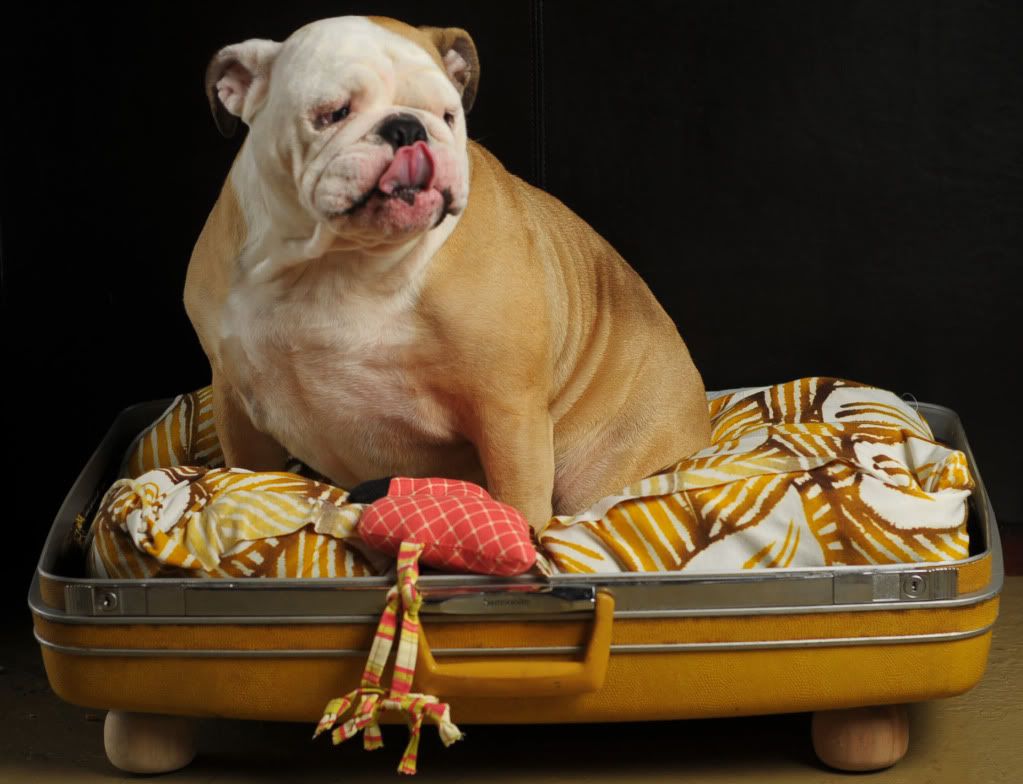
And if you're feeling really up to it, you could even build them a custom vintage suitcase bed for napping! I love the look of them but could never justify the pricetag associated, so Mike and I headed to Lowe's to build our own! We weren't sure we'd be successful so we used a huge janky Samsonite suitcase we had stored away (so Georgia could fit!). We wouldn't be heartbroken if it didn't work and we lost the suitcase. Anyway, it was a super super easy project. You do need a drill, but you can have the wood pieces cut at a home improvement store, so you don't need to worry about that! It probably took all of 15 minutes to actually make. If you're interested in the process, peep below!


What you'll need:

  • Vintage suitcase
  • 1x4 wood cut to size (2 slats to fit the width)
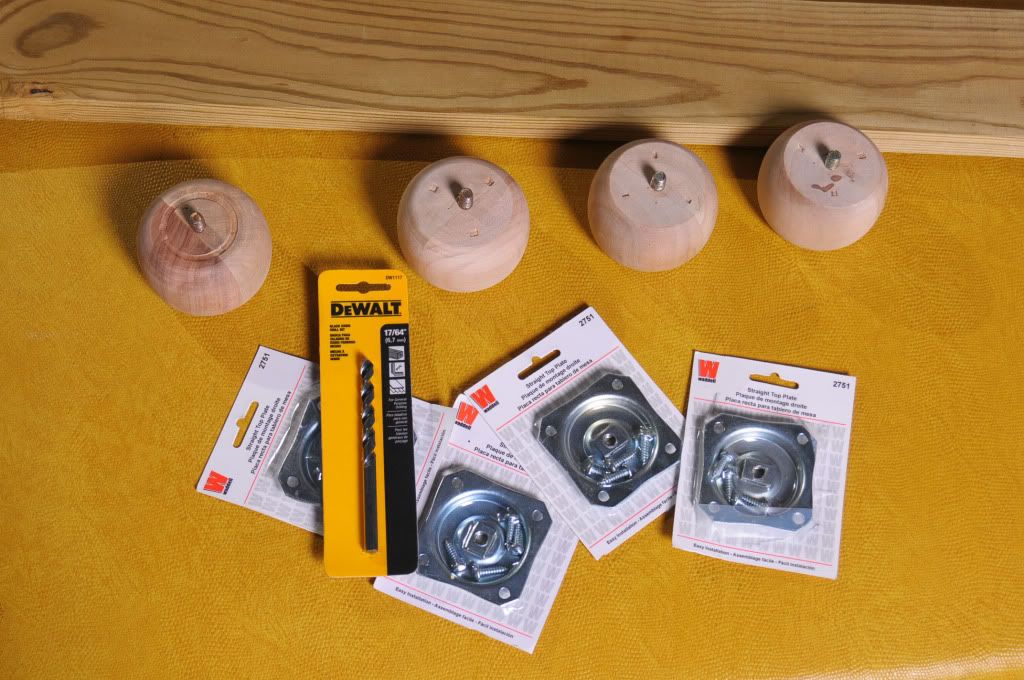
  • 4 internally threaded furniture legs
  • 4 leg braces with screws (found next to the furniture legs)
  • Properly sized drill-bit (We used a 7/64")
  • A pillow insert for the "bed"
  • Drill

First you need to unhinge the top of the suitcase from the bottom. Some suitcases are as simple as a screw, and some (like ours) have rivets that you can just drill right through to pop the top off. Many Samsonites are built this way. It takes a little arm pressure, but it's easy! Remove and discard the top portion of the suitcase.


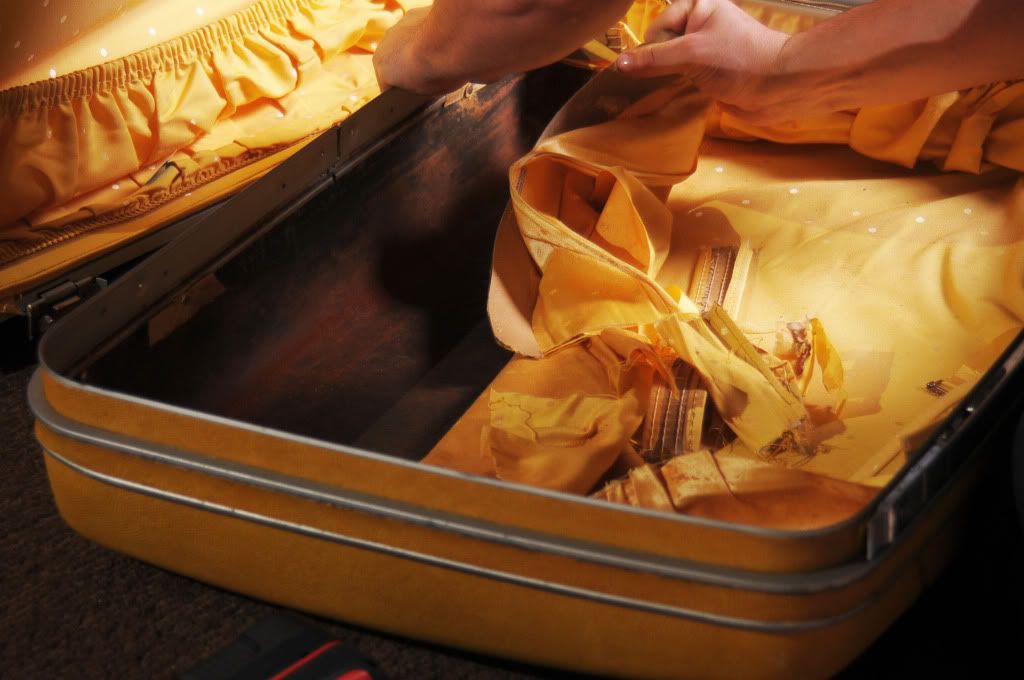
Then rip the lining out of the suitcase. Some people may choose to leave it, and that's fine. We wanted to be able to see where we were drilling.


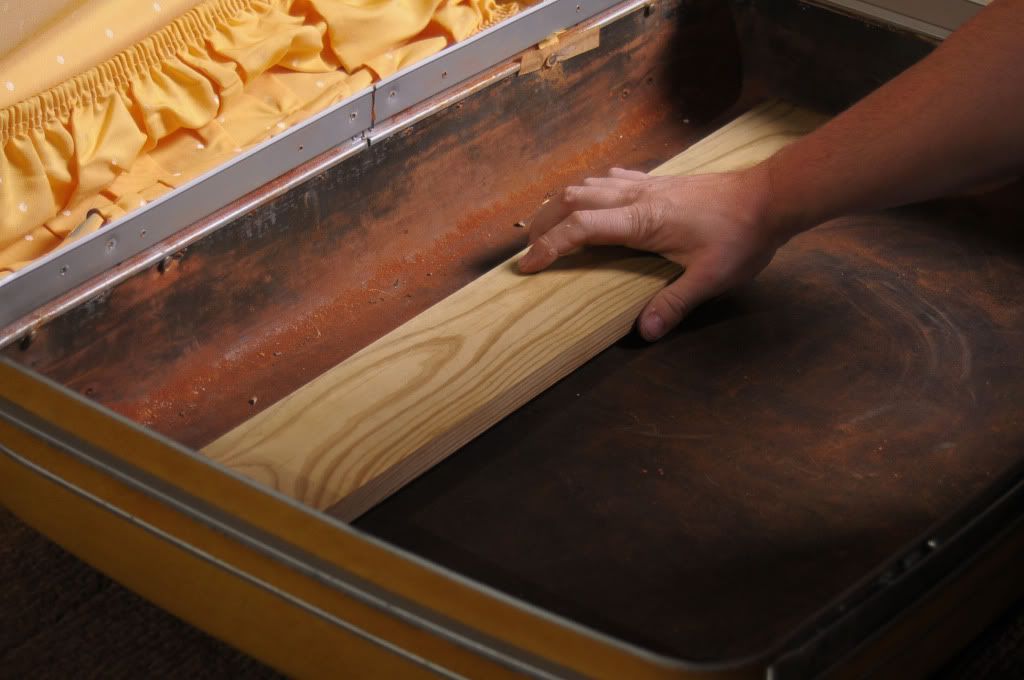
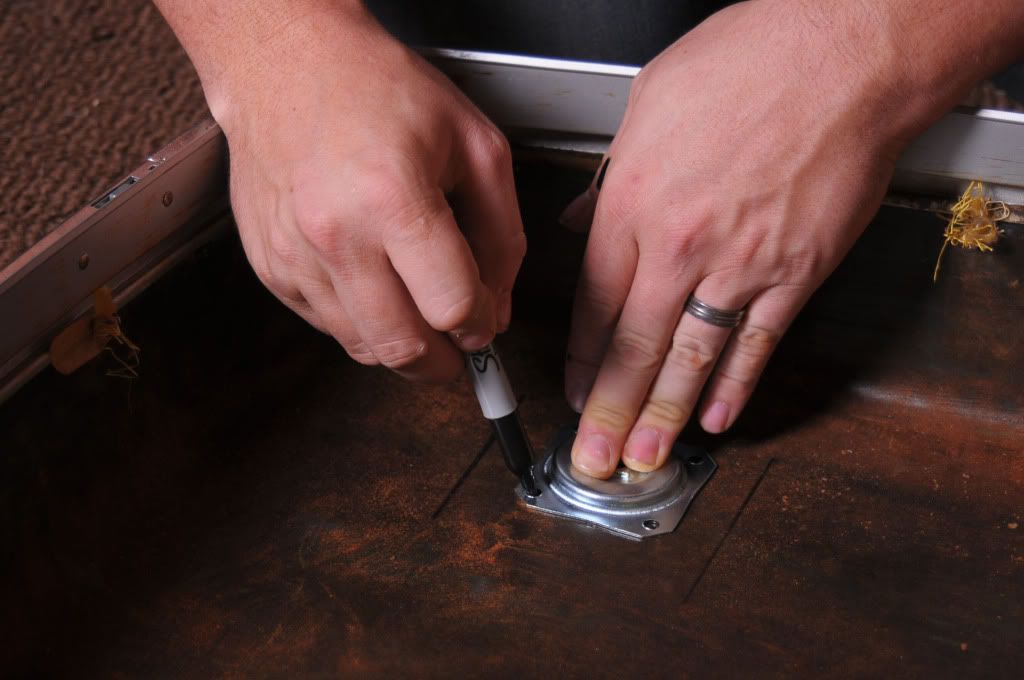
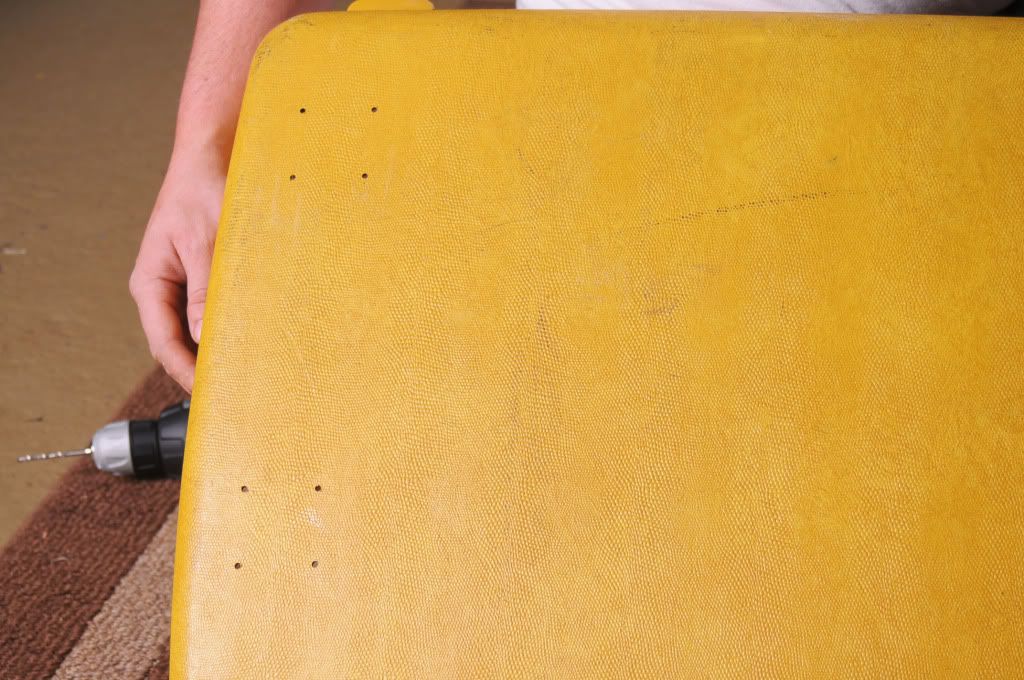
Place your cut boards into the front and back of the suitcase to help keep it stable. Figure out where you want them to go and mark it with a permanent marker or chalk.  Then place your braces inside those lines to mark where the screws will go. This is where you will drill through.  The back should have 16 holes when you're finished with this step.


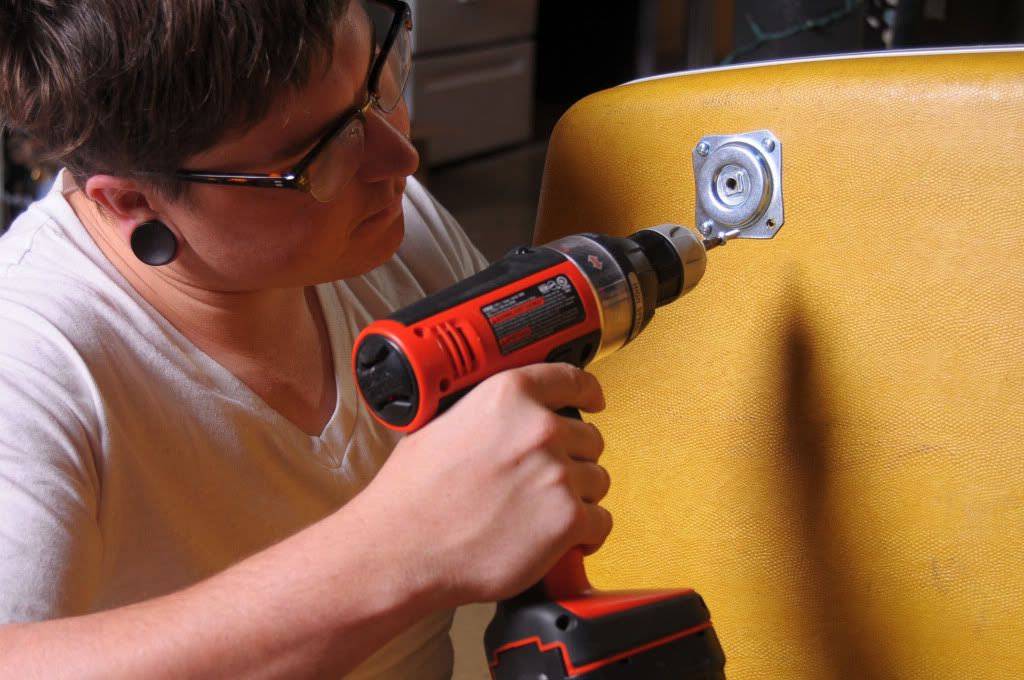
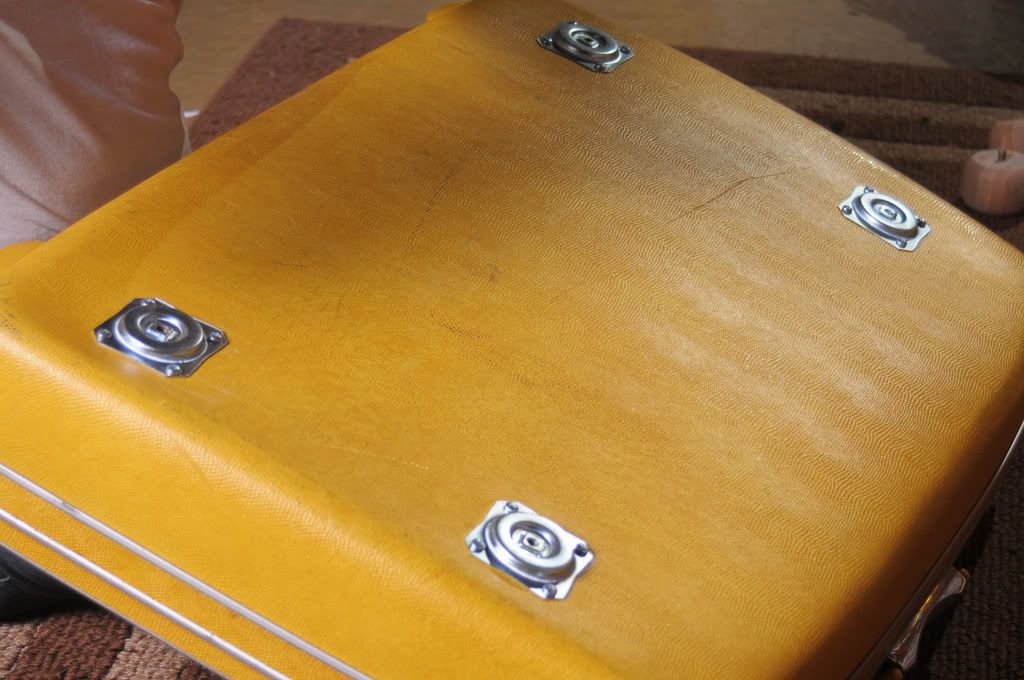
Now you can use the screws that came with the braces to attach them to the outside of the suitcase. Attach all 4 of them and then screw the furniture legs into the braces. ETA: We actually had to screw through the middle section of the brace, too. So we ended up with 20 holes! Depending on how long the thread is on the legs, you may need to screw through there, too!


Then you can sew a simple rectangle, stuff it with filling and call it a day! You now have a sweet pet bed! (Don't mind mine... It's lumpy and poorly sewn, but you get the idea!)


The furniture legs can be really expensive at the home improvement stores, so if you have some time, look them up online and order them! These simple wheel-like legs were $3 a piece (most were $8!) and that can add up quickly! You could even repurpose old furniture in your house or something from the thrift store! The final product cost us less than $20, but if we had been more creative then we could've done it for under $10! I'm planning on making some cuter ones but this one will do for now! (They both actually really love it!)

Give all your pets lots of hugs from me! xo

Do you celebrate the holidays with any of your pets? Do you like to make/get them gifts or hang stockings?

Monday, 28 November 2011

Bohemian Gift Guide


I thought it'd be fun to put together some gift guides based on certain personality and style traits, but I waited a little late in the game! This is still one I already had mocked up so I'll go ahead with it and see what I can't post in the next week or so! If you've got someone in your life that has an Earthy, bohemian style, these might be some rad gifts to give! 

Clockwise from top left: 

If you're looking to make a difference by buying fair trade items, Ten Thousand Villages is a wonderful one-stop shop for apparel, accessories, and home goods sourced from all corners of the world. 

You could also get crafty and make a batch of sugar or salt scrub to give as gifts! It's on my list of things to do!

What would you gift to a boho princess?

Wednesday, 23 November 2011

Ummph! Martha Stewart Canceled, Again!

As you're running around today preparing for the big day tomorrow, here's a little silliness to give you a giggle.  Stop, take a few deep breaths today and know this:  It doesn't have to be perfect.  It doesn't even have to be edible.  It just has to be about gathering together with the ones we care about and love.

Dear Family & Friends,

I know that you were eager to accept our family’s invitation to Thanksgiving dinner when you found out that Martha Stewart would be joining us. However, due to a scheduling conflict, Ms. Stewart finds that she is unable to grace our table this year.

Image from Martha Stewart

With that in mind, there will be a few minor changes regarding the meal and decor, as outlined below. Please be aware of them, and adjust your appetite and dress appropriately.
Thank you…

1) Our driveway will not be lined with homemade, paper bag luminaries. After several trial runs and two visits from the fire department, it was decided that, no matter how cleverly done, rows of flaming lunch sacks do not have the desired welcoming effect.

2) Once inside, please note that the entry space will not be decorated with swags of Indian corn and fall foliage. Instead, we included our dog in decorating by having him track in colorful autumn leaves from the back yard. The mud was his idea.

3) The dining table will not be covered with expensive linens, fancy China, or crystal goblets. If possible, we will use dishes that match and everyone will get a fork. Since this is Thanksgiving, we will refrain from using the paper SpongeBob dinner plates, the leftover Halloween napkins, and our plastic cup collection.

4) Our centerpiece will not be a tower of fresh fruit and flowers. Instead we will be proudly displaying a hedgehog-like decoration hand-crafted from the finest construction paper and pine cones. The artist assures me it is a turkey, albeit one without wings, legs, or a beak.

5 )We will be dining somewhat later than planned. However, our daughter will entertain you while you wait. I’m sure she will be happy to share every choice comment her mother made regarding Thanksgiving, pilgrims, stuffing choices, the turkey hotline, and, especially, her husband. Please remember that most of these comments were made at 7:00AM upon discovering that said husband had only remembered to pull the turkey from the freezer at 6:00 AM, and that the thing was still hard enough to cut diamonds.

6) As an accompaniment to our daughter’s recital of these events, I will play a recording of Native American tribal drumming. Curiously, the tribal drumming sounds a great deal like a frozen turkey in a clothes dryer, but that only enhances the holiday appropriateness. If our daughter should mention that we don’t own a recording of Native American tribal drumming, ignore her. She’s only nine; what does she know?

7) A dainty silver bell will not be rung to announce the start of our feast. We have chosen to keep our traditional method of assembling when the smoke alarm goes off.

8)  There will be no formal seating arrangement. When the smoke alarm sounds, please gather around the table and sit where you like. In the spirit of harmony, we will ask all the children to sit at a separate table. In a separate room. Next door. And I would like to take this opportunity to remind our younger diners that “passing the rolls” is neither a football play nor an excuse to bean your cousin in the head with bread.

9) The turkey will not be carved at the table. I know you have seen the Norman Rockwell image of one person carving a turkey in front of a crowd of appreciative onlookers. Such a scene may occur somewhere in America , but it won’t be happening at our dinner table. For safety reasons, the turkey will be carved in the kitchen at a private ceremony. I stress “private”, meaning Do not, under any circumstances, enter the kitchen to laugh at me. Do not send small, unsuspecting children, or older, helpful grandparents into the kitchen to check on my progress. I have a very large, very sharp knife. The turkey is unarmed. It stands to reason that I will eventually win the battle. When I do, we will eat

10) For the duration of the meal, we will refer to the gravy by its lesser-known name: Kraft Cheese Sauce. If a young diner questions you regarding the origins or makeup of the Kraft Cheese Sauce, smile kindly and say that you know the answer, but it’s a secret that can’t be revealed to them until they are 18.

11) Instead of offering a choice among 12 different scrumptious desserts, we will be serving the traditional pumpkin pie, garnished with whipped cream and dog tongue marks. You still have a choice: take it or leave it.

That concludes our list of alterations. Again, I apologize that Martha will not be joining us this year.

Source unknown

See you tonight for Tablescape Thursday!

Monday, 21 November 2011

Thanksgiving Turkey Napkin Fold Tutorial

Recently, for Tablescape Thursday, I posted a Thanksgiving tablescape with the little ones in mind.  It included a fun turkey napkin fold.   Today I'm sharing a tutorial showing how it's made, in case you would like to incorporate it into your Thanksgiving table this year.


To create your turkey napkin fold, besides a napkin, you'll need a pinecone and a chenille pipe cleaner.  Actually, one pipe cleaner will make the necks/heads for two turkeys, so you'll only need 2 pipe cleaners to create turkeys for four place settings.


For this napkin fold, it's best if you fold your napkins on an ironing board so you can press each fold as you make it.  A little spray starch would be a great idea, too.  I didn't have any starch on hand and the napkins still came out pretty well, but starch would have given them a bit crisper look.  It was also very humid and raining off and on the day I created this table setting.  I had the door to the porch standing open since it was so warm out.  It's a wonder the folds I made didn't completely wilt.  So, if you don't have starch, don't worry.  They should still be just fine.


Fold your napkin from right to left and press.


Starting at the bottom, fold up the edge of your napkin about 1 to 1 1/2 inches and press.  You may need to "test" fold a napkin or two before you figure out the right size/width to make each fold.  You'll will need to have about 4-5 inches left over in the end that doesn't get folded into the fan shape.  That left over section actually becomes the support for your napkin.


Turn the fold you just made up underneath the napkin to create another fold, and press.


Fold the napkin upward again and press.


Repeat this folding process back and forth, pressing each fold along the way.  Stop with the napkin in the position shown below with about 4-5 inches left unfolded.


Fold the whole napkin over from left to right...as shown below.


Take the top right corner and fold it downward (all four sections) and tuck those down under the napkin folds you've made, as shown below.


Press along the slanted edge of the flap you've tucked down.  This will be the support that helps keep your napkin stay standing up on the plate.


Place your napkin on the plate and gently open it up into a fan shape.  Here's a view of the back of the napkin once it has been opened.  You can see how the sections that were folded down and tucked behind the folds, become the support for the fan-shaped tail.


Just place your pinecone in front of your folded napkin and tuck your chenille pipe cleaner down into the pinecone, bending it to create the look of the turkey's neck/head.


For additional napkin folding ideas/tutorials, click on the heading "Tablescapes" at the top of this blog and scroll down past the tablescape links where you'll find additional napkin folding tutorials. Happy Turkey Day!

Tuesday, 1 November 2011

Front Porch Decorated for Halloween

Wow, what a fun night! I love, love, love Halloween. I have so many wonderful memories from my childhood of trick-or-treating with friends, so Halloween has always been one of my favorite holidays.

I decorated the porch pretty simply for Halloween this year.


I covered the front door with the "creepy cloth" used as a tablecloth in THIS previous Halloween tablescape.  (You can see the door minus the creepy cloth in THIS post.)


The witches hat I wore last year (while giving out candy) became my door decoration for this year.  I was inspired to use it on the front door after seeing a similar one at the Country Living Fair.  A crow kept watch from the lantern nearby.


Pumpkins and fall leaves spilled out of an over-turned basket.


And a ribbon-covered pumpkin came out to play for the night.  You'll find an easy tutorial for decorating a pumpkin with ribbon, HERE.   This is a look that should work well all the way through to Thanksgiving.

The scented candle smelled soooo yummy each time I answered the door.  Even the princesses, witches and ghosts who came trick-or-treating kept commenting on the wonderful scent.


Did you have a fun Halloween?

Referenced links in this post:
Porch minus Halloween Decor
Halloween Tablescape with Creep Cloth Tablecloth
Country Living Fair
Tutorial for Ribbon Decorated Pumpkin

Resources:
Witches Hat and Scented Candle: Provided by Colonial Candle
Creepy Cloth: Michael's last year
Lantern: Old Time Pottery
Pumpkins: Home Depot
Basket...had a while so don't remember now