Showing posts with label tutorial. Show all posts

Thursday, 29 December 2011

DIY: Coasters

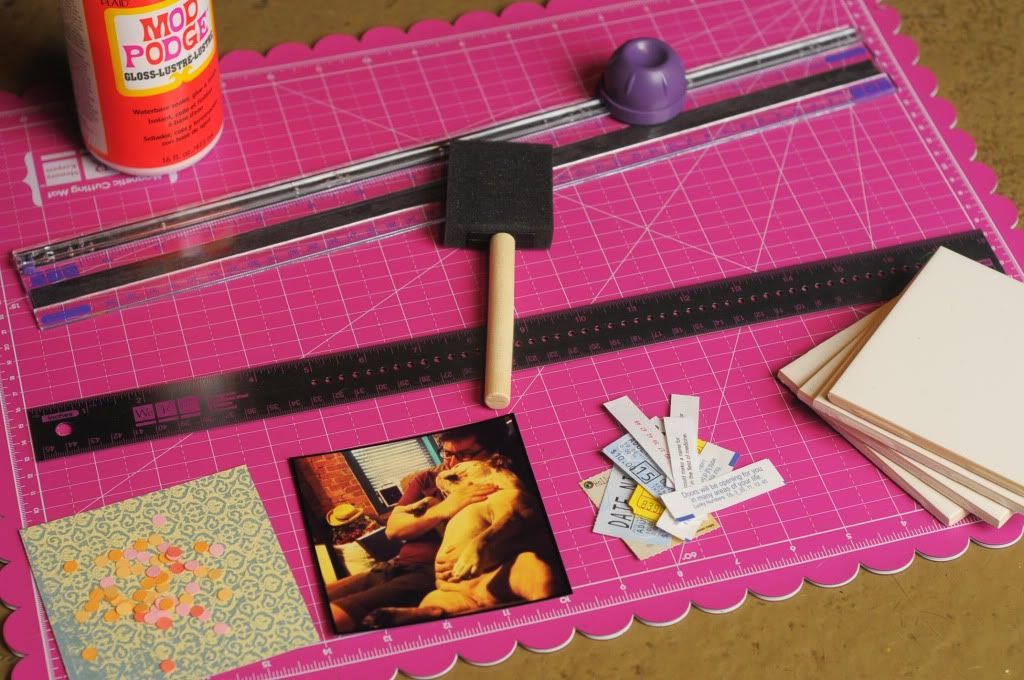
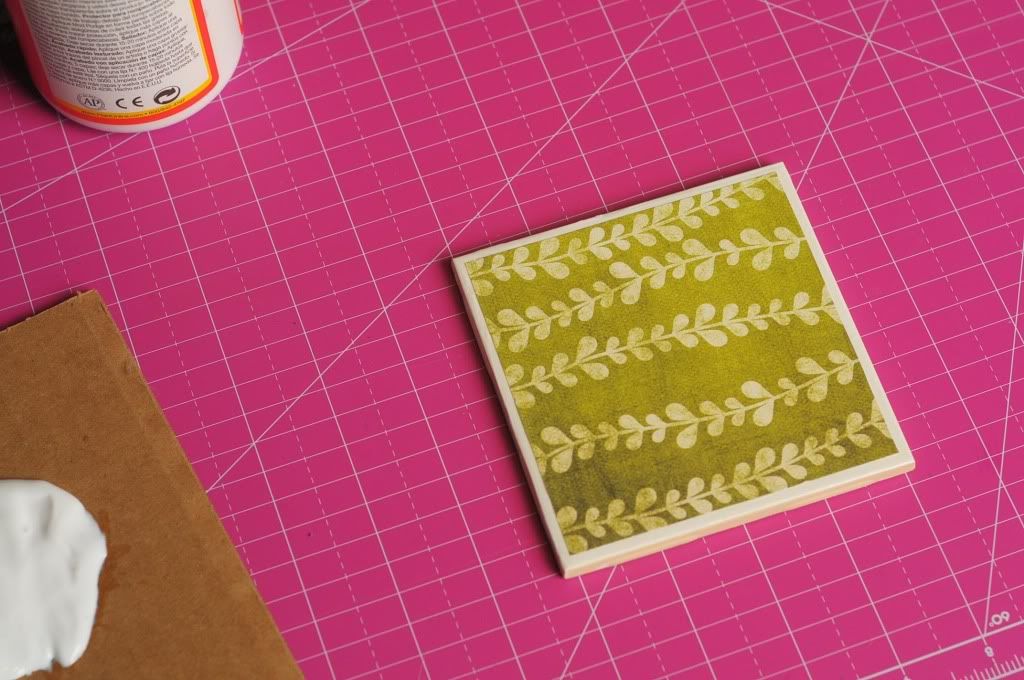
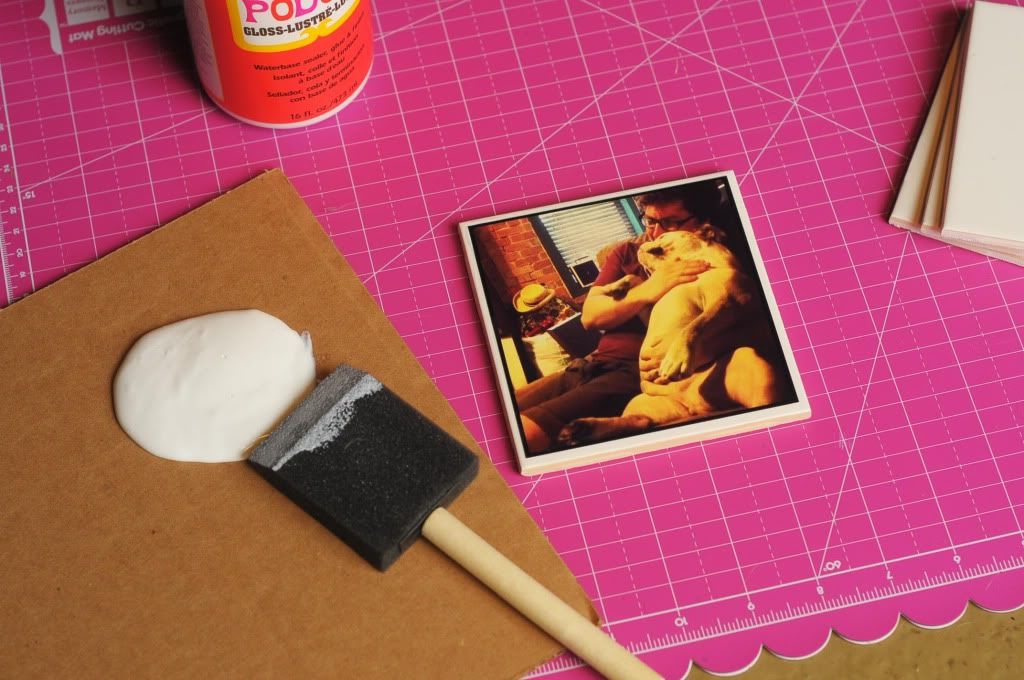
Mike and I decided to do a fully handmade Christmas this year (with one or two exceptions thrown in. Dads are hard to make for!) We were super excited to devote a handful of days to just getting crafty and baking away. I started on these coasters a couple of weeks ago (!!!) and only meant to make about 4 sets. I ended up making about 16! They're so simple and effortless that I couldn't help myself. It was fun to try different techniques to make them special, too. These are great inexpensive (yet thoughtful!) gifts for anyone you may know (or even to use in your home!). I made batches for practically everyone, and ew used our Instagram prints we've had lying around for our own set. Below I'll show you three fun ways to spruce up your own porcelain coasters, and give you a few more ideas! (It's really so simple that I don't need to do a step by step tutorial!)


What you'll need:
+ Four 4.25" x 4.25" porcelain tiles from hardware store
+ ModPodge
+ Foam brush
+ Paper or something for the "design"
+ Felt furniture backings

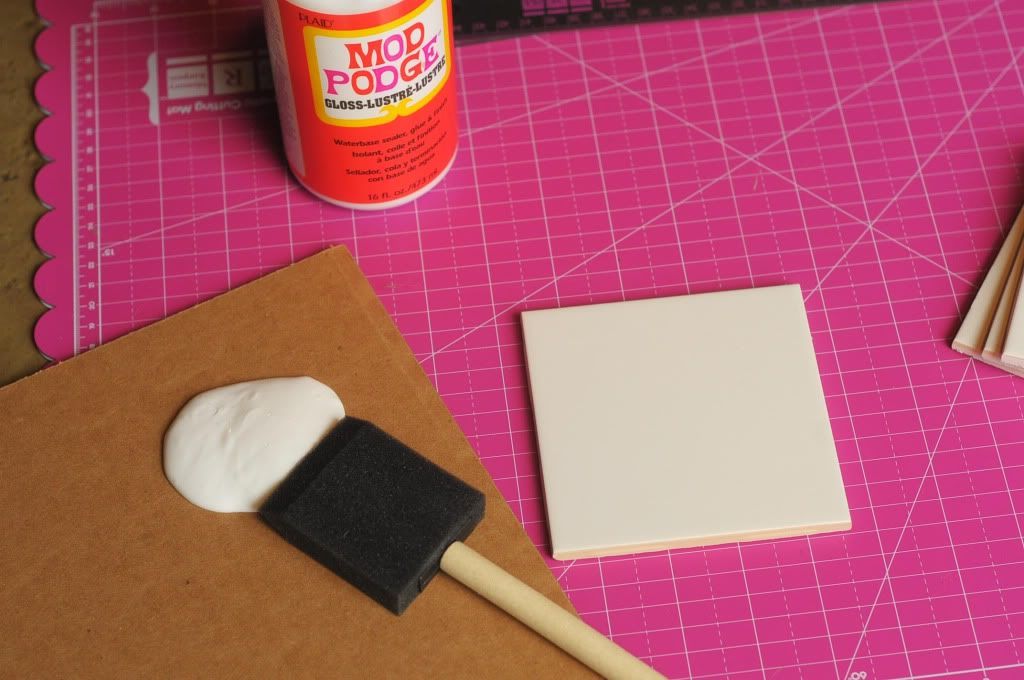
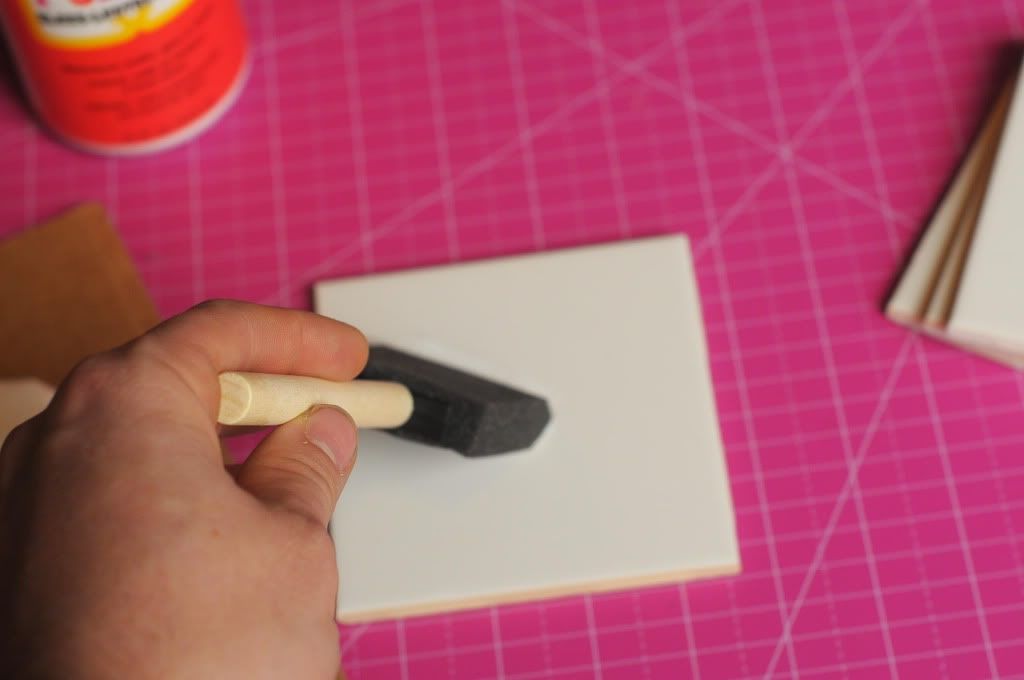
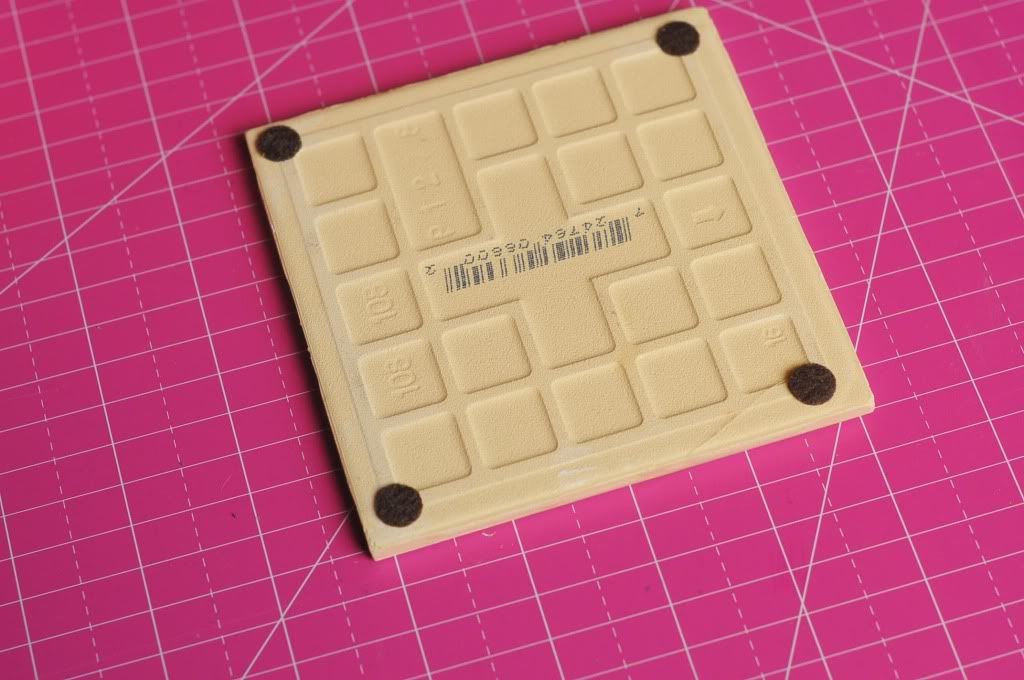
What you'll do: If you're using scrapbook paper or something of the sort, trim it into a 4"x4" square. (One piece of 12" scrapbook paper makes 9 (!!!) coasters!) Pour out some ModPodge and use your foam brush to brush a layer onto the top of the porcelain tile. Immediately place the design paper onto the fresh ModPodge. If you're using small pieces of paper for a collage, be careful not to tear them! The MP is sticky! Wait 20 minutes and allow it to dry. Come back and add another coat of MP over all 4 tiles, making sure to pay close attention to the edges. Allow this coat to dry for another half hour or so, and repeat two more times. After 3 coats of MP, you may turn over the coaster and add 4 felt backings to each one. This will help protect any surface it sits on. 

Voila! You now have a set of personalized coasters! Stack them up and tie them with a ribbon for a pretty presentation!

Tips and tricks: Use old movie stubs or anything that may be special between you and the recipient to make it more personal. Mike and I made a set with old date tickets and fortunes! You can also use baby pictures, pictures from growing up, or family portraits. If you have a new baby in the house then it could be sweet to use pictures of him/her to give to the baby's grandparents (or if you're on the outside then you can gift these to the parents of the baby!). If you decide to use small pieces, confetti, or anything with ink, pick up some transparencies at the office supply store and cut them into 4x4 square to place on top. This will help keep the coating even and nice. 

If you'd like to order your own Instagram prints (which are sized at 4x4!), use Mpix or download the Postal Pix app on your iPhone! 

These make great gifts because they're easy to make and cheap to put together. The tiles cost 16 cents a piece at Home Depot. 1 sheet of scrapbooking paper is enough for 2 full sets and is only 50 cents. The felt backings can be bought in sets of 25, 60, or 80 for only about $2.75. At the end of the day each set cost us roughly $1 to make (Instagram sets run about $2.50 or less!)

What would you put on your coasters if you made a set?! 

Friday, 23 December 2011

Ice Chiller for Wine or Champagne: A Tutorial

I shared how to make this wine chiller last year, but I thought it would be fun to share that post again in case you're looking for something fun for your Christmas table or for your New Year's eve celebration.  It's easy to make...you'll just need a couple of containers, water and cranberries.  Sliced lemons and limes would work, too.

Tutorial:  Make a wine chiller:

Last year I received a catalog in the mail and it showed this pic/ad. I was tempted to order it until I realized the silver bowl was plastic. I remembered I already had a silver bowl, so I decided to try and make the ice chiller with things I already had and save myself $29.00.


The Before:
The only items I had to purchase were a bottle of wine, cranberries and distilled water. You don't have to use distilled water so you could save the expense of buying that, if you like. But I discovered when I made flower ice cubes HERE, distilled water will usually freeze pretty clear, and it's only $1 for a gallon...more than enough for my ice chiller. If you would like your ice chiller more frosty looking like the one in the catalog, just use tap water.


I searched around the house and decided on this tin for my mold. (It measures 6 1/2 wide by 7 1/2 tall.) This worked fine except for two snags. 1. It leaked very slowly, so I had to add a little more water to it after about 45 minutes. It was such a slow leak in the freezer, the water froze as it leaked out, so I just broke it off and tossed it in the sink. I think that could be prevented by running a bead of hot glue around on the inside bottom where it meets the sides, prior to using it.

2. The other little snag is the indention near the top made my ice mold a little tricky to get out. A container that's completely smooth at the top would work better. Just DON'T use glass. If you used glass, it would be very difficult to get your ice chiller out because you'll need to run warm water over it and glass would most likely break.)


I found a plastic container to use in the center...it's an old Tupperware container/pitcher. (Again, please do not use glass for this part either...same reason...it would break with the temperature change.) I placed the wine inside to make sure it was the right size for a bottle of wine. It was perfect. (It measures around 3 1/2 inches wide by 8 1/2 inches tall.)


I needed something heavy to go in the center container so it wouldn't float. Clay cat litter almost worked, but wasn't quite heavy enough. Next I tried pennies from a huge penny jar collection and that worked great. Sand, marbles or even pebbles/rocks would work fine, too.


I stuck the container (filled with pennies) into the cannister and poured distilled water all around, saving just enough room for 1 full bag of cranberries at the top. You can pour some of the water off or add more--whatever you need to do to get your cranberries right up to the top.


After it had frozen overnight, I took the lid off and poured out all the pennies. Next I refilled the center container with warm water, being careful to not get water on the ice inside. In this pic I had just dumped the pennies out into the big container you see on the left. I ran just a little warm water into the center container, it came right out.

I didn't take any pics of me fighting the ice chiller out of the tin container.  It was loose toward the bottom but that blooming ridge at the top of my container got wedged with a cranberry. I kept running warm water on the outside of the container near the top and it finally let go.


After:
This is the only pic I have with the lamp off, and it shows the shape of the ice chiller best. It's the shape of the small tin I had used. Note how much clearer distilled water freezes than tap water.


The rest of the pics are a bit harder to see due to the light reflecting inside the bowl, but I think you'll get the idea.


Wouldn't this be a fun way to serve your white wine for a dinner party, holiday party, or New Year's Eve? I bet there are lots of other things that could be added besides cranberries. Lemons, limes or orange slices?  I'll be keeping my eye out for a better container than the tin one, for the future--but I am happy about saving $29.


Merry Christmas!

Wednesday, 19 October 2011

Wedding Wednesday


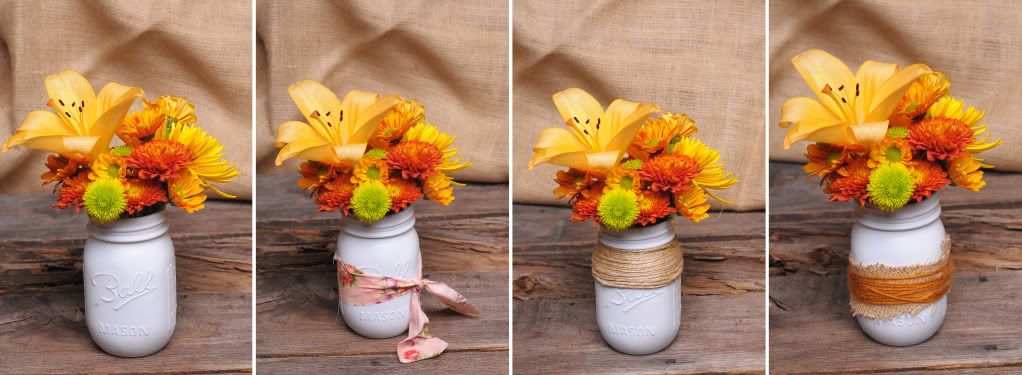
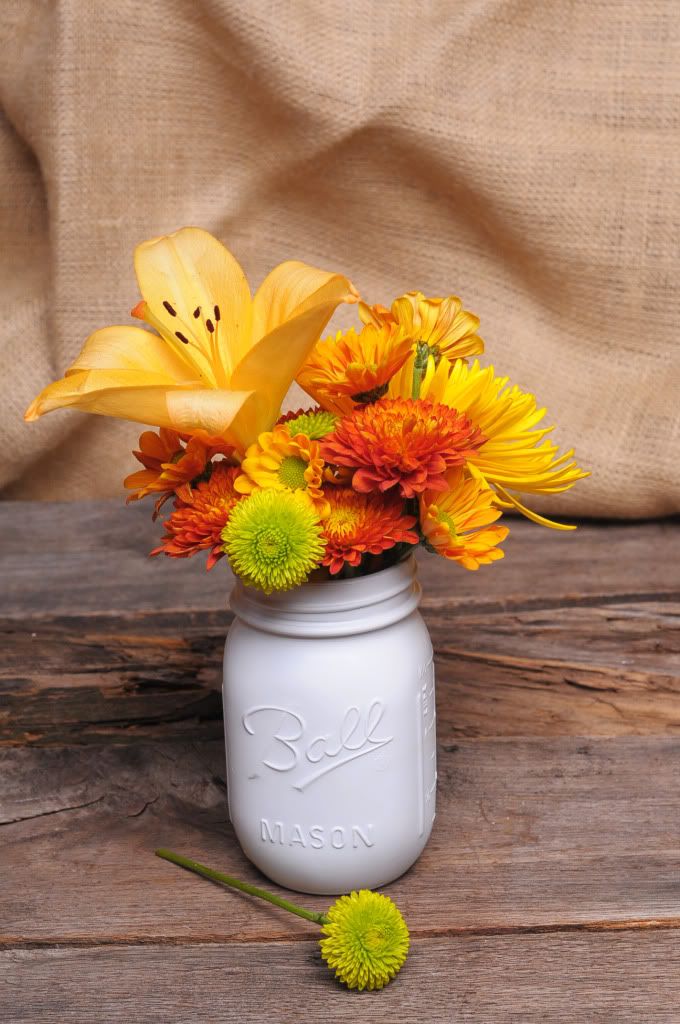
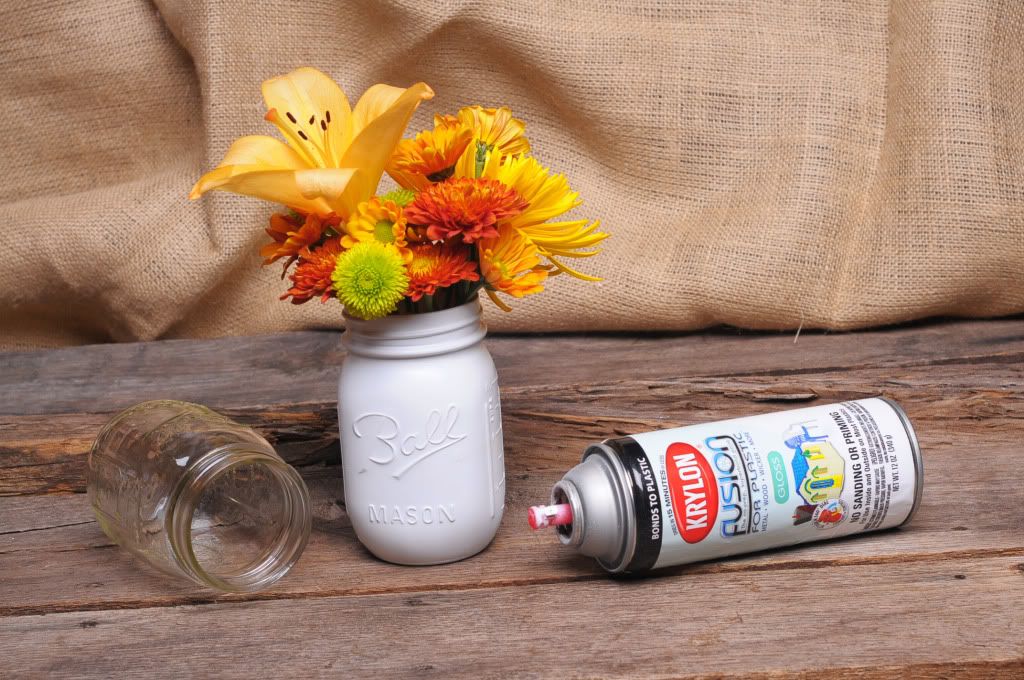
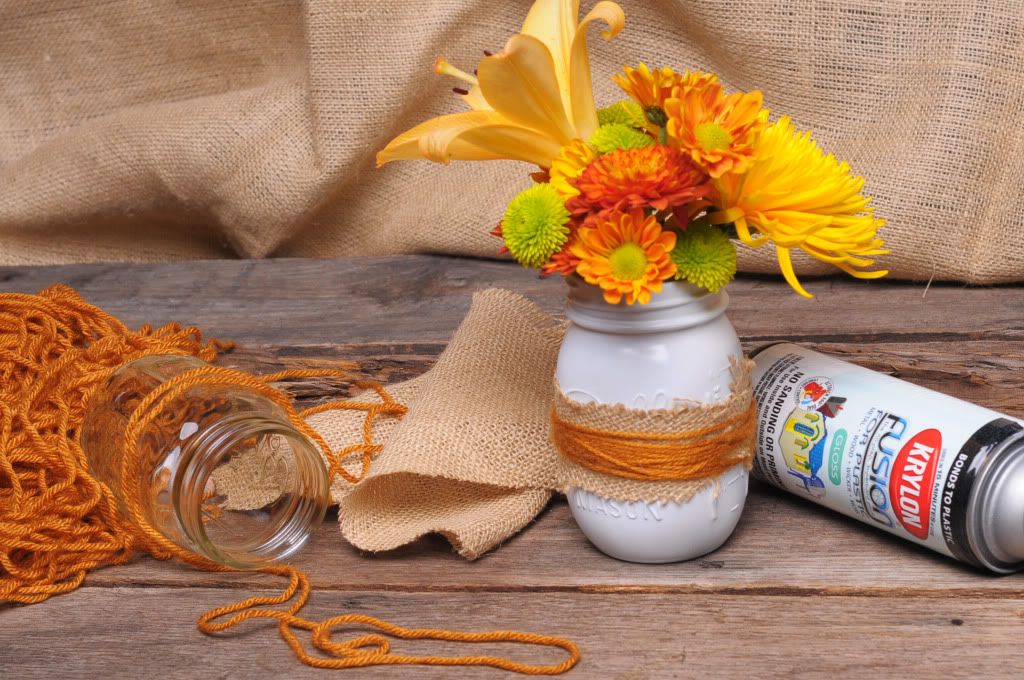
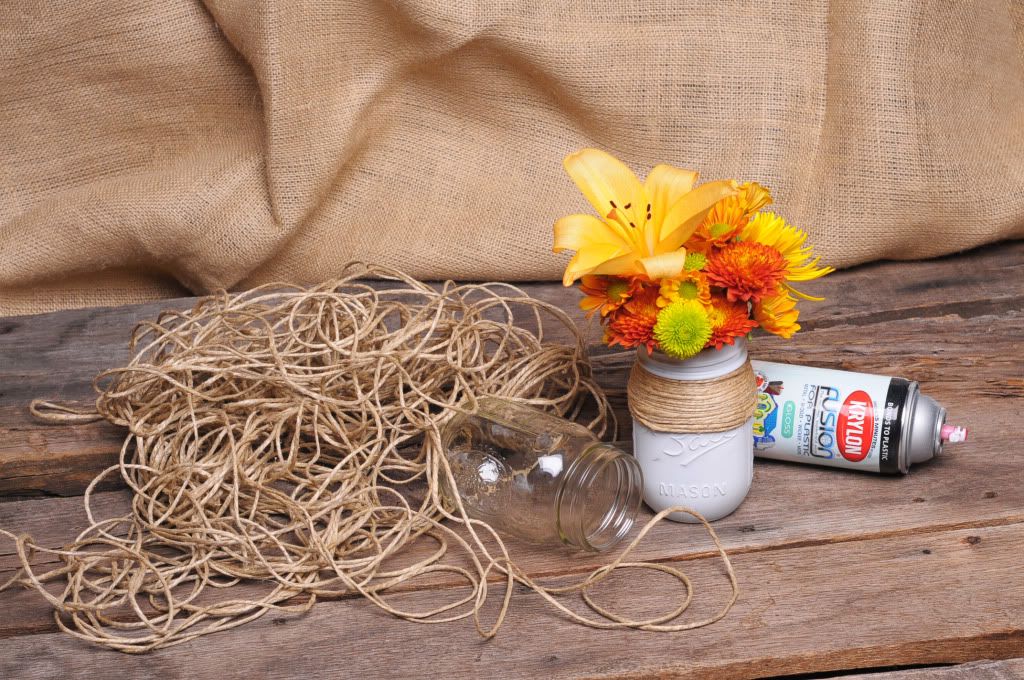
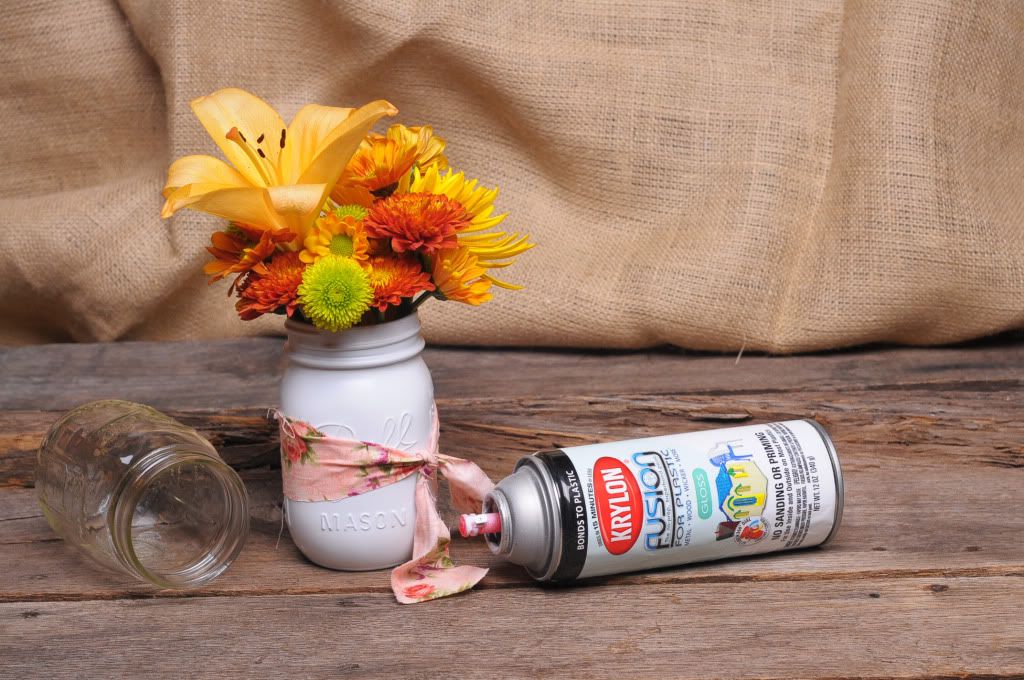
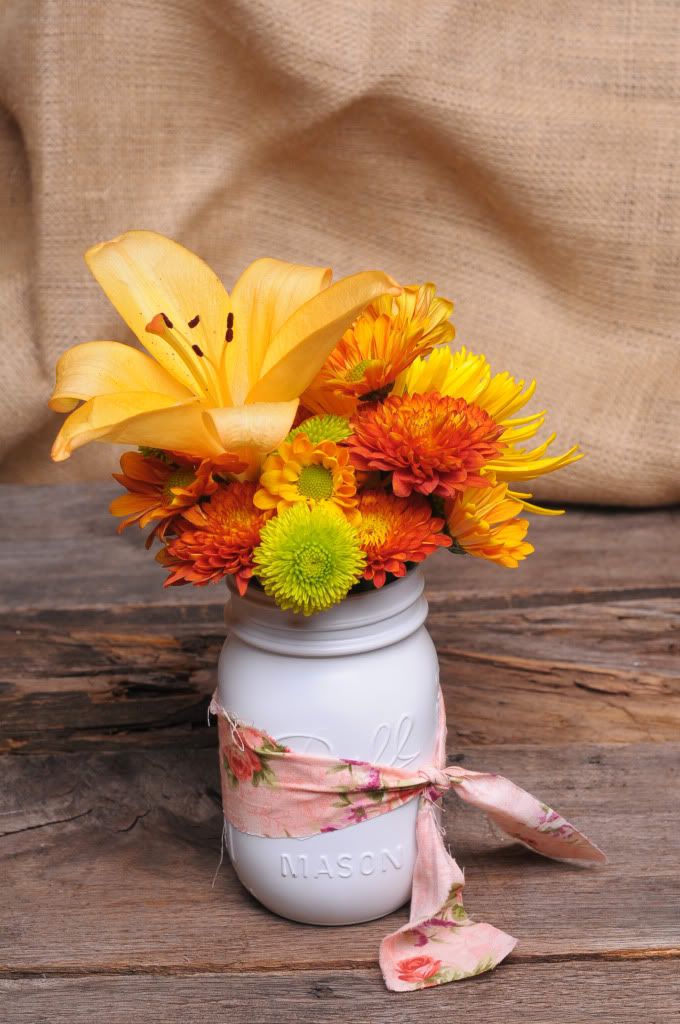
Let me preface this little DIY with this: It's simple. So simple that I probably shouldn't even call this a tutorial (so I won't). I was first inspired by the second image from a past WW post and I thought "Oh hey, that's cute!" so I did it. Our wedding is going to be very low-key, DIY driven, and Southern. What is more southern than mason jars (aside from Paula Deen)? Exactly. I love a little spray paint, and I've shared painting vases in the past to mimic milk glass. This is perfect for your windowsill, your dinner table, your desk, or your wedding centerpieces. Below I'll show you 4 different stylings of it and let you get to work! Enjoy!


All you need for #1 is a mason jar and spray paint. Guess what you do with them? Yep. Simple.

#2 is a mason jar, spray painted white, wrapped with a rough piece of burlap, and secured by a few rounds of your favorite color yarn. The best part is that you don't need any glue or anything. Use the yarn to secure the burlap and tie it in the back. It'll slip right off so you can slip a new cover on it!

#3 is just the spray painted mason jar with some thick twine or jute wrapped around the top. You can do this around the top, the middle, or the whole thing. It gives it a really fun rustic vibe!

#4 is just some hand-ripped cotton fabric wrapped around and knotted in the front. Seriously... it doesn't get much easier than that!

A few tips I've learned from spray painting glassware:
1. When in doubt, use glossy spray paint. I'm a huge fan of a matte finish, and the matte looks great in colors, but more often than not the white matte spray paint comes out like a chalky primer. It's really really gross to the touch and it doesn't give you a smooth surface. The glassware is typically shiny, so keep it simple with the gloss!
2. Use brown for an earthy tone, baby blue or pink for a baby shower, and maybe black or orange for halloween decor! 
3. When you're doing pastel colors like blue, pink or yellow, do a base coat of white glossy spraypaint first. This will help the colors really pop and be even!
4. If you want to make the decor on the jar more permanent, use a little bit of hot glue to secure the burlap/twine/etc. 

I thought #2 was the perfect look for Autumn so it's now sitting on my desk next to my computer. It's the perfect punch of color for the season and I think having fresh flowers nearby is always inspiring! xo

Wednesday, 28 September 2011

Hiding Ugly Scratches on Furniture

Monday, when I was playing with the mantel in the family room for a Fall Mantel post HERE,


I noticed a few scratches on the armoire you see over in the corner.


Can you see the little dents/scratches in this pic below?


Over the years, this armoire has accumulated small scratches from everyday use.


I thought I'd share a few products I've found that work well to help hide the boo boos that are inevitably going to happen.  By the way, I was not paid or perked in any way to share these products...just sharing them in case you find them helpful.


The product I use most often for a quick touch-up of a scratch on wood furniture is Wood Finish Stain Markers by Minwax.  I found these at Home Depot.  I love Minwax products and use them a lot.  In fact, I noticed when the hardwood flooring guys installed my office flooring HERE, HERE, HERE and HERE.   Minwax stain was the stain they used to match my exisiting hardwood flooring.


After I bought the markers, I wanted a quick way to tell which one I should use each time I needed to touch up a scratch.  I found, even though a chest or table might be made of mahogany, sometimes the best marker to use wasn't always the "mahogany" marker.  Sometime the "Dark Walnut" or the "Early American" marker was a better match.  It just depends on how the piece was stained and how the wood has aged over the years.

So, I created this little reference sheet to carry to the piece I'm about to touch up.  Not very high tech, but it works. :)  I just put a few marks/samples of each stain onto a piece of notebook paper and I store this paper in the same place I keep the markers.  Each time I need to touch something up, I just carry the paper over to the piece of furniture to pick the best marker for the job.


I used "Red Mahogany" to touch up the armoire and here's how it looked afterwards.


Before:


After:  Those shiny areas you see off to the right are not scratches.  They are just the reflection of the lamp on the table nearby.


If you have larger areas to touch up...too much for a marker, you can use Howard's Restor-A-Finish.  It also comes in several stain colors.  Be sure to test it out on a inconspicuous area before applying it...just to make sure it gives you the finish/color you need.


My very favorite furniture polish is The Original Bee's Wax.  It protects your furniture but doesn't leave a wax build-up.  I used to buy this at a local antique store but they recently closed, so I'll have to find a new place to purchase it.  Fortunately, I have two cans right now, so I'm good to go for a while.  Update:  Just Googled and apparently, The Original Bee's Wax can be ordered online.


I use my son's old cloth diapers to apply furniture polish.  They also come in handy for polishing silver.  He's gonna shoot me if he sees this post. ;)  Someone told me years ago that cloth diapers make great dusting/cleaning cloths when your kids are potty trained.  So I saved them and 28 years later, they are still working great.  Talk about durable! Guess they last so well because they are made to go through a million washings.


Now, I need your suggestions.  I was noticing yesterday, the wood walls of my family room are looking pretty dry.  I haven't rubbed them down with polish/oil in several years...so it's time.


I've used Old English Lemon Oil in the past.  It worked great, but I would like to know if you have a product you recommend for judges paneling?


Or, do you have a favorite touch-up product for case pieces/wood furniture?  How about a favorite furniture polish?  I hear Guardsman is an excellent furniture polish, but I've never tried it before.  Have you used it?  What are your favorite furniture care products?

Saturday, 17 September 2011

Tutorial: Carved Watermelon Party Centerpiece

Survey:
Wow, I have learned sooo much about what you enjoy reading/viewing when you visit BNOTP. Thanks so much to the 400+ readers who have already completed the short 9 question survey I posted HERE.   And thank you from the bottom of my heart for the unbelievably generous comments you've shared. I found myself almost in tears at times while reading your comments.  Please know how much I appreciate your responses and that you took time to share your preferences with me.  If you haven't yet taken the brief survey, there is still time.  I'll leave it open through Monday evening.  Thanks again for your input!


Carved Watermelon Party Centerpiece:
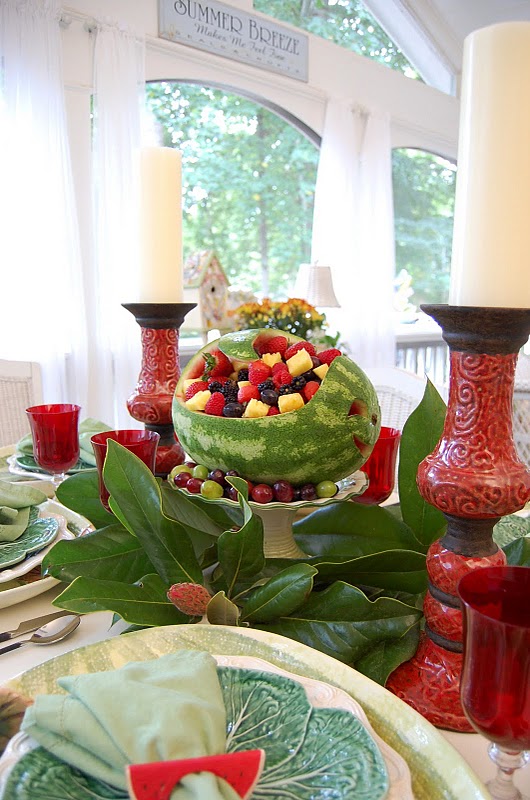
This past Tablescape Thursday, I shared a table setting with a carved watermelon centerpiece.


For a party many years ago, I cut the top off a watermelon and hollowed it out to hold fruit.   That was cute, but I've always wanted to try my hand at carving one into a fun shape.


The cookbook below provided the inspiration I needed for this centerpiece.  I've had this cookbook for many, many years and I've always admired the carved watermelon on the front.  I've carved designs in pumpkins as shown in THIS post where I managed a reenactment of the burglars sliding on the ice-covered stairs in the movie, Home Alone. ;)


Pumpkins can be a bit hard to carve unless you have special carving tools (also shared in that post.)  I'm happy to report, carving a watermelon is nothing at all like carving a pumpkin.  Watermelons are much softer and much easier to carve out than pumpkins.


The cookbook above provided this template for tracing out Mr. Whale's tail.  You should be able to save it to your computer by right clicking on the pic and choosing save.  Then just enlarge or decrease it to the size that's appropriate for your watermelon.


Here's how my template looked once I printed and cut it out.


I purchased a small watermelon for my first carving attempt.  If you're having a really large gathering, you may wish to buy a larger melon.  This small one held a LOT of fruit, though...I was really surprised.

Place your melon on a flat surface.  The stem is going to be the nose of your whale when you're done, so position your tail template on the opposite end of the whale, but with the tail pointing back toward the stem end.  When you're done, it's going to look like Mr. Whale has flipped his tail up into the air and pointed it back toward his head/face.

I didn't use pins to hold the template in place...just held it with my hand as I traced around it.  Trace the tail shape/design using a pen, crayon or whatever you have handy.


Once I had the tail traced on the top of the melon, I continued the line out, down and around the side of the pumpkin, then upward on the front to create the rise for the face/head.  (Refer back to the pictures above of the completed whale to get the general idea of where to draw your lines on the sides and for the face.)

I used a crayon to draw this design and I made adjustments along the way, just wiping off the crayon marks where I didn't want them.   If you like, go ahead and free-hand on the eyes and smile at this point.  There wasn't a template for the eyes or for the mouth in the book, but they are easy to draw on your melon.


The directions recommend you cut an X like this into the top section of the pumpkin between the tail and the head to relieve the pressure inside the pumpkin.


Once you have your design on your melon, take a pumpkin cutting tool or just a small paring knife and began cutting around one side of the tail.  Don't rush, just take your time.  You can see the pumpkin cutting tool/knife I used below to get started.  A small, sharp knife would work great too because melons are just so much easier to cut than pumpkins.  In this view below, you can see the shape of the head as it rises upward on the front of the melon.  I hadn't yet drawn on the eyes or mouth.


Next, I just began cutting out sections of the middle part that I knew would need to be removed.  I was careful to avoid cutting into the tail, head or side.


You can cut the part you're removing out in small chunks or bigger pieces...whatever you feel comfortable doing.


Making progress...


With most of the middle removed, it was time to start scooping out the inside.  I also trimmed down the "meat" side of the tail section until it was about an inch or so thick.  I hadn't done that when this photo was taken.  Be super careful when you're trimming away melon from the underside of  the tail.  Support the tail with your other hand and take it slowly so you don't slice too deep or take off too much.


Of course, you'll want to save the melon you scoop/cut out to make melon balls or to cut up into small pieces to put back into your melon once it's ready to be filled.  Once I got Mr. Whale all scooped out, I traced on some eyes and a smiling mouth on to the front, then cut those out.

An Idea:  The mouth was the hardest section to cut because I couldn't tilt the melon back...too afraid I'd break off the tail.  Once you have your outline drawn on your whale...along with the face, it might be better to cut the mouth out then, before cutting the rest of the melon.  That way, you could tilt it to cut.  It's a bit tricky to cut the mouth once the rest of the melon is cut out.


Here's how Mr. Whale looked once carved.  You can see the underside of the tail looks thinner in this pic.  I had cut away more of the pumpkin by this point.  See how the stem is now his nose. :)
TIP:  It's okay to cut all the way through when you cut out the eyes of your whale, but when cutting the mouth, only cut a little ways into the pumpkin, not all the way through.  I know it's hard to see in this pic, but I didn't cut all the way through, like I did with the eyes.  The reason for this is...it keeps the juice of the fruit from leaking out onto your table once you fill Mr. Whale.


A view from above...


The directions in the cook book suggests poking a hole into the top of your whale's head and poking in some dried white flowers so it will look like Mr. Whale is spraying water up into the air.   I love that idea.  I didn't have any whitish flowers to use or I definitely would have done that.  You can see how it would look on the cover of the book below.


Fill Mr. Whale with your favorite fruits...


And enjoy the ooohs and ahhhs of your party guests. :)


I Googled watermelon and found the National Watermelon Promotion Board.  They have directions for carving so many awesome designs.  Here are just few from their site:


Ha!  A porcupine!  This melon has the same basic face shape of our whale.  Love the ragged edge around the face...those small details add so much.  This design actually looks pretty easy to replicate.


Licorice makes a cute mouth and whiskers for Mr. Kitty.  Notice how they only cut as deep as the white part of the melon to outline the kitties face.  The white of the melon makes a great outlining for features.  Love the melon ball eyes.  They even included a ball of yarn and a collar for kitty. :) Cute!


Wouldn't this be a fun centerpiece for a beach house party?  All the directions for these designs are available at the site linked above in this post.  I'll definitely be trying my hand at some of these fun designs next summer.


See you Sunday evening for Metamorphosis Monday!

Templates for pumpkin carving can be found HERE.