
The Before:
The only thing I had to purchase was a bottle of wine, cranberries and distilled water. You don't have to use distilled water so you could save the expense of buying that, if you like. But I learned back when I made "flower ice cubes" that distilled water will usually freeze pretty clear, and it's only $1 for a gallon...more than enough for my ice chiller. If you'd like your ice chiller to be more frosty looking like the one in the catalog...just used tap water.

I searched around the house and decided on this tin for my mold. (It measures 6 1/2 wide by 7 1/2 tall.) This worked fine except for two snags. 1. It leaked very slowly, so I had to add a little more water to it after about 45 minutes. It was such a slow leak in the freezer that the water froze as it leaked out, so I just broke it off and tossed it in the sink. I think that could be prevented by running a bead of hot glue around on the inside bottom where it meets the sides prior to using it.
2. The other little snag is the indention near the top made my ice mold a little tricky to get out. A container that is completely smooth at the top would work better. Just DON'T use glass. It would be very difficult to get your ice chiller out because you'll need to run warm water over it and glass would most likely break.)

I found a plastic container to use in the center...it's an old Tupperware container/pitcher. (Again, please do not use glass for this part either...same reason...it would break with the temperature change.) I placed the wine inside to make sure it was the right size for a bottle of wine. It was perfect. (It measures around 3 1/2 inches wide by 8 1/2 inches tall.)

I knew I needed something heavy to go in the center container so it wouldn't float. Clay cat litter almost worked, but wasn't quite heavy enough. Next I tried pennies from a huge penny jar collection and that worked great. Sand, marbles or even pebbles/rocks would work fine, too.

I stuck the container (filled with pennies) into the cannister and poured distilled water all around saving just enough room for 1 full bag of cranberries at the top. You can pour some of the water off or add more...whatever you need to do to get your cranberries right up to the top.

After it had frozen overnight, I took the lid off and poured out all the pennies. Next I refilled the center container with warm water, being careful to not get it on the ice inside. In this pic I had just dumped the pennies out into the big container you see on the left. I ran just a little warm water into the center container, it came right out.
I didn't take any pics of me fighting the ice chiller out of the tin container. (LOL) It was loose toward the bottom but that blooming ridge at the top of my container got wedged with a cranberry. I kept running warm water on the outside of the container near the top and it finally let go.

After:
This is the only pic I have with the lamp off, and it shows the shape of the ice chiller best. It's the shape of the small tin I had used. See how much clearer distilled water freezes than regular ole tap water?

The rest of the pics are a bit harder to see due to the light reflecting inside the bowl, but I think you'll get the idea.


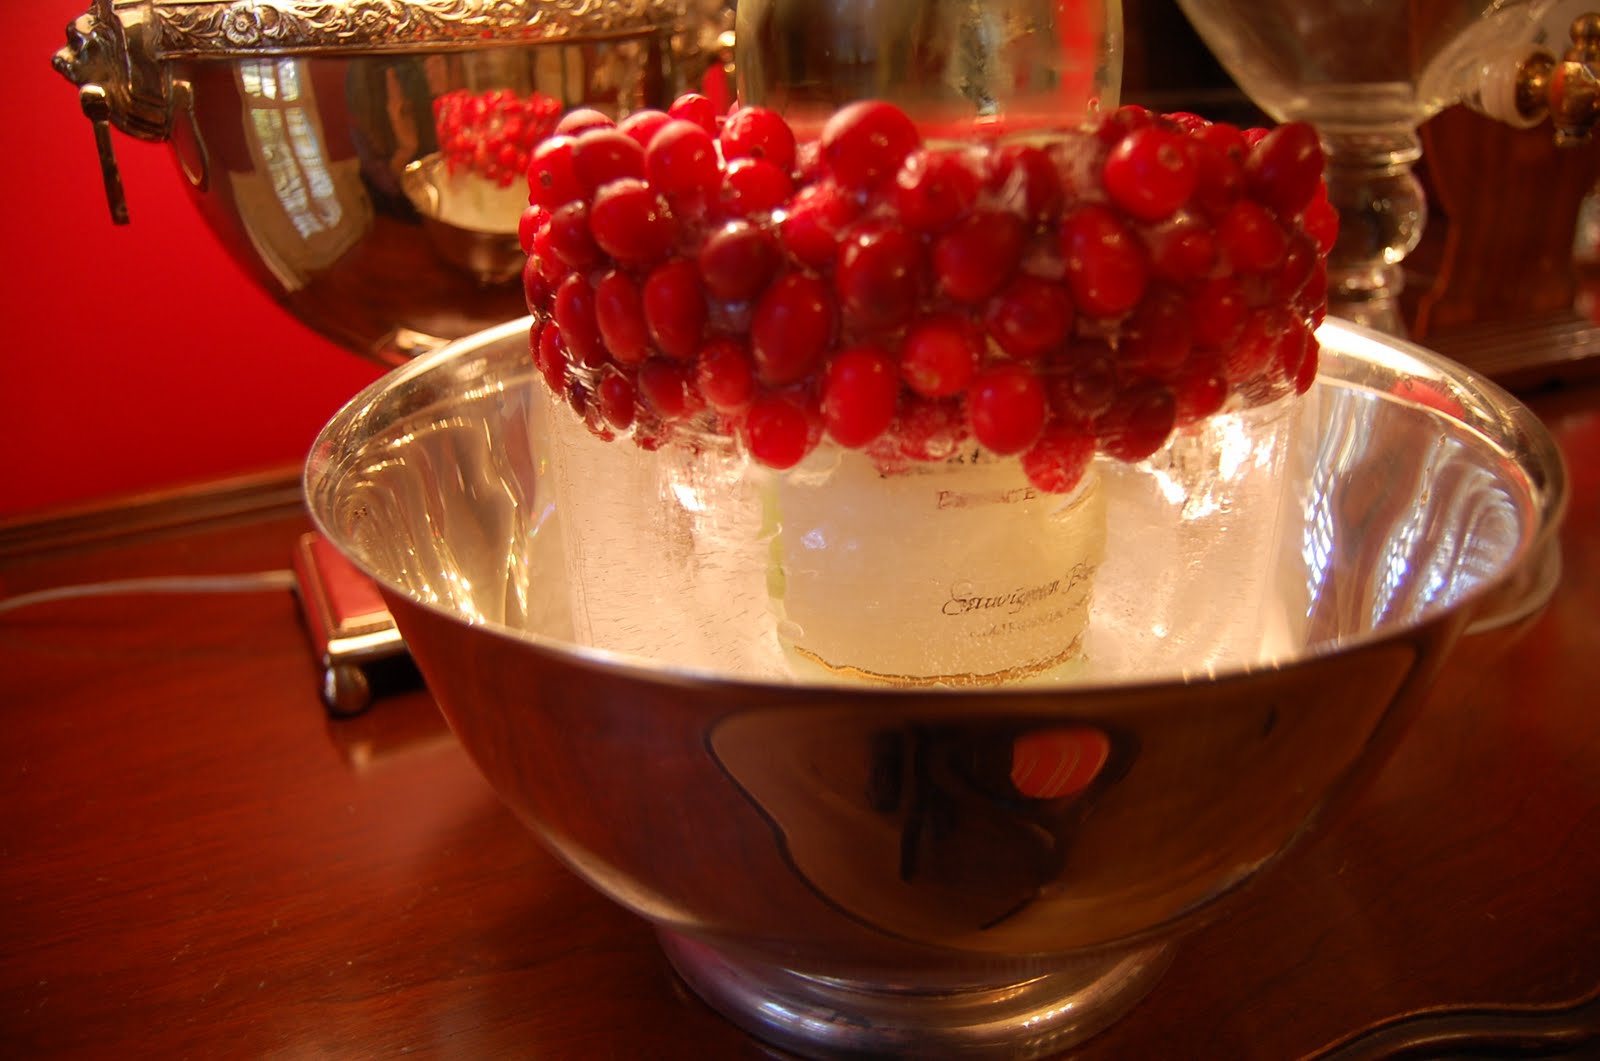
Wouldn't this be a fun way to serve your white wine for a dinner party or holiday party, or really any party? I bet there are lots of other things that could be added besides cranberries. Lemon or orange slices?

I'll be keeping my eye out for a better container than the tin one for the future...but I am happy about saving $29. :)


Metamorphosis Monday:
If you are participating in Metamorphosis Monday: Please be sure to add your permalink below, and not your general blog address. To get your permalink, click on your post name, then just copy and paste the address that shows up in the address bar at the top, into the "url" box for the picture linky. You'll also need to put your e-mail address in, but don't worry, it will not be visible to anyone.
I'd love it if you would include the MM button in your post, to make it easy for others to find you MM post. To do that, just copy and paste the Met Monday button to your computer or grab the html code from underneath the MM logo on my sidebar.
Please include a link in your MM post back to the host blog, Between Naps on the Porch. Why is this important? When you include a link back to BNOTP, it ensures your regular readers/visitors will find the other awesome "Before and Afters" linked for this Metamorphosis Monday. If everyone links back, this maximizes the visits for all participants.
Please do not add your link below, until your MM post is actually published to your blog. Please DO NOT type in all caps...it spreads the links waaaay out. Thanks! :-)
Let's try something fun today! Please visit the person who linked before you and after you...that way everyone will get some visits. Hope you'll visit more, of course. :-)
Little Reminder: Thank-you for linking back to this post so the regular visitors to your blog will find all your fellow Blogger's posts linked here for this Met Monday. If you find your link has been deleted, it is because your post didn't mention you were participating in Metamorphosis Monday and didn't include a link back to the other participants and/or was not a "Before and After" subject/project.
No comments:
Post a Comment