One of my last Pottery Barn inspired projects was Christmas garland for the columns of my front porch, HERE. (You'll find the full tutorial for the garland hack, HERE.)
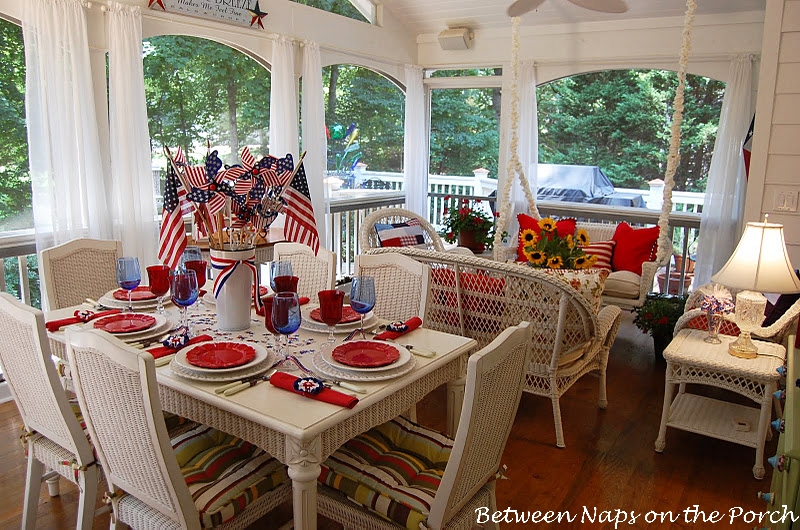
Recently, I decided to do a complete a make-over of my screened-in porch for the 4th of July.

I had seen an awesome flag in a Pottery Barn catalog but the $129 price tag was way more than I wanted to spend. Also, the PB flag was 50" x 27", too large for what I had in mind. (Doesn't that light fixture look like a giant spider?)

So, what to do? I decided to try making my own. Before heading off to The Home Depot for supplies, I measured the area where I wanted to display the flag. I envisioned hanging it above the hutch for my 4th of July porch redo, replacing the large platter that normally lives there.

I wanted to use narrow strips of wood so the flag would have a "pieced together" look, as opposed to being cut out of a solid sheet of wood. When I got to Home Depot, I found an associate, described what I wanted to do and asked him where I could find wood slats or narrow wood molding/trim. He immediately understood what I was trying to do (YAY!) and showed me several different options. One of the things he showed me was a bundle of "grade" stakes. They looked just like the stakes used to hold a sign on the side of the road for a garage sale or open house.

The hutch is around 37 inches wide and the stakes were 36 inches long in their present state, so I knew they would be just about right. I wanted the finished flag to be about 32-34 inches wide and about 17-18 inches tall.
I had planned to saw off the pointed part of the stakes when I got home, but the nice Home Depot guy offered to run them through their giant saw. Is that service, or what?! I definitely took him up on that deal!
I didn't really want nails to show on the face of the flag, so I bought a tube of "Liquid Nails." The HD guy wasn't too sure about this plan and suggested I buy a box of nails, too...just in case. In the end, the Liquid Nails was all I needed, except for the frame which I nailed together with skinny, little nails I already had at home.
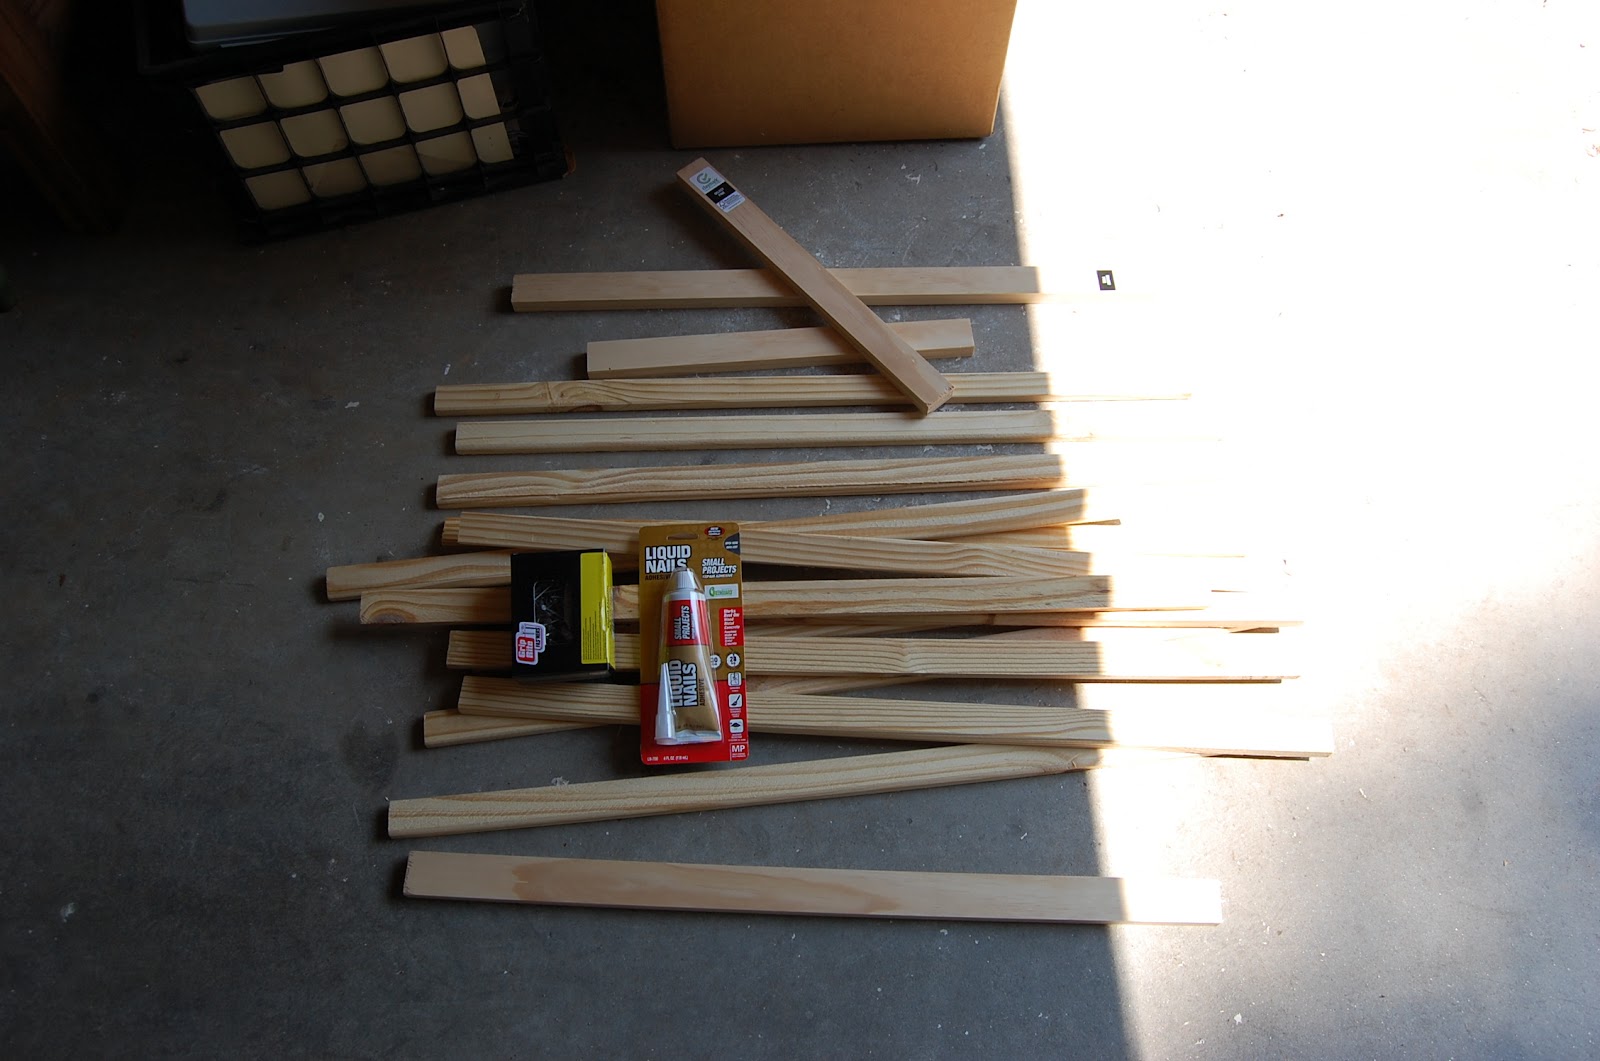
Below you'll see the stakes with the tips already cut off, and the "frame pieces" the Home Depot associate cut to the size I requested. You'll also see the tube of Liquid Nails, as well as the box of nails I purchased but didn't use.

I used nails I already had to put the base frame together. I didn't used Liquid Nails at the corners, but that wouldn't have been a bad idea. I pre-drilled the holes for the nails because I didn't want to splinter the skinny frame pieces. The top and bottom pieces of the base frame each measure 28 1/4 inches and the side pieces measure 16 1/2 inches long each. I asked the Home Depot guy to cut them this size because I wanted the base frame to be smaller than the finished flag. That way when I glued the strips of wood across the frame, it wouldn't be visible from the front. That was my plan...I was keeping my fingers crossed it would work.

I brought the wood strips and frame inside and created the flag in the air conditioned comfort of the breakfast room. Ahhhhh! It was blazing hot in that garage when I was building the frame! I laid the stakes across the frame to test out my plan. When working on a project, I always try to "simulate" as much as I can before I commit and start nailing, gluing, painting, etc.... It's the old measure twice and cut once theory.

Using a pencil, I sketched off the area where the stars would be. There was no exact measuring for this part. I just pulled up a flag online, noticed the star section (known as the canton) didn't go quite to the center of the flag and I eye-balled it from there. I was careful to count down and make sure the canton didn't extend lower than the 7th stripe since that's how it is on a real flag.

I decided to paint all the stripes prior to using the Liquid Nails to attach them to the base. After my Home Depot trip, I had stopped by Michael's and picked up some small bottles of paint. I chose Americana's Cherry Red and Apple Barrel's White (205803) and True Blue (20383). I also bought another red called Americana Primary Red, but after testing the reds on the back of the flag, I liked the Cherry Red best.

I started by painting all the white stripes first, including a white background for the canton. You'll see why I painted that section white in a sec.

I painted a second coat of white paint on the canton area so it would be bright white.

With the individual stripes/stakes still not glued down, I began painting the red stripes, next. I just took each piece of wood over to the kitchen counter and painted it while I watched TV. It didn't take long to paint them at all and was actually pretty fun. :) Painting each strip of wood (stripe) first before gluing the flag together made the flag super easy to paint. No risk of getting white paint on the red stripes or red paint on the white stripes.

In this photo all the stripes have been painted. The sections of wood are spread out drying and are still not glued to the base.

Next, using the Liquid Nails, I glued the strips of wood to the base I had constructed. Apparently, I forgot to take pics during the gluing process (bad blogger) so I'll describe it. I just pre-positioned all the strips on the frame exactly where I wanted them and starting at the top, going down one at the time, I glued each piece of wood to the base/frame you saw at the beginning of this post.
I used nails I already had to put the base frame together. I didn't used Liquid Nails at the corners, but that wouldn't have been a bad idea. I pre-drilled the holes for the nails because I didn't want to splinter the skinny frame pieces. The top and bottom pieces of the base frame each measure 28 1/4 inches and the side pieces measure 16 1/2 inches long each. I asked the Home Depot guy to cut them this size because I wanted the base frame to be smaller than the finished flag. That way when I glued the strips of wood across the frame, it wouldn't be visible from the front. That was my plan...I was keeping my fingers crossed it would work.

I brought the wood strips and frame inside and created the flag in the air conditioned comfort of the breakfast room. Ahhhhh! It was blazing hot in that garage when I was building the frame! I laid the stakes across the frame to test out my plan. When working on a project, I always try to "simulate" as much as I can before I commit and start nailing, gluing, painting, etc.... It's the old measure twice and cut once theory.

Using a pencil, I sketched off the area where the stars would be. There was no exact measuring for this part. I just pulled up a flag online, noticed the star section (known as the canton) didn't go quite to the center of the flag and I eye-balled it from there. I was careful to count down and make sure the canton didn't extend lower than the 7th stripe since that's how it is on a real flag.

I decided to paint all the stripes prior to using the Liquid Nails to attach them to the base. After my Home Depot trip, I had stopped by Michael's and picked up some small bottles of paint. I chose Americana's Cherry Red and Apple Barrel's White (205803) and True Blue (20383). I also bought another red called Americana Primary Red, but after testing the reds on the back of the flag, I liked the Cherry Red best.

I started by painting all the white stripes first, including a white background for the canton. You'll see why I painted that section white in a sec.

I painted a second coat of white paint on the canton area so it would be bright white.

With the individual stripes/stakes still not glued down, I began painting the red stripes, next. I just took each piece of wood over to the kitchen counter and painted it while I watched TV. It didn't take long to paint them at all and was actually pretty fun. :) Painting each strip of wood (stripe) first before gluing the flag together made the flag super easy to paint. No risk of getting white paint on the red stripes or red paint on the white stripes.
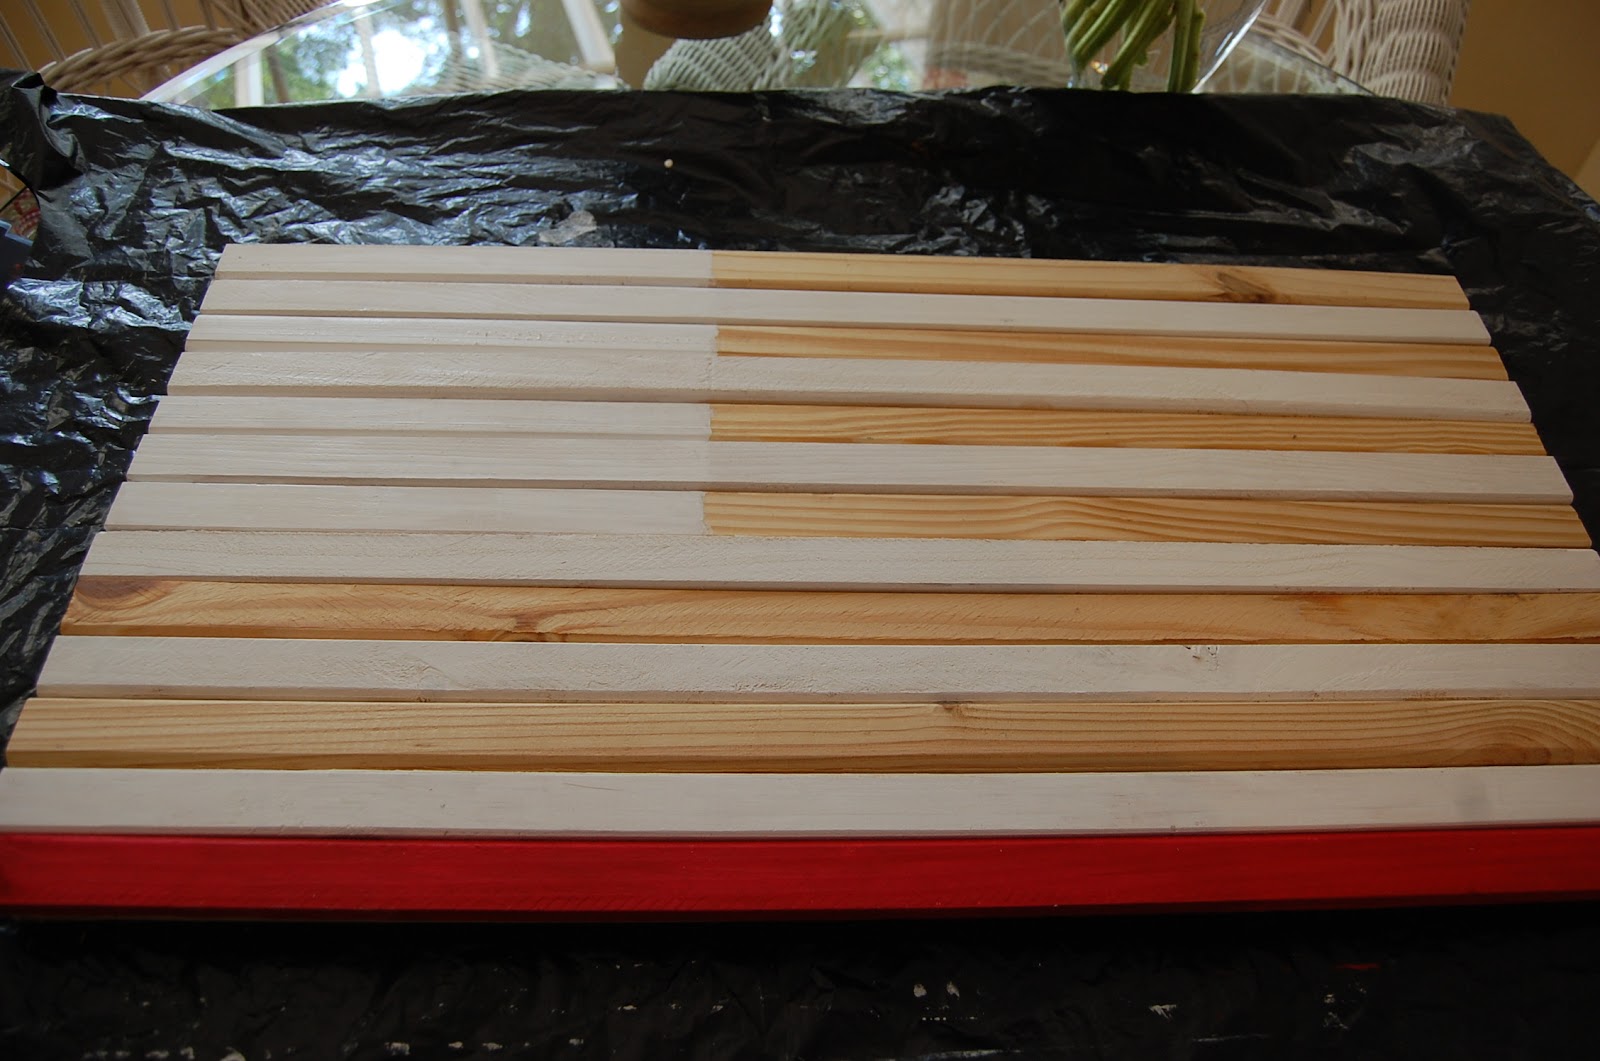
In this photo all the stripes have been painted. The sections of wood are spread out drying and are still not glued to the base.

Next, using the Liquid Nails, I glued the strips of wood to the base I had constructed. Apparently, I forgot to take pics during the gluing process (bad blogger) so I'll describe it. I just pre-positioned all the strips on the frame exactly where I wanted them and starting at the top, going down one at the time, I glued each piece of wood to the base/frame you saw at the beginning of this post.
Follow the directions on the Liquid Nails tube. It's best to squirt the glue on the base frame, press the strip of wood down, let it set a few seconds, then lift it off and place it again. Somehow that helps the Liquid Nails bond everything better, per the directions on the tube.
Liquid Nails works quickly. It was firmly set up within 24 hours, but I was able to move the flag around and even try it out on the porch just a couple of hours after gluing all the wood strips down. I didn't leave it in the upright position, though (just to be safe) until 24 hours had passed.
Here's a side view of how the flag looked with all the wood strips glued down. See how the base I made is a bit smaller than the flag itself. I'm sure there are many ways to construct this flag. You could even build a frame to go all the way around for a really "finished" look.

Here's a photo of how the flag looks on the back. You can see where I tested out the red and blue paint colors before deciding to use them. That strip with the dried glue showing...that's a strip I had glued to the bottom of the base/frame, but during the gluing process I decided to move it upward to a different spot. That's why you can see glue on it from the back. It had been the bottom stripe at one point.

Here's a photo of how the flag looks on the back. You can see where I tested out the red and blue paint colors before deciding to use them. That strip with the dried glue showing...that's a strip I had glued to the bottom of the base/frame, but during the gluing process I decided to move it upward to a different spot. That's why you can see glue on it from the back. It had been the bottom stripe at one point.
The stakes aren't "perfect" and some are cut/beveled a little "off" so that's why it helps to try them out in different places before you start gluing them down. I did that, but apparently I swapped a couple in the painting process, so once I started gluing them down, I had to do a little repositioning. You have about 15-20 minutes before the Liquid Nails sets up, so that gives you time to move them around. I tell you, I'm a big fan of Liquid Nails now. It worked great for this project! And, no, I am not affiliated with them and they don't know me from Adam's house cat. :)

Now it was time to create the star section or canton. When I first started thinking about how I wanted to build a flag a few weeks back, I had an idea I hoped would work for this star section. The trick would be in finding the right size star stickers. If I couldn't, I figured I'd cut a star sponge shape and stencil them on. After hitting Home Depot and Michaels, I headed over to Office Depot. They had stickers in a couple of different sizes and these looked like they just might work. They came 72 to the package and I used all but 7 of them. I'll explain in a sec.

Again, I like to test how things are going to look before "committing." It was a pain in the you-know-what, but I rough-cut out each sticker and just set them out on the star section before going for it. They looked about right, so I decided to use them. This testing process also helped me to know exactly how much of the canton I wanted to paint blue and how much I might need to extend the red stripes over.

I taped off the star section using Frog Tape. I bought this tape to use when I painted the crown molding in my Pottery Barn Bedford office. I still haven't caulked and painted it, yet...can you say procrastination??? :) The Frog Tape came in handy for this flag project.

I peeled all the stars off and positioned them one at a time on the flag. I did the top row and then moved on to the second row, etc... I left all the stars I had cut out in place as I worked, just lifting the one I was working on at the moment, to stick it down. That way I kept my rows fairly straight through to the end. Then I painted the entire canton area with "True Blue" paint.

Now it was time to create the star section or canton. When I first started thinking about how I wanted to build a flag a few weeks back, I had an idea I hoped would work for this star section. The trick would be in finding the right size star stickers. If I couldn't, I figured I'd cut a star sponge shape and stencil them on. After hitting Home Depot and Michaels, I headed over to Office Depot. They had stickers in a couple of different sizes and these looked like they just might work. They came 72 to the package and I used all but 7 of them. I'll explain in a sec.

Again, I like to test how things are going to look before "committing." It was a pain in the you-know-what, but I rough-cut out each sticker and just set them out on the star section before going for it. They looked about right, so I decided to use them. This testing process also helped me to know exactly how much of the canton I wanted to paint blue and how much I might need to extend the red stripes over.

I taped off the star section using Frog Tape. I bought this tape to use when I painted the crown molding in my Pottery Barn Bedford office. I still haven't caulked and painted it, yet...can you say procrastination??? :) The Frog Tape came in handy for this flag project.

I peeled all the stars off and positioned them one at a time on the flag. I did the top row and then moved on to the second row, etc... I left all the stars I had cut out in place as I worked, just lifting the one I was working on at the moment, to stick it down. That way I kept my rows fairly straight through to the end. Then I painted the entire canton area with "True Blue" paint.
I was glad the package contained 72 stars because the stars were very thin/fragile and occasionally one would tear when I was trying to remove the backing to stick it down or if I had to pull it back up to reposition it. I used all but 7 stars in the end.

In the pic below, you can see I went a little further over with the red paint on that top stripe than I did with the other red stripes. No need to panic...I knew the blue would hide that pretty well. I do recommend trying to keep it even, though, because the blue won't totally hide the red paint.
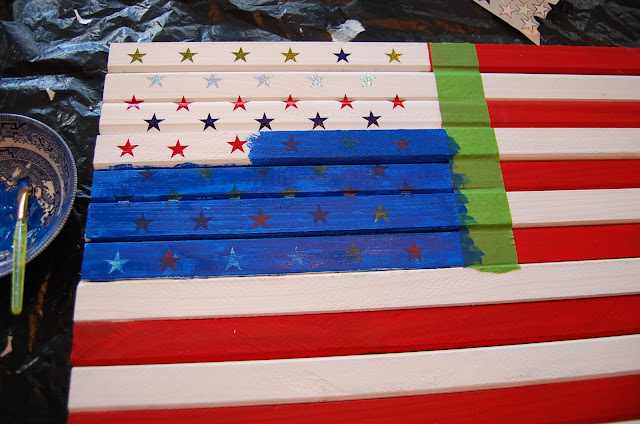
I let it dry for about 15 minutes (acrylic paint dries quickly) but before it was completely dry, I took a straight pin and began lifting the stars off, one at a time. I just skipped all around, as you can tell in the photo below. The bright white stars are the ones where I had already lifted the stickers. It was fun seeing the star section come to life. :)

Now, here's something you may decide to do differently. The stakes I bought were kind of flat on one side and beveled on the other. A few seemed to be beveled on both sides, but mostly they were flat on one side and beveled on the other. I chose to put the beveled side facing upward. I was trying to emphasize the fact that this flag wasn't a solid piece of wood, but was made by individual strips of wood assembled together. The bad thing about building the flag with the beveled side facing up is, the star stickers kind of wrap around the beveled edge which can sort of give the impression the top or bottom tip of the star is missing, even though it isn't.

If that bothers you, design your flag with the FLAT side of the stake facing upward and the beveled side facing down. I'd still probably build it this way again...I just like the beveled look.

Another variation you could consider doing is to make your base frame bigger than I did and space the wood strips out a teeny bit using a penny or some slender object as a spacer, creating little gaps between the slats of wood. I thought of doing that, but in the end I decided to just squish them up close to each other. I'm just throwing that idea out there, though...in case you like it. Here's how my flag looked after all the star stickers had been removed with a straight pin.

Because I wanted my flag to look pretty crisp and near perfect (before I distressed it) I touched up a few of the stars with the white paint and a really skinny paint brush. The stickers worked great so the only touching up I did was just due to the beveling where a tip might be missing here or there. The paint had a bit of an uneven look, due to how the wood absorbed the paint. I actually liked that since I didn't want it to look too, too perfect.

In place above the hutch...

I put two short screws into the back when I initially built the base frame so I could hang the flag with picture wire once I was done. But in the end, I liked the casual look of having it just leaning against the wall.

Side views...

I haven't distressed my flag, yet. I think I'm going to just live with it a while...then decide. This flag was a labor of love, but really fun to make!

In the pic below, you can see I went a little further over with the red paint on that top stripe than I did with the other red stripes. No need to panic...I knew the blue would hide that pretty well. I do recommend trying to keep it even, though, because the blue won't totally hide the red paint.

I let it dry for about 15 minutes (acrylic paint dries quickly) but before it was completely dry, I took a straight pin and began lifting the stars off, one at a time. I just skipped all around, as you can tell in the photo below. The bright white stars are the ones where I had already lifted the stickers. It was fun seeing the star section come to life. :)

Now, here's something you may decide to do differently. The stakes I bought were kind of flat on one side and beveled on the other. A few seemed to be beveled on both sides, but mostly they were flat on one side and beveled on the other. I chose to put the beveled side facing upward. I was trying to emphasize the fact that this flag wasn't a solid piece of wood, but was made by individual strips of wood assembled together. The bad thing about building the flag with the beveled side facing up is, the star stickers kind of wrap around the beveled edge which can sort of give the impression the top or bottom tip of the star is missing, even though it isn't.

If that bothers you, design your flag with the FLAT side of the stake facing upward and the beveled side facing down. I'd still probably build it this way again...I just like the beveled look.

Another variation you could consider doing is to make your base frame bigger than I did and space the wood strips out a teeny bit using a penny or some slender object as a spacer, creating little gaps between the slats of wood. I thought of doing that, but in the end I decided to just squish them up close to each other. I'm just throwing that idea out there, though...in case you like it. Here's how my flag looked after all the star stickers had been removed with a straight pin.

Because I wanted my flag to look pretty crisp and near perfect (before I distressed it) I touched up a few of the stars with the white paint and a really skinny paint brush. The stickers worked great so the only touching up I did was just due to the beveling where a tip might be missing here or there. The paint had a bit of an uneven look, due to how the wood absorbed the paint. I actually liked that since I didn't want it to look too, too perfect.

In place above the hutch...

I put two short screws into the back when I initially built the base frame so I could hang the flag with picture wire once I was done. But in the end, I liked the casual look of having it just leaning against the wall.

Side views...

I haven't distressed my flag, yet. I think I'm going to just live with it a while...then decide. This flag was a labor of love, but really fun to make!

Click HERE to see the full make-over of the porch for the 4th of July.
♫ You're a Grand 'Ole Flag
♪ Music and lyrics by George M. Cohan
You're a grand old flag,
You're a high flying flag
And forever in peace may you wave.
You're the emblem of
The land I love.
The home of the free and the brave.
Ev'ry heart beats true
'neath the Red, White and Blue,
Where there's never a boast or brag.
Should auld acquaintance be forgot,
Keep your eye on the grand old flag.

General Information About Construction:
Flag was constructed of sign stakes from The Home Depot that measured approximately 1 1/4 wide and 36 inches long before the pointed tips were cut off. After tips were cut off, stakes measured 32 inches long.
Paint Colors: Acrylic Paint (purchased at Michael's)
Apple Barrel, White, 20503
Apple Barrel, True Blue, 20383
Americana, Cherry Red
Star Stickers:
Purchased at Office Depot
Flag Measurements:
Side pieces of base/frame: 16 1/2" long each
Top and bottom pieces of base/frame: 28 1/2" long each
Size of Canton Area:
12 1/2 " wide x 9" tall
Size of Finished Flag:
32" wide by 17" tall
Cost to build:
Wood Stakes: $5.97
Paint: $1.98
Stickers: $1.99
Liquid Nails: 3.47
Total: $13.41
Looking forward to all the "Before and Afters" for this Metamorphosis Monday!

Metamorphosis Monday:
If you are participating in Metamorphosis Monday you will need to link up the permalink to your MM post and not your general blog address. To get your permalink, click on your post name, then just copy and paste the address that shows up in the address bar at the top of your blog, into the "url" box for InLinkz.
If you'd like to include the MM button in your post, just copy and paste the Met Monday button to your computer or grab the html code from underneath the MM logo under the "Join a Blog Party" header at the top of this blog.
In order to link up, you'll need to include a link in your MM post back to the host blog, Between Naps on the Porch so your regular readers will be able to find the Met Monday party which ensures your friends and fellow bloggers will receive lots of visits, too. Isn't that what a party is all about? :)
PLEASE DO NOT type in all caps...it spreads the links waaaay out. Thanks! :-)
Let's try something fun today! Please visit the person who linked before you and after you...that way everyone will get some visits. Hope you'll visit more, of course. :-)
Welcome! Thanks for coming to the party!