Showing posts with label Metamorphosis Monday. Show all posts

Sunday, 15 January 2012

Blogger Updates and Dremel Deserves a Crown! Welcome to the 156th Metamorphosis Monday!

Greetings Friends!  I hope you've been having a marvelous weekend!  I have a mini-metamorphosis to share for this Met Monday, but before I let cha see what I've been up to, I want to share a big change Blogger made recently, a change that made this girl very happy.

You may already know, Blogger added one of the most oft requested features to the Blogger platform a few days ago: the threaded comment system.   In the past, when several comments/questions were left on a post, when I moderated and published the comments and tried to answer a question or reply to a comment, my reply/comment always ended up way down below the comment to which I was replying.  Not any more!  Now I can reply directly under the comment, and so can you.  YAY!  This greatly enhances and encourages the flow of conversation.  It should make it much easier for you to find any follow-up replies that are posted.


If you see someone asking a question, feel free to jump in and answer.  I don't have all the answers by a long shot so I welcome your input.  I'd love to see us all pitching in to answer the questions that arise...or just to add something to the conversation.  For example, if someone asks where I purchased a particular item, if you've seen it for sale somewhere, feel free to reply.  This helps everyone.  I'm so excited about this new feature!

BNOTP has the most positive, friendly, caring, uplifting readers around.   Your comments are always so appreciated and I read every single one.  In fact, a recent comment solved a problem I had and you'll be reading about that in today's post.

If you are a blogger and you would like to know how to activate this awesome, new feature on your blog, visit Blogger Buzz and you can read all about it.  Don't ask me how to do it because I just sort of clicked this and clicked that, and then suddenly realized it was working.  I have no idea what I did, but it seemed to work.  I just followed the directions I found in the Blogger Buzz article. It wasn't hard and only took a few seconds to get it working.

Mini-Metamorphosis:
I've been dremeling.  Yep, I'm using that word as a verb today.  You may remember I recently shared a post called "Fun Stuff Worth Sharing" which included, among other things, a wee addition to the office.
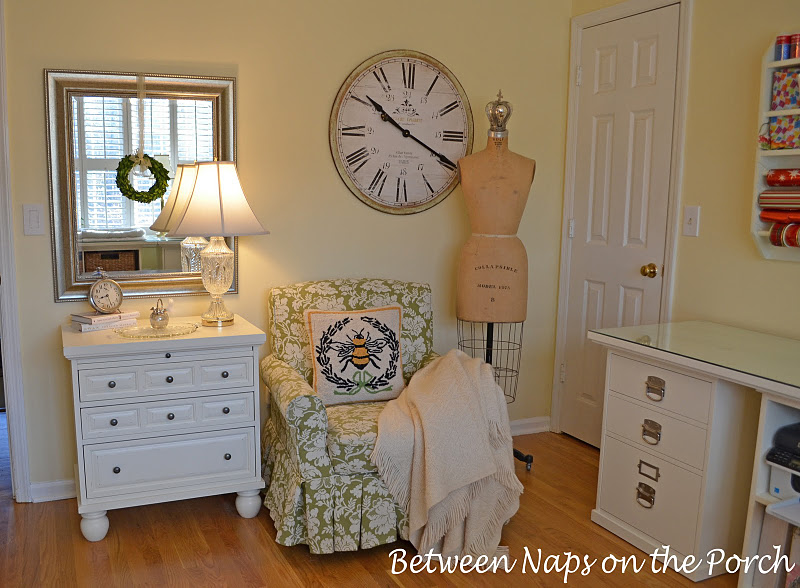

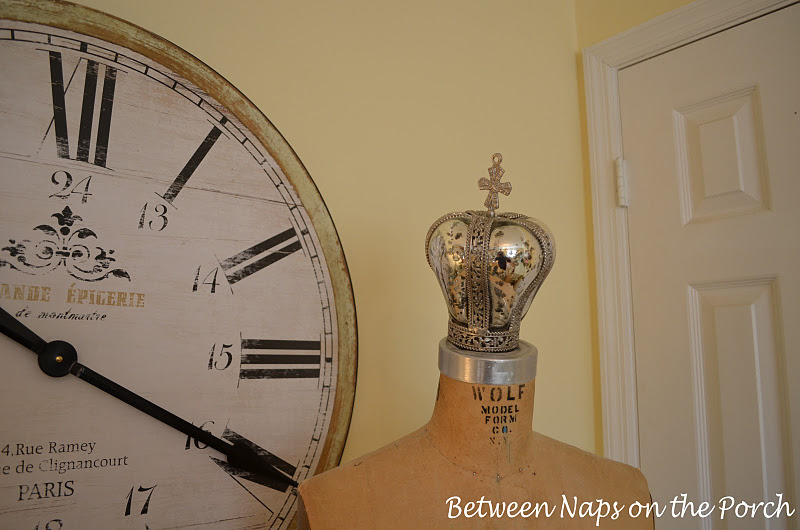
The addition was this little mercury-glass and silver crown I found at Marshalls about 1-2 months ago for just $12.99.  I had been thinking about adding a crown to the top of the dress form for a while, but most were a bit more than I wanted to spend.  The only problem with the crown I found was it had a rather large hanging loop attached to the top.  I guess the crown was supposed to be an ornament, although, it is so heavy a Christmas tree branch would definitely droop under its weight.

I really wanted to get rid of the hanging loop so I tried to cut it off with some heavy duty ceramic cutters I already had.  No going.  The cutters weren't even making a dent.


About a year or so ago I was cruising around one of my fave stores, the Home Depot, and I came across this Dremel set on sale.  I had no idea how I was going to use it, but I thought it might come in handy when I began renovating a vintage doll house that adopted me a few years ago.  I used the Dremel recently to do a little sanding on the doll house in THIS post.  (Still haven't painted the dollhouse trim...it's on my to-do list, though.)

When I posted about my "loop" dilemma, Labbie (who blogs at (The Adventures of Garrett Squared) suggested using a Dremel.  Duh!  Why hadn't I thought of that?


I got out my trusty Dremel and sure enough, there was a "cutting" attachment that looked like it just might do the job.  I didn't have any safety glasses so I wore my dorky sunglasses I bought at Wally World a while back.  They are curved and designed to fit over regular eye glasses, which is good since I wear those most days (since I'm on the computer a lot) instead of my contacts.  The sunglasses worked well for shielding and protecting my eyes since they curved right up to my face, but they made it sort of tricky for seeing.  lol  I recommend wearing real safety glasses when using a Dremel.


I cut from both sides of the loop and I snapped this pic below right before I cut the last teeny thread of metal holding the loop on top.  It worked great!
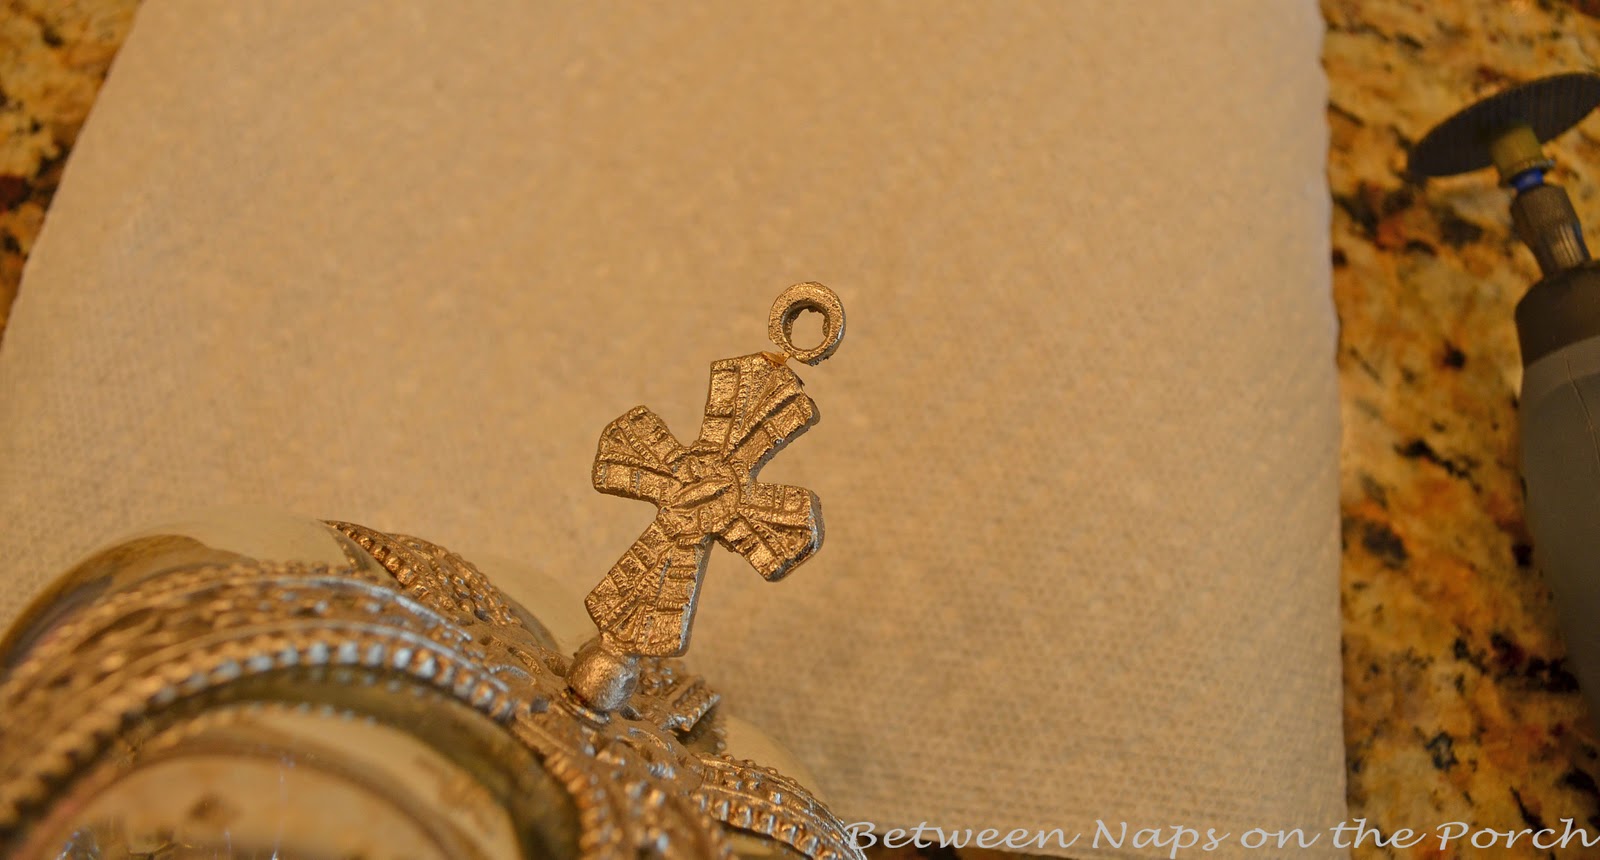


I attached this little tool to the Dremel and sanded down the top edge a bit to make it nice and smooth.


And here she is, back in place.


Come a bit closer and check it out.


Loopless and much better! :)


So, that's my wee metamorphosis.   Do you have a Dremel?  If so, what have you been using it for?  I'm sure there are a 101 things I could be doing with mine that I just haven't thought of, yet.

 Oh, I almost forgot...another change I made this week that really seemed to help was I moved the lamp to the other side of the chest.  I kept thinking I needed it right beside the chair to read, but I decided to try it over on the other side and it looks so much better.  It seems to balance out the space much better this way.  And I can see to read just fine.  Lesson learned:  you don't always have to have the lamp on the side where the chair is located to see to read.


Bonus Picture:
I was playing around with the "effects" mode on the Nikon D5100 a few weeks ago, just seeing what it would do...and I snapped this photo with the sketch effect.  Christmas is long over, but I thought this might put a little smile on your face.  It's a photo of one of the dormer windows in the Upstairs Family Room, stuffed full of my son's old Teddy Bears.  They were too cute to toss so I tucked them into one of the dormer window seats.  They make me smile when I pass through that room.


And they make me a little nostalgic.  Wonder why?


It's the little things...ya-know-what-I mean? :)


Looking forward to all the Before and Afters for this Metamorphosis Monday!

Links referenced in this post:
Office
Blogger Buzz
Doll House Renovation
Upstairs Family Room

To receive the latest posts, as well as updates about blog parties, subscribe via an RSS Reader or have BNOTP delivered right to your Inbox.  You'll find links to subscribe via RSS and Email on the sidebar to the right.  Thanks for reading; so glad you are here!

Reading this post via e-mail or RSS feed?
*If you are reading this via email or RSS feed, to view all the Before and Afters linked for Metamorphosis Monday, click HERE.


Metamorphosis Monday:
If you are participating in Metamorphosis Monday you will need to link up the "permalink" to your MM post and not your general blog address. To get your permalink, click on your post name, then just copy and paste the address that shows up in the address bar at the top of your blog, into the "url" box for InLinkz.

In order to link up, you'll need to include a link in your MM post back to the party.

If you'd like to include the MM button in your post, just copy and paste the Met Monday button to your computer or grab the html code from underneath the MM logo under the "BNOTP Parties" header at the top of this blog.

PLEASE DO NOT type in all caps...it spreads the links waaaay out. Thanks!

Let's try something fun today! Please visit the person who linked before you and after you...that way everyone will get some visits. Hope you'll visit more, of course.
Welcome! Thanks for coming to the party!

Sunday, 8 January 2012

Table Numbers for Wedding Reception: Welcome to the 155th Metamorphosis Monday!

Greetings!  Hope your weekend has been going great!  I have a Before and After to share for this Met Monday that's near and dear to my heart.  My son, Chip, and his sweetie, Nancy, will be getting married in May and they have been busy planning out all the details.


I'm always telling Nancy she would be a great blogger and should have an Etsy shop because she's a super talented seamstress, crafter and DIYer.   Much of what she's created for the wedding is all under wraps for now, but after May I'll be able to share a good bit more, including the beautiful dress she's made for the rehearsal dinner.

For this evening, I have permission to share the table numbers Nancy made for the wedding reception.   Nancy will fill you in on just how she crafted the numbers.  Oh, and I would be remiss if I didn't introduce our assistant for the evening, Thai.  Thai is Chip and Nancy's kitty.  Think of him as a furry Vanna White, except with numbers instead of letters. ;)  Nancy, take it away!


Nancy:
When I started this whole "wedding planning" thing I realized it was going to be 99% DIY on my part.  Did this scare me? NOT AT ALL!  I looked at it as the biggest, most amazing craft project ever - and let’s be honest, I am not one to shy away from anything crafty. I live for this stuff!

After designing and printing all our Save the Date notices, ordering hundreds of sheets of cardstock online to print our DIY invites, and tying bows on our 150+ programs, I realized I needed something else to focus my energy on because these projects were quickly wrapping up. So, I decided to work on table numbers.


I looked on Etsy.com for table numbers hoping to find a creative steal, but alas, they were all more than my DIY-self wanted to spend (at least $8.50 + a piece). With that idea out the window, I basically stalked Michaels (craft store) for sales and coupons. I was pretty sure I wanted to framed numbers of some sort, nothing crazy, and when picture frames went on sale for 40% off I knew I had to make this happen!


I went into Michaels with the intention of getting wooden (to paint) or black frames, but then I saw two different styles of metal frames (one with little diamonds and one without diamonds, but a pretty design) for $8.99. With 40% off this made them $5.39 a piece.  Hold the phone…I also had a 25% off frames coupon (gotta sign up for those e-mail deals--they are worth it!!) = $4.04.   I also had a "spend $25 get $5 off--spend $50 get $10 off" coupon.  I bought 12 so it was $48.48, plus I had some other knick-knacks, so I got $10 off which made each frame come down to $3.21 a piece!  I could have saved even more if I had gone with my black frame idea (I believe those started at $5.99) but I LOVED the silver frames so I decided to “splurge.”


The numbers are wooden, 3 inch cutouts I had previously gotten at Michaels on clearance for $0.65 each (normally $0.99+). I sanded them down and painted them black. Then I took silver paint and a dry paintbrush and gave them an “antique” look. I had left over “pearl” paper from our invitations, so I cut that down to size and used it for the backing in each frame (3 pieces = 12 backings). Then glued (hot glue gun) the numbers in place. VoilĂ !


Total spent: $46.32 + tax…which was about 1/3 of what I would have paid (at least) to order them elsewhere. ANOTHER DIY SUCCESS!


Nancy, thanks so much for sharing how you created these beautiful table numbers for the wedding reception.  They are perfect and are going to look wonderful on the tables!


Looking forward to all the Before and Afters!

To receive the latest posts, as well as updates about blog parties, subscribe via an RSS Reader or have BNOTP delivered right to your Inbox.  You'll find links to subscribe via RSS and Email on the sidebar to the right.  Thanks for reading; so glad you are here!

Reading this post via e-mail or RSS feed?
*If you are reading this via email or RSS feed, to view all the Before and Afters linked for Metamorphosis Monday, click HERE.

Metamorphosis Monday:
If you are participating in Metamorphosis Monday you will need to link up the "permalink" to your MM post and not your general blog address. To get your permalink, click on your post name, then just copy and paste the address that shows up in the address bar at the top of your blog, into the "url" box for InLinkz.

In order to link up, you'll need to include a link in your MM post back to the party.

If you'd like to include the MM button in your post, just copy and paste the Met Monday button to your computer or grab the html code from underneath the MM logo under the "BNOTP Parties" header at the top of this blog.

PLEASE DO NOT type in all caps...it spreads the links waaaay out. Thanks!

Let's try something fun today! Please visit the person who linked before you and after you...that way everyone will get some visits. Hope you'll visit more, of course.


Welcome! Thanks for coming to the party!

Sunday, 1 January 2012

Yummy Key Lime Pie Recipe: Welcome to the 154th Metamorphosis Monday!

If you're new to BNOTP, every Sunday evening (by 9:00 P.M.) our Metamorphosis Monday party begins. MM is a chance to share a "Before and After" you may have been working on this past week/month. Click on the category heading Parties at the top of this blog for more details.

I'm sharing an edible "Before and After" for this Metamorphosis Monday. This past Christmas I decided to shake things up a bit.  I made the traditional Coconut Cake and Ambrosia (recipe for Coconut Cake HERE) but I decided to make a pie, too.  Years ago, I used to make a Lemon Meringue pie using a recipe from  an old Eagle Brand Sweetened Condensed Milk recipe booklet.  I came across the recipe again recently and decided to give the Key Lime version a try.


The coconut cake took a lot more effort since I made it from scratch, including grating fresh coconut. When all was said and done, there was plenty of cake left and not a single piece of Key Lime pie.   Something tells me I've just started a new tradition for our Christmas feast.


Here's some of the ingredients you'll need to make this super easy pie.  I came across "Nellie & Joes Famous Key West Lime Juice" at Publix and had to try it because of the cute little houses on the label.  Yep, I'm very scientific about how I pick my ingredients.

You'll need:
1 (9 inch) baked pastry shell, cooled
4 eggs (to be separated)
1 (14 ounce) can of Eagle Brand Sweetened Condensed Milk
1/2 cup Lime juice
Green food coloring (optional)
1/2 teaspoon cream of tartar
1/3 cup sugar


One word of caution:  When I made this pie last week for Christmas, I used Borden's Eagle Brand Sweetened Condensed Milk and it came out perfect.  When I made the pie again for this post, I used the "store" brand sweetened condensed milk since it was on sale.  The pie came out a bit runny this time.  I'm sticking with Eagle Brand from here out...learned my lesson.


For my crust, I used one of these ready-made pie crusts.  The crust came out great.  I crimped the edge of the pie crust to create a pretty fluting around the edge when I made the pie last week.  The edge ended up hidden under the meringue, so this time around I didn't take time to create the pretty fluting.  Ummm, now that I think about it, I guess I should have left the crimped edge exposed.  Oh well, something to try next time.


Directions:
Preheat your oven to 350 degrees.  Separate all four egg whites and yolks.  Keep one egg white separated from the others.  It will be used in the filling.  The other three egg whites will be used to make the meringue.

How do you separate your egg whites?  I acquired this little egg separator at a Tupperware Party a gazillion years ago.  I can do the little "swapping it from egg shell to egg shell" trick, but this device makes it a bit easier.  Wonder if they sell something like this online?  I'm sure they do since Tupperware was making it so many years ago.  I bet William Sonoma has a high tech version.  Any of you awesome cooks know?

Tip:  Never separate egg whites over each other.  If a yolk breaks, you'll get yolk in with your other egg whites and will have to start all over.  Not fun...I speak from experience on that.


In a medium bowl, beat egg yolks.


Next, stir in your Eagle Brand sweetened condensed milk, lime juice and a touch of green food coloring.  The food coloring is optional but I think it adds a lot to the appearance of the pie.   I added just a smidgen to give it more of that "lime" coloring.


In a small bowl, stiffly beat the egg white you separated out from the other egg whites.  Then fold it into the sweetened condensed milk mixture.


Pour the mixture into your previously baked pie shell.


Beat the remaining three egg whites with the cream of tartar until they are foamy.  Then, gradually add the sugar, beating the egg whites into a meringue until they are stiff, but not dry.  Spread your meringue over the top of your pie, sealing to the edges of the shell.  I'm thinking now, I probably should have left the edges of the pastry shell exposed.  Ummm, will do that next time.

Bake your pie at 350 degrees for 15 minutes.  The meringue will begin to brown so you'll know it's getting close to being done.  Once it's done, just chill it in the frig.


When the pie was done, I took it out to the porch where the lighting is better so I could grab a quick pic. Can you tell it was a breezy day out on the porch? :)


This pie is so easy to make.  It would be a great dessert to serve for a spring or summertime party.  It looks huge in the picture doesn't it.  Must be the angle...it's normal size in real life. lol


The pie was a bit tricky to slice since the meringue was stuck down to my pie pan.  A food photographer, I'm not. HA!  I did discover after squishing a few slices, if you wish to cut pretty slices, smear a tiny bit of butter on your knife before cutting.  As I photographed the pie, I was thinking how great this would be poured into tiny, individual pasty shells for little mini Key Lime pies.  Ummm, may try that next time.

Love trying new recipes?  You'll find additional recipes HERE.  Just click and scroll past the picture links to table settings, party tips, napkin folds, etc... to the bottom of the page where you'll find more of my fave recipes for party food, desserts, appetizers, etc...  Or, click on the category header, Tablescapes and scroll to the bottom of that page.


Looking forward to all the Before and Afters!

RSS Reader or have BNOTP delivered right to your Inbox.  You'll find links to subscribe via RSS and Email on the sidebar to the right.  Thanks for reading; so glad you are here!

Reading this post via e-mail or RSS feed?
*If you are reading this via email or RSSHERE.


Metamorphosis Monday:
If you are participating in Metamorphosis Monday you will need to link up the "permalink" to your MM post and not your general blog address. To get your permalink, click on your post name, then just copy and paste the address that shows up in the address bar at the top of your blog, into the "url" box for InLinkz.

In order to link up, you'll need to include a link in your MM post back to the party.

If you'd like to include the MM button in your post, just copy and paste the Met Monday button to your computer or grab the html code from underneath the MM logo under the "BNOTP Parties" header at the top of this blog.

PLEASE DO NOT type in all caps...it spreads the links waaaay out. Thanks!

Let's try something fun today! Please visit the person who linked before you and after you...that way everyone will get some visits. Hope you'll visit more, of course.


Welcome! Thanks for coming to the party!

Sunday, 25 December 2011

The Upstairs Family Room For Christmas: Welcome to the 153rd Metamorphosis Monday!

Merry Christmas!   I have just a quick "Before and After" to share for this Met Monday.   I added a few holiday touches to the Upstairs Family Room this year and never got around to sharing those.  As always, I hung a little wreath on the grandfather clock.

1 053


This year the armoire got a bit of lit greenery and I moved the feather tree from its usual spot in the guest room, HERE, to the upstairs family room.


1 018


A view at night...

1 209


Snapped a quick pic today right after I finished icing the coconut cake.  The wax paper was still under the layers.

1 250


With the wax paper removed...

1 257


You'll find the recipe for this cake and the icing, HERE.  I changed the recipe up a bit this time.  I wanted the cake to be even taller than normal.  The recipe calls for all-pupose flour, but I used half self-rising and half all-purpose flour.  And, I still added the normal amount of baking powder.  It was definitely taller than ever, almost too tall for the lid to fit on.  Be careful what you wish for. lol

1 296


Once the cake was done, it was time for the best part.  I surely couldn't let all this icing just go to waste. Right?

Hope your day was filled with lots of yummy moments!  And I hope YOU got to lick the beaters. :)

1 297


Looking forward to all the Before and Afters!

To receive the latest posts, as well as updates about blog parties, subscribe via an RSS Reader or have BNOTP delivered right to your Inbox.  You'll find links to subscribe via RSS and Email on the sidebar to the right.  Thanks for reading; so glad you are here!

Reading this post via e-mail or RSS feed?
*If you are reading this via email or RSS feed, to view all the Before and Afters linked for Metamorphosis Monday, click HERE.


Metamorphosis Monday:
If you are participating in Metamorphosis Monday you will need to link up the "permalink" to your MM post and not your general blog address. To get your permalink, click on your post name, then just copy and paste the address that shows up in the address bar at the top of your blog, into the "url" box for InLinkz.

In order to link up, you'll need to include a link in your MM post back to the party.

If you'd like to include the MM button in your post, just copy and paste the Met Monday button to your computer or grab the html code from underneath the MM logo under the "BNOTP Parties" header at the top of this blog.

PLEASE DO NOT type in all caps...it spreads the links waaaay out. Thanks!

Let's try something fun today! Please visit the person who linked before you and after you...that way everyone will get some visits. Hope you'll visit more, of course.


Welcome! Thanks for coming to the party!

Sunday, 18 December 2011

Beautiful Kitchen Renovation: Welcome to the 152nd Metamorphosis Monday!

Happy Met Monday!  I'm so excited to share an amazing kitchen make-over today.  Linn and her hubby did all the work themselves!.   On their blog, The Home Project, Linn says their main goal was to just "clean up the area and make it a great place to cook and organize our pantry."  The budget didn't allow for knocking down any walls or changing the area/size of the kitchen, but the changes are still quite dramatic.

As you can see, Linn was dealing with a lot of green: green walls, green ceiling and green linoleum flooring.  Note where the refrigerator is in this pic.  It blocked a lot of light in that location.


Another "before" view looking toward the other end of the kitchen.


Here's a "during" picture.  It can feel sooo overwhelming when you're knee deep in a renovation process.  You have to hold onto the dream and keep your focus.  Just keep saying, "It's going to be worth it, it's going to be worth it!"


And indeed, it was!  The flooring was done in a beautiful marble and granite tile.  Linn also decided to tile all the kitchen walls with white subway tile for a nice, clean look.


The counter is stainless steel, giving the kitchen a bit of an industrial vibe.    This photo shows the refrigerator's new home.  The stove and refrigerator basically swapped locations, allowing more light into the kitchen.   Linn updated the stove, too.


Love the knife rack/bar and the additional lighting.


You can read more about this renovation and see the full breakdown for the budget at The Home Project.  Linn thanks so much for sharing this inspiring kitchen renovation!

Looking forward to all the Before and Afters!

To receive the latest posts, as well as updates about blog parties, subscribe via an RSS Reader or have BNOTP delivered right to your Inbox.  You'll find links to subscribe via RSS and Email on the sidebar to the right.  Thanks for reading; so glad you are here!

Reading this post via e-mail or RSS feed?
*If you are reading this via email or RSS feed, to view all the Before and Afters linked for Metamorphosis Monday, click HERE.


Metamorphosis Monday:
If you are participating in Metamorphosis Monday you will need to link up the "permalink" to your MM post and not your general blog address. To get your permalink, click on your post name, then just copy and paste the address that shows up in the address bar at the top of your blog, into the "url" box for InLinkz.

In order to link up, you'll need to include a link in your MM post back to the party.

If you'd like to include the MM button in your post, just copy and paste the Met Monday button to your computer or grab the html code from underneath the MM logo under the "BNOTP Parties" header at the top of this blog.

PLEASE DO NOT type in all caps...it spreads the links waaaay out. Thanks!

Let's try something fun today! Please visit the person who linked before you and after you...that way everyone will get some visits. Hope you'll visit more, of course.


Welcome! Thanks for coming to the party!