Showing posts with label recipe. Show all posts

Wednesday, 30 November 2011

Wedding Wednesday: Chocolate Chip Cookie Dough Pie

Mike and I are getting really excited about putting our plans into motion for our October 2012 wedding. We made the decision several months ago to do a multitude of pies rather than cakes or cupcakes for the reception. We've been having fun playing with pie recipes ever since. While the Blueberry + Peach is still by far my favorite (yum!), we've also made apple pie and Blackberry+Pear! This one is our most recent attempt though! I baked one for my family on Thanksgiving (and we kept one at our home, too!). Mmmm! It's rich and gooey and positively divine when still warm! Of course all pie tastes better with ice cream in my opinion but this one hits a homerun!

I originally stumbled upon this recipe from Our Best Bites (which originated from Nestle) and they have the best pictures, too! I didn't manage to snap any while I was baking away (aside from the 3 which are obviously from my phone!) but I've included a few from OBB and you can always pop on over to see step-by-step photos if needed! I got to use my new baby KitchenAid mixer for this recipe and boy oh boy, it's a dream machine! 

Let me preface this recipe with this: It is so simple! I made a second one without even looking at the recipe and I clocked myself and five and a half minutes! Of course you need to bake it for an hour, but really, it's such a simple recipe! (I changed a tiny thing here or there, but not too much!)

Chocolate Chip Cookie Dough Pie

Ingredients:
1 unbaked 9-inch pie crust, homemade or store-bought.
2 large eggs
1/2 C flour
1/2 C white granulated sugar
1/2 C packed brown sugar
3/4 C real butter, softened (1 1/2 sticks)
1 C chocolate chips (semi-sweet or dark works best, you might find milk too sweet)
1 C candied pecans (you are welcome to make it without nuts)
Directions:
Vanilla ice cream, or sweetened whipped cream for serving (a must!  I prefer ice cream)
optional: chocolate sauce (honestly, doesn’t really need chocolate sauce, but it looks pretty!)
Preheat oven to 325° F.
Beat eggs in large mixer bowl on high speed until foamy. Beat in flour, granulated sugar and brown sugar. Beat in butter. Stir in morsels and nuts. Spoon into pie shell.
Bake for 55 to 60 minutes or until knife inserted halfway between edge and center comes out clean. Cool on wire rack or serve slightly warmed.  Serve with ice cream or whipped cream.


Okay, so mine doesn't look all that delicious out of the oven, but I assure you it is! OBB makes a good point that it takes a lot less rich when it's cooled, but you can't really beat the oogey gooey goodness of a fresh-from-the-oven pie! iPhone photos and poor kitchen lighting do not do it justice. It's a super simple recipe with things you might already have in your house so you simply must give this a shot! Even if you don't like overly sweet things, this might tickle your fancy! (Mike even liked it!)


* Additional photos courtesy of Our Best Bites

Wednesday, 23 November 2011

[Vegan] Salted Chocolate Chip Cookies

Today I thought it would be fun to have one of my closest friends (and bridesmaids!) do a guest post on vegan baking. Shannon just started her blog in the past week or so and we decided to trade a blog design for some awesome vegan baking guest posts! If you've got any last minute time to kill, maybe you could whip some of these bad boys up for your Thanksgiving festivities tomorrow! Enjoy!
♥ ♥ ♥ ♥ ♥ ♥ ♥ ♥ ♥ ♥ ♥ ♥
Hi! My name is Shannon. I recently started my blog, Leaves & Flours, because I wanted to show people that neither baking nor veganism were too difficult. When I went vegan I had to learn how to bake all the treats that I knew I would miss otherwise. And really, nothing makes me happier than sharing treats with people.

There's a DC based bakery named Sticky Fingers (you may have seen them on Cupcake Wars) that makes a sweet and salty chocolate chip cookie that I love. Since I appreciate it so much, I thought I would share with y'all my own recipe that was inspired by their creation. If you have any questions about vegan baking, don't hesitate to ask!


Salted Chocolate Chip Cookies
yeilds approximately one dozen

½ cup vegan butter*
½ cup brown sugar
¼ cup granulated sugar
1½ tsp vanilla extract
1 Ener-G egg or other egg replacement**
1 cup all purpose flour
1/3 cup old fashioned oats
½ tsp baking sode
1/3 tsp salt & extra salt for sprinkling
1/3 cup chocolate chips


Allow butter to soften at room temperature at least 30 minutes. Preheat oven to 375F. Cream butter & sugar. This may take some arm strength. Add vanilla & egg replacer, mix again. Mix in dry ingredients, aside from chocolate. Gently fold in chips. Using a cookie scoop or tablespoon, drop approximately 1" balls of dough spaced at least an inch apart on an ungreased cookie sheet. Slightly flatten balls of dough with palm of hand. Bake 10-12 minutes, rotating tray once during baking. After removing cookies from oven, sprinkle with extra salt to taste. I prefer sea salt, but any should work.

* I use Earth Balance
** You can find Ener-G in most grocery stores, and one box has lasted me 3 years. As a different egg replacer, I recommending mixing 1 tbsp ground flax seeds with 2 tbsp water.


Tuesday, 15 November 2011

Kaelah's Cocktail Hour: Bartender Knows Best

Two weeks ago I shared my first cocktail recipe here on Little Chief Honeybee! (Can you believe two weeks have passed already?! Yikes! I'm a little embarrassed for my lack of promptness!) I shared my all-time favorite-drink-ever no-one-makes-it-like-i-do (yes, I'm proud!) New Old Lady recipe! Then I realized, um, ya probably want to know what it looks like! If you're like me, you judge your food and drink heavily on the way it looks. That's simply how it works for me. There aren't many things I'll eat that don't look appetizing (no-bake cookies and pasta bake are my exceptions!). Today I'm going to share with you not one, but five (!!!) fantastic cocktail recipes that I use frequently at my bar (including my newest creation from Saturday night!).


One of the coolest things about bartending is you can just make up recipes. Mix a little of this and a little of that, then come up with a really cool name. It may exist somewhere else by some totally different calling, but it can be your little creation in your little bar (even if your "bar" is just your home or circle of friends!) Here's a rainbow of beverages for your next night out, party, or if you're feeling fancy on a night at home!
Blue Valium
This is a drink we make all too often at our bar. It's a simple two-liquor drink and it tastes pretty darn good! It's a bright blue and it gets a lot of attention. More often than not I have eager patrons coming to the bar asking "What is that blue drink you just made? I want that!" simply because it's pretty. Looks sell in a bar, that's for sure!

The recipe:
1 ounce vodka
1/2 ounce blue curacao
Equal parts sweet 'n sour mix + Sprite
Garnish with a cherry

Liquid Marijuana
This is without a doubt our most popular drink at my bar. It has only since become the favorite this year, but we sell them like hotcakes. It got so crazy trying to pour all of the liquors for each one that we actually started pre-mixing the alcohol so we can do a simple 1.5 oz pour. If you decide to pour each one you'll undoubtedly get more alcohol, so be careful! This one can add up quick and you might be stumbling around! We don't want that!

The recipe:
1/2 ounce Malibu rum
1/2 ounce light rum
1/2 ounce blue curacao
1/2 ounce apple pucker (or melon liqueur)
Equal parts sweet 'n sour mix + pineapple juice
Garnish with a cherry

Peached Whale
This is my newest creation! I came up with it Saturday night at work and boy oh boy... it's good! I polled my Twitter followers for a name and Baily came up with the winner: Peached Whale! It's absolutely perfect for a drink with Malibu and peach schnapps! I actually ended up selling quite a few Saturday night as I told everyone about them! I brought my own passionfruit juice but we might just have to start stocking it! I promise you won't regret this one! Most bars don't have passionfruit juice so this is a great drink to make at home!

The recipe:
1/2 ounce Malibu rum
1/2 ounce Bacardi rum
1/2 ounce peach schnapps
1/2 ounce amaretto
Fill passionfruit juice
Garnish with a cherry (or three!)

Tootie Fruity
We make this one quite a bit at my bar too. It's a great drink that is super easy to make at home. I'm not really a fan of vodka but I know a lot of people are so if you like vodka and fruity drinks (but hate that you always get handed a Sex on the Beach), this is your calling! 

The recipe:
1 ounce vodka
1/2 ounce triple sec
Equal parts grenadine (or cranberry juice!), orange juice, and pineapple juice
Garnish with a cherry

Cape Cod
This is as simple as they come. It really needs no explanation! If you're a no-fuss-or-frills kind of gal, you might really like the Cape Cod!

The recipe:
1.5 ounces vodka
Fill cranberry juice
Garnish with a lime


So now I'm curious... Did any of you try the New Old Ladies I blogged about the first Kaelah's Cocktail Hour?! Did you like them? (If you're ever in Tennessee, stop by my bar! I promise to make them better!) How about these? Think you'll give any of them a go?!

Friday, 28 October 2011

Kaelah's Cocktail Hour: New Old Lady

I've been bartending for over 5 and a half years now (holy crap!) so it goes without saying that I've found certain drinks to be my favorite to make and consume. I decided to start a new feature here on LCH sharing some of my absolute favorite cocktails from my bar. Some originated there. Some originated from me. Some came from goodness knows where but made an impression at my little bar. But they have one thing in common: they're all delicious. I'm biased to a few and this first one I'm sharing is my all time favorite. I might as well not drink anything else because 99% of the time, it's a New Old Lady.

In my 5+ years I have never had a single person tell me they didn't like the NOL when I suggest it. I get a lot of customers who have no idea what they want and this is always my first suggestion. It's kind of my baby!

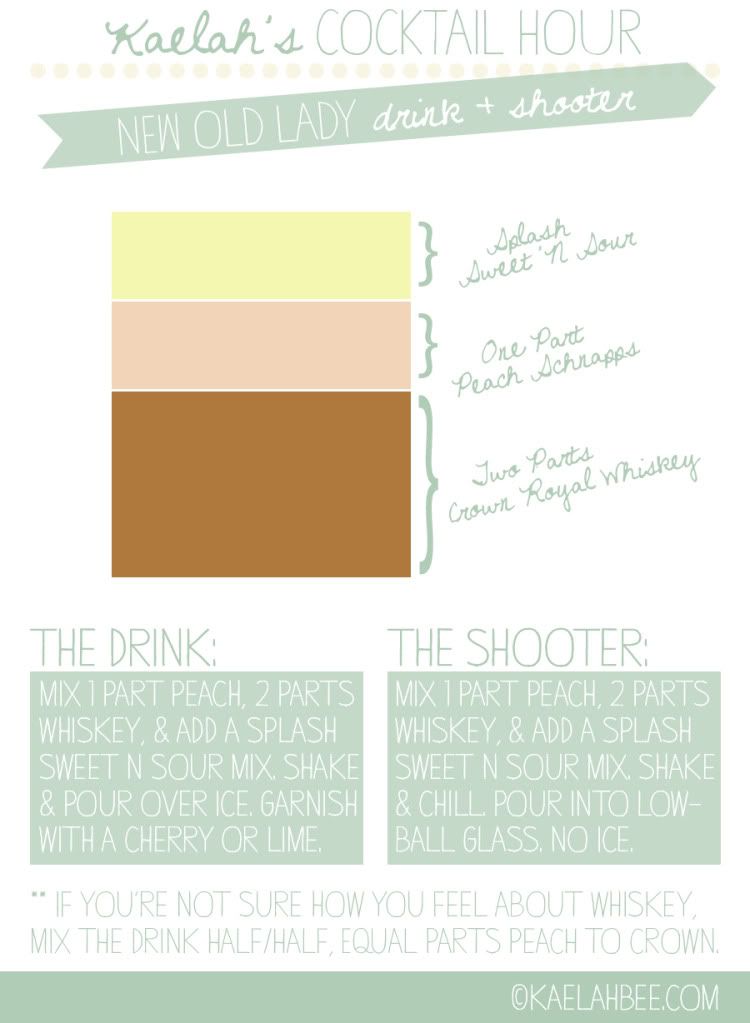
Below you'll find the illustrated (and very simplistic) recipe, and I'll include ways to change it up to suit your mood underneath! 

For everyone afraid of taking a "recipe" to a bartender, worried that they'll roll their eyes at you and tell you they can't make it, don't be scared! I love when customers bring me new recipes and I love sharing my concoctions with other bartenders! Other bartenders (or you!) may recognize some of the drinks I feature by a different name, and that's all well and good! Every place tends to call it by a different name, and every bar may mix a Sex on the Beach differently! We don't actually abide by a little black book of recipes so don't be alarmed if I share something you think is wrong... it's just how we do it! Enjoy! (Click on the image below to see it full size!)


Ways to mix it up:
+ Add a splash of Sprite and/or pineapple juice. This is especially tasty if you serve it on ice as a drink!
+ Like the subtext reads, do equal parts whiskey and schnapps if you want to ease your way into it.
+ Add a tiny splash of grenadine for a fruity kick.

Most bartenders will understand what you mean when you say "one parts" and "two parts" and "splash"... but if you want to make it at home and you have no idea what that means, think of all alcohol equaling 1.5 ounces (2 or 2.5 if you're feeling wild!). 3 parts of 1.5 oz would be .5 oz each. 1 oz whiskey and .5 oz peach schnapps. I don't actually measure this as I've grown accustomed to just knowing when to pour/stop, but if you have a jig on your liquor, start to pour it and count to five fairly quickly. That is roughly between 1 and 1.5 oz. I tend to say counting to 3 is half an ounce but that's fudging it a bit! (ex: count to 5 quickly for the whiskey and count to 3 for the schnapps!) Okay, I may tend to give a wee bit more alcohol than the recipe calls for but oh well! If you're mixing it at home you can mix to taste so don't sweat it too much! If it's too strong you can always dilute it a bit with sweet ' sour mix. Be careful if you're prone to heartburn as the sweet 'n sour might set it off!

New Old Lady is without a doubt my favorite drink so if you find yourself craving something new when you're out and about (or even at home), give it a try! Let me know if you decide to try it and what you think! It's absolutely yummy! xo

What's your favorite cocktail to have when you go out?

PS; I'll also be sure to include some mock-tail recipes for all of you readers who are underage or choose not to drink alcohol! I can't leave you out! ;)

Monday, 10 October 2011

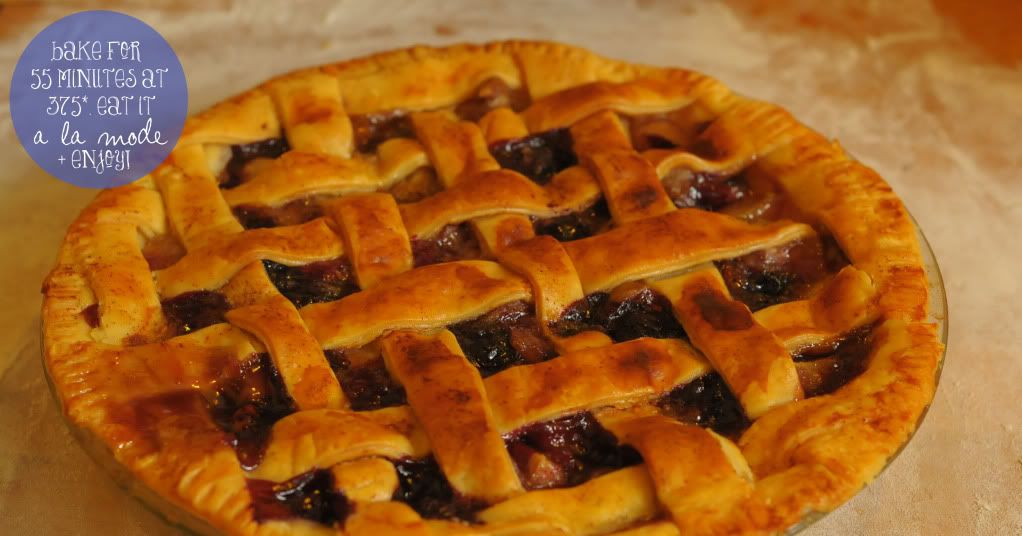
Mike's Blueberry-Peach Pie

I've been waiting for what feels like forever to post this recipe. Timing issues and scheduling aside, this pie is long gone in our house. We pretty much ate one piece each per day until the pie dish was totally clean. Yum! Mike threw this recipe together with absolutely no help from the internet or a cook book. I mean, pies really aren't all that hard... it's just baked fruit. So he mustered up some courage to just throw things in a bowl and cook it... and it was the most heavenly thing I've ever eaten! Seriously... sounds like a slightly strange combo but nothing beats it! Give it a whirl! (Edit: I didn't realize how small/hard to read the photos would be... Whoops! Too late. You can click on each one to see it larger or you can follow the typed out version below! Or maybe you have better eyesight than me!)


Here's the typed version in case you want to copy + paste or print it out! It's seriously a ridiculously easy recipe! xo

Ingredients:
1 box of 9" pie crusts (2 total)
4 peaches
1 cup of blueberries
1/2 cup of brown sugar
1/2 cup of flour
1 cup of sugar
2 Tbls of honey
1 Tbls of cinnamon
1 stick of butter
1/2 cup of glazed pecans (pre-packaged)

Directions:
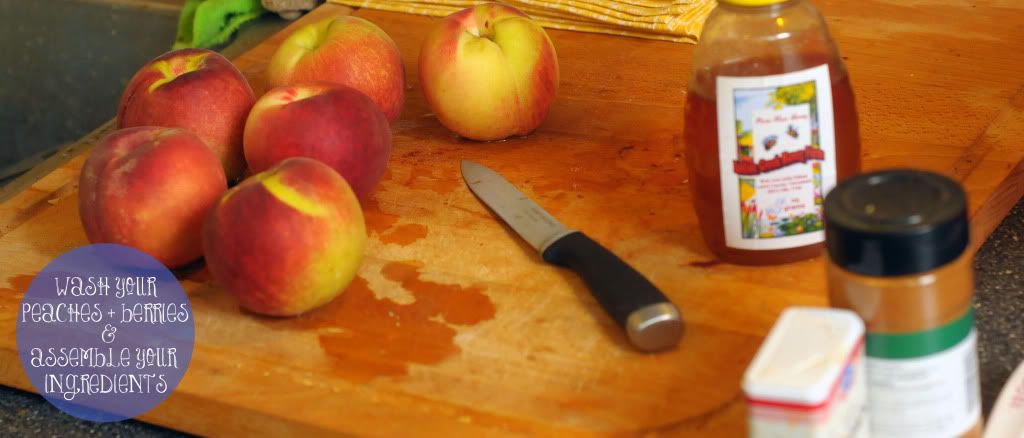
Step one: Wash your fruit but leave skin intact. Line your pie dish with one 9" pie crust. (Lightly coat the bottom of the pie dish with butter.)

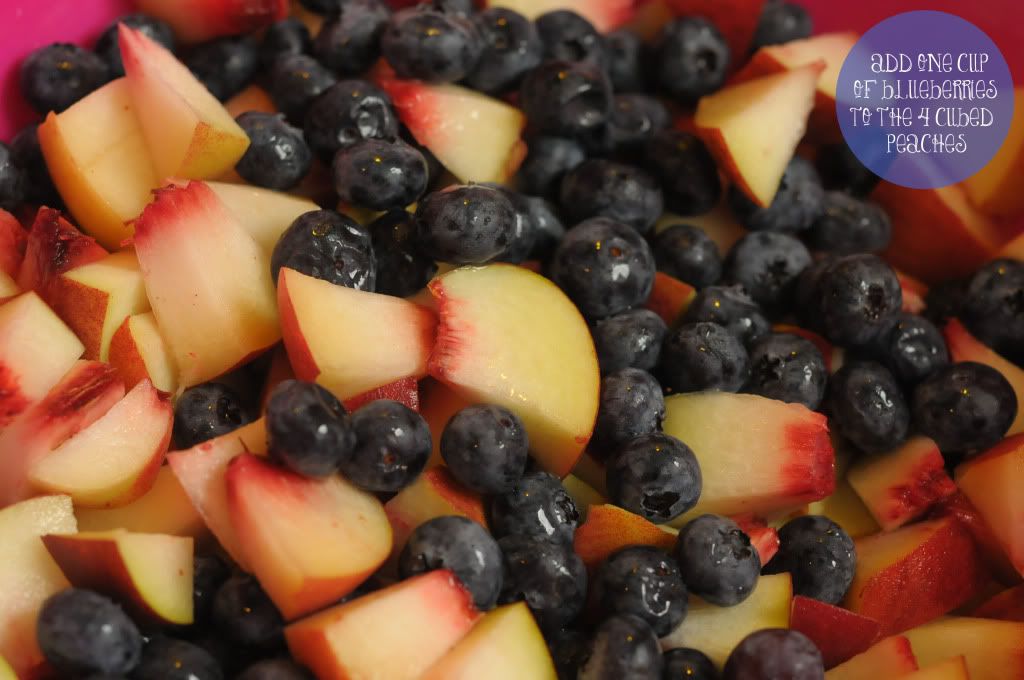
Step two: Remove peach pits and cube peaches. 

Step three: Add one cup of blueberries to the bowl. As well as 1/2 cup of glazed pecans

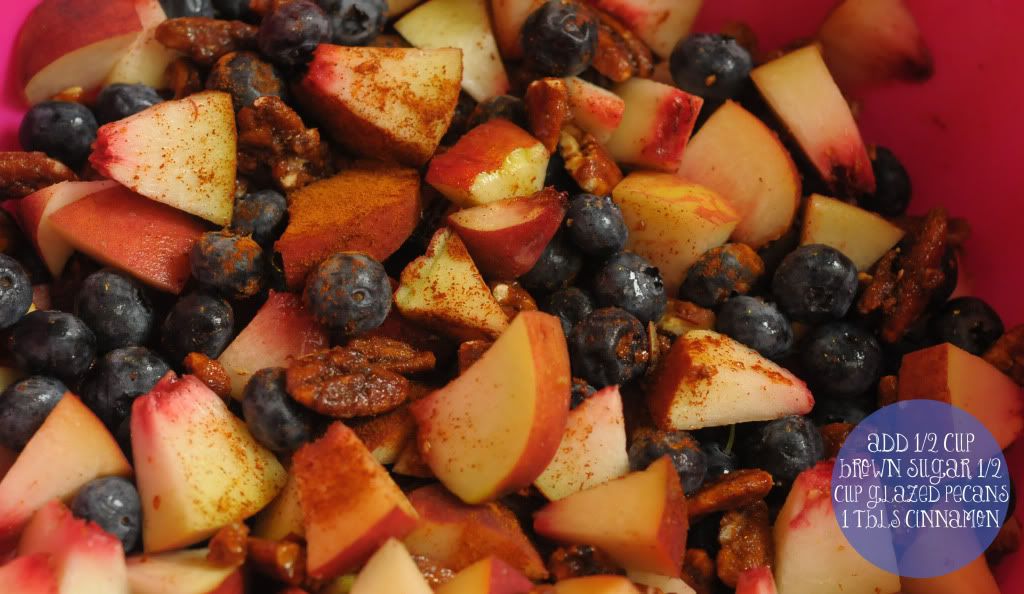
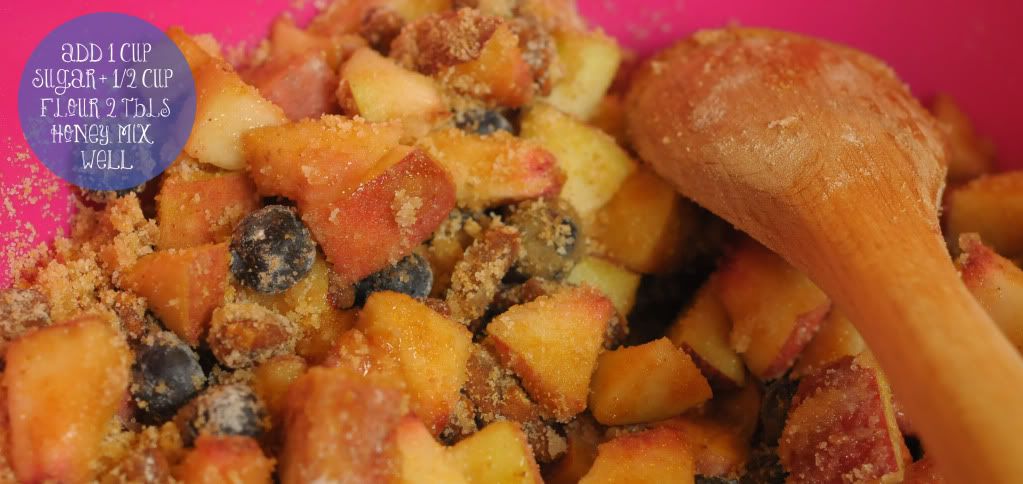
Step four: Add all dry ingredients... 1/2 cup of brown sugar, 1/2 cup of flour, 1 cup of sugar, 1 tablespoon of cinnamon. Add 2 tablespoons of honey. Mix well.

Step five: Add the pie filling mixture to the pie dish with the crust already laid out. Slice the remaining stick of butter and lay it on top of the filling.

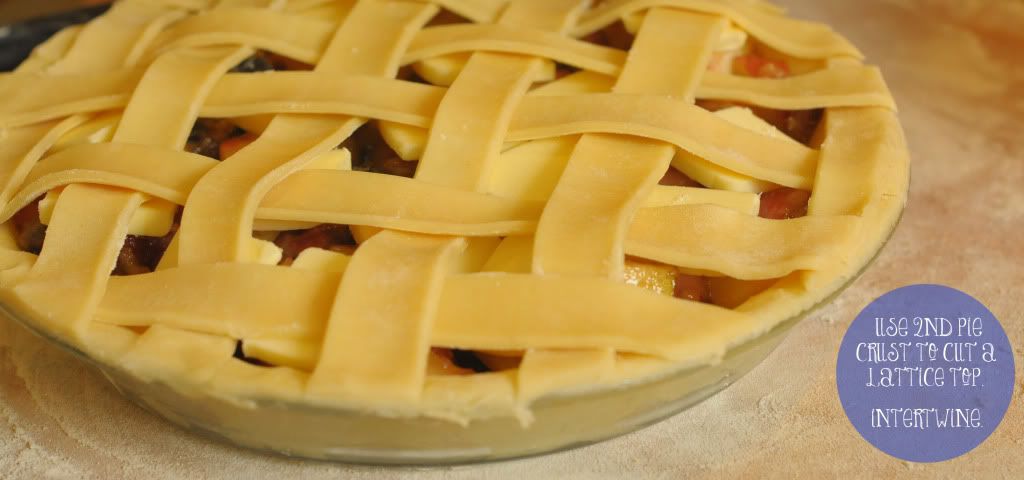
Step six: Use the second 9" pie crust to create a lattice top. (Optional. You can have any type of pie top you wish, but c'mon... lattice is so pretty!)

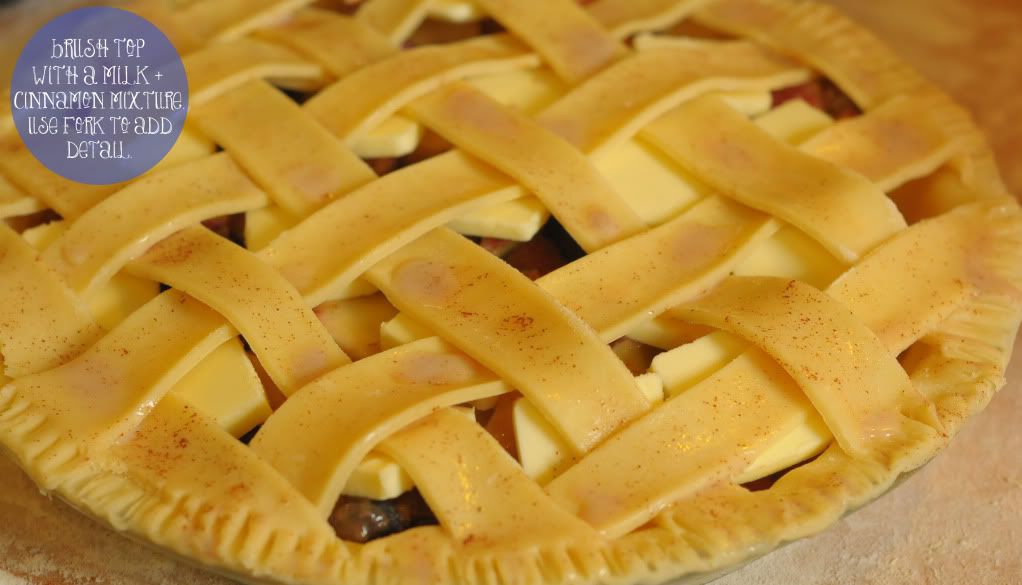
Step seven: Brush a milk + cinnamon mixture on the top of the pie to help it brown in the oven.

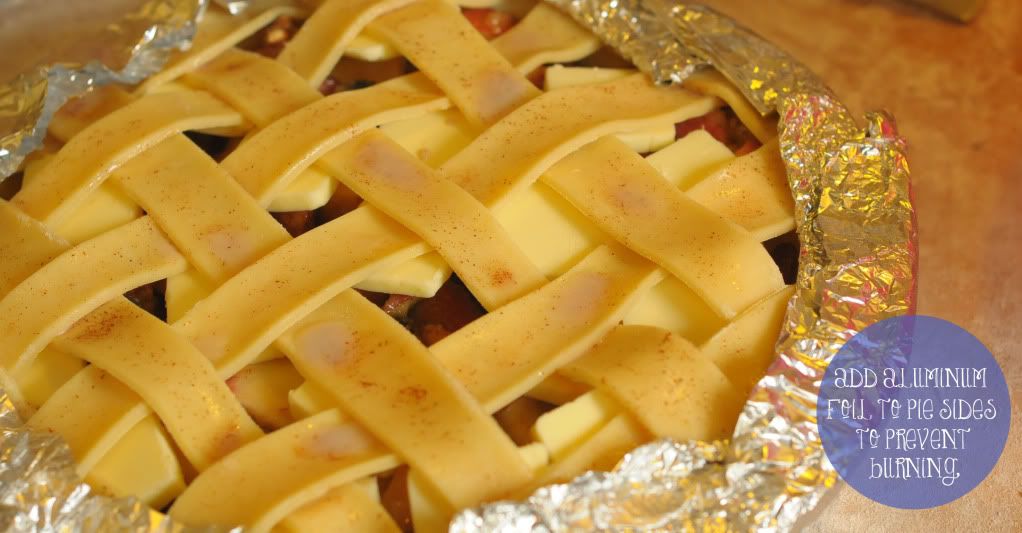
Step eight: Cover the edges of the pie with aluminum foil to prevent it from burning.

Step nine: Bake in the oven for 55 minutes at 375 degrees. Remove it and let it cool for 5 minutes.

Step ten: Top it with vanilla bean ice cream and serve it a la mode! Enjoy!

Please let us know if you decide to try it! I promise you you won't regret it! I'll be making some mini apple pies tonight to share later this week! Happy Monday, honeybees! xo

Wednesday, 1 December 2010

Guest Post: Katrina's Quinoa Salad Recipe!


Hi everyone! I'm Katrina from The Demure Muse! Thanks so much for having me over here at Little Chief Honeybee.


I can usually be found blogging about my daily outfits or jewelry making but today I'm here to share with you one of my most recent kitchen experiments. I hope you try it out this holiday season because I think the colors are perfect for the winter festivities!

Quick disclaimer: This whole recipe was an experiment between myself, a meatetarian, and my friend who has newly converted to being a vegetarian. If you’re like me and have never heard of quinoa prior to this, it’s a pseudo-cereal that is extremely nutritious and is often considered a vegetable substitute due to its nutritional value instead of a grain.

Vegetarian Quinoa Salad - serves 4

What you’ll need:
1. 2 cups of quinoa
2. 4 cups of vegetable broth (or a mix of vegetable broth and water)
3. 1 ½ cups of cherry tomatoes
4. carton of fresh basil (add as desired)
5. small block of feta cheese (or as much/little as you’d like!)


First, we need to wash the quinoa. You may notice that the water that the quinoa is being washed in will have a bit of a “soapy” feel. I did two rinses before cooking the quinoa.


Much like preparing rice, place a pot on the stove at medium to high heat with the vegetable broth in it. Once the broth comes to a boil, add the quinoa and put a lid on it. Remember to stir the quinoa every few minutes so that it doesn’t stick to the bottom of the pot. You’ll know when the quiona is ready because all of the broth gets boiled into the grains.

While the quinoa cooks, you can prep the rest of the ingredients for the salad. The great thing about making this salad is the fact that there is relatively little “‘cooking” involved! From here, halve the cherry tomatoes and chop the fresh basil. We want the basil to be in relatively big pieces.


Cut the feta cheese into about ½ inch cubes and then mix all of the fresh ingredients together in a separate bowl.


By this time, your quinoa should be well on its way to being fully cooked. We were a little impatient when we made this first batch of salad and we mixed all the ingredients in with the quinoa while it was still extremely hot, which melted the feta cheese. Depending on how you like your salad, it might be better to let to let the quinoa cool down a bit before mixing everything together.

Due to my meatetarian needs, I added a side of chicken. (I know, I know. I’m not the most supportive friend in terms of helping a newly converted vegetarian. I have a habit of forcing myself to have a balanced meal in terms of carbohydrates, vegetables, and proteins) I couldn't bring myself to have only a salad for dinner which is why I added the meat. I also added a small bed of spinach to my quinoa salad.


I hope you enjoyed the recipe! :)

--------------------------------------------------

Big thanks to Katrina for her awesome recipe! I can't wait to try it! You can stop by Katrina's blog or shop if you'd like to learn more about her!

Thursday, 4 November 2010

Foodie Feature: Mike's Veggie Pasta

We're back with another Foodie Feature installment! It's been a bit since we've done one of these but we have a few recipes we're excited to share. We thought we'd keep this one really simple (and because we had it for dinner tonight!). It's pretty much fool-proof so I bet I could even make it! Enjoy! 

Veggie Pasta


Ingredients:
1/2 Yellow Squash
1/2 Zucchini
1/2 Red Bell Pepper
1/2 a bag of Fresh Broccoli
Small bit of Basil
Pasta
Salt
Pepper
1 jar of Pasta Sauce

Steps:


1. Heat frying pan on medium high heat and in another pot bring water to a rolling boil. Meanwhile cut vegetables into desired size (we use quarters).


2. When frying pan is at cooking temperature, add 2 tablespoons of oil and then cup up vegetables. Cook vegetables until golden brown. Add pasta to pot of boiling water.


3. When the vegetables are done, mix pasta and sauce into the same pan. Cook until sauce is fully heated. Cut up basil and toss in.


4. Plate the pasta and top with desired cheese (Parmesan, Mozzarella, etc). Voila!


It's really that simple! And so yummy! I think it's hands down the best way to eat pasta. I love veggies anyway, but I don't think I could eat regular ol' pasta again! 

Friday, 20 August 2010

Foodie Feature: Mike's Garlic + Basil Naan Pizza

This is a great and fun recipe if you're home alone or not super hungry, or well... you're like me and you really just fail at all things cooking related. There's NO cooking involved! Except a small stint in the oven just to melt/toast it all! Even I can do that, people! So I know you can, too! Mike is a pizza LOVER! I mean LOVER. And I am not really a fan all that much so this was a nice compromise for the two of us. It's really yummy and so so simple! The rest is allllll Mike! Enjoy!


Garlic + Basil Naan Pizza


Ingredients:

  • Fresh mozzarella (not the stuff in a bag. look for it in a package in the deli area. it will clearly say "fresh mozzarella."
  • Fresh basil
  • A pack of garlic naan bread
  • A jar of you favorite tomato sauce (I used "fire roasted tomato and garlic")
  • Extra virgin olive oil
  • Ground black pepper
  • A tall frosty beer for the chef (totally optional)

Garlic + Basil Naan Pizza

Step one:
Lay out your desired number of naan breads on a baking sheet. (Cooking these on a baking sheet will yield a soft chewy crust with crispy edges while cooking them directly on the rack will result in a crust that is crispy all the way through. I prefer them on a baking sheet but you decide what's right for you) use a pastry brush or a clean set of hands to brush the bread with a light coat of olive oil. After the olive oil I usually toss on just a pinch of black pepper.

Garlic + Basil Naan Pizza

Step two:
Take your tomato sauce and use a spoon to spread it evenly around the top of the bread leaving just a little bit of a border on the outside so you have a nice crust when it's done. Now take some of your basil (not all of it) and sprinkle it evenly on top of the tomato sauce.

Garlic + Basil Naan Pizza

Step three:
Take your shredded mozzarella and spread in evenly on top of your pizza. use as much or as little as you like. Sometimes the fresh mozzarella is a little tough to grate. the best way to do it is to used the big holed sized of the grater and use light pressure. It's ok that it crumbles apart (and it will) because you can use all those crumbles too. It's just cheese and it's all going to look the same after it spends a little time in the oven.

Garlic + Basil Naan Pizza

Step four:
Take the rest of your basil and spread it out evenly on top of the cheese. Now really really really lightly drizzle olive oil over the whole thing and then crack some pepper on top of it just to finish it off.

Step five:
Place your pizza(s) in an oven that has been preheated to 350. let it cook for about 12-15 minutes. You're looking for melted cheese and a golden brown edge on the crust.

Garlic + Basil Naan Pizza

Step six:
Nom.

We served our Naan pizzas with a side of vegetables. This is completely optional of course! 

Side of Vegetables

Let us know if you decide to try it!

xoxo