Showing posts with label halloween. Show all posts

Tuesday, 1 November 2011

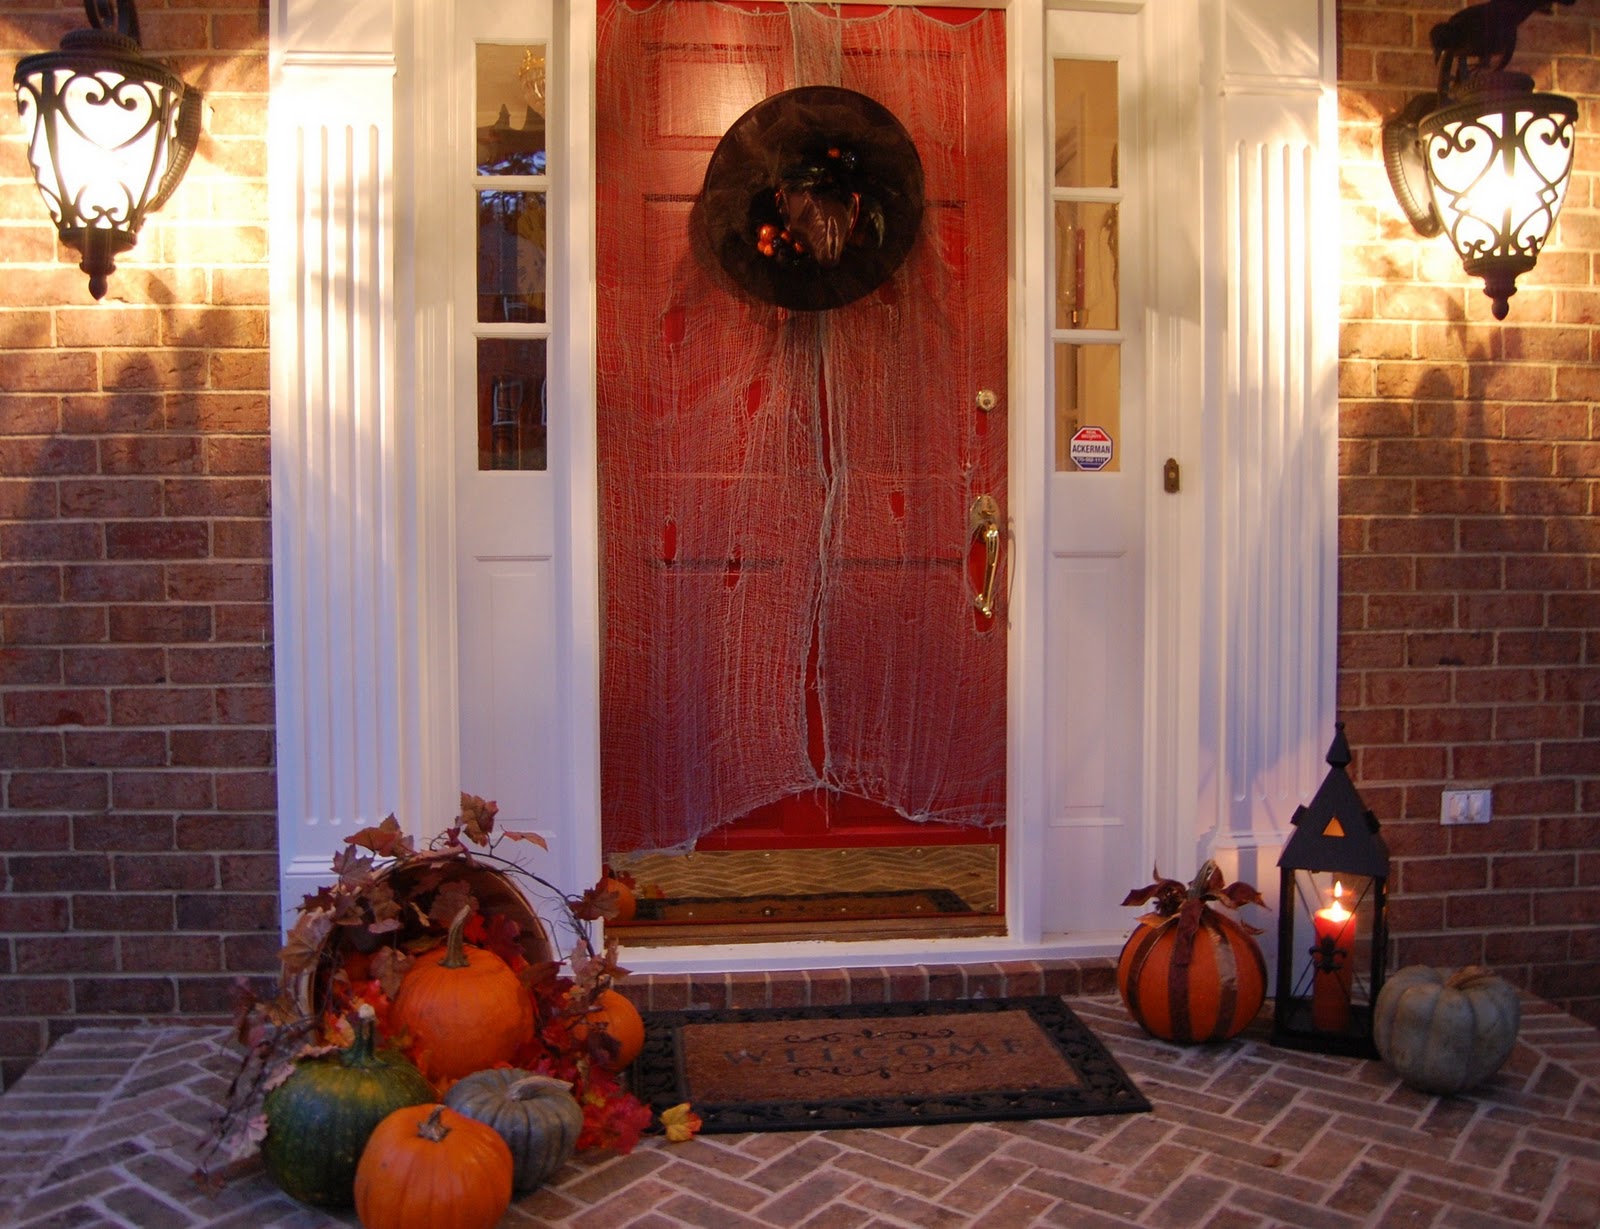
Front Porch Decorated for Halloween

Wow, what a fun night! I love, love, love Halloween. I have so many wonderful memories from my childhood of trick-or-treating with friends, so Halloween has always been one of my favorite holidays.

I decorated the porch pretty simply for Halloween this year.


I covered the front door with the "creepy cloth" used as a tablecloth in THIS previous Halloween tablescape.  (You can see the door minus the creepy cloth in THIS post.)


The witches hat I wore last year (while giving out candy) became my door decoration for this year.  I was inspired to use it on the front door after seeing a similar one at the Country Living Fair.  A crow kept watch from the lantern nearby.


Pumpkins and fall leaves spilled out of an over-turned basket.


And a ribbon-covered pumpkin came out to play for the night.  You'll find an easy tutorial for decorating a pumpkin with ribbon, HERE.   This is a look that should work well all the way through to Thanksgiving.

The scented candle smelled soooo yummy each time I answered the door.  Even the princesses, witches and ghosts who came trick-or-treating kept commenting on the wonderful scent.


Did you have a fun Halloween?

Referenced links in this post:
Porch minus Halloween Decor
Halloween Tablescape with Creep Cloth Tablecloth
Country Living Fair
Tutorial for Ribbon Decorated Pumpkin

Resources:
Witches Hat and Scented Candle: Provided by Colonial Candle
Creepy Cloth: Michael's last year
Lantern: Old Time Pottery
Pumpkins: Home Depot
Basket...had a while so don't remember now

Monday, 31 October 2011

A Poor Man's Dorothy

First off, let me just say this: Holy cow! Y'all really blew me away in response to yesterday's post. Your comments were so eloquent, sincere, and wonderful. It's so great to know that even in our vulnerable/uncomfortable situations, we're never alone. It's literally going to take me weeks to get back to everyone but please know that I've already started working on it! Also know that I read absolutely every single comment (about three times each!) and I'm so proud to call this little slice of the internet mine! You humble me daily and I'm so glad you can be part of my journey!

Since today is Halloween (Happy Halloween, by the way!) I thought I'd post what I wore to work on Saturday night for our "costume contest". I don't really get too wrapped up in Halloween (I know... so boring of me!) and I didn't want to spend any money (Frugal McDoogal!), so I opted to take the Speedy Girl dress from this post and style it up like Dorothy from Wizard of Oz. I didn't want to DIY any glitter shoes so I just wore some red flats and braided my hair. Close enough right? I spent exactly ZERO cents. Win! Maybe I'll get crafty next year, but this year I was fine just cruisin' through! It was a successful night at work (for the most part. May or may not have had a verbal showdown with an incredibly insufferable gentleman) and I'm ready to be productive this week!

Yesterday was spent thrifting and fawning over a rescue/special needs puppy we have our heart set on. More on that at another time! 

What are you dressing up as for Halloween? (Or what have you this weekend?) Did you do anything super fun and exciting for the ~holiday?!

Cupcake Princess dress c/o Speedy Girl
Forever 21 cardigan
Black tights c/o Foot Traffic
Go Max flats via PLNDR
Thrifted belt

Saturday, 29 October 2011

Halloween Table and Mantel...Spooky!

Happy Weekend! Are you making final preparations for all the goblins and ghouls who will soon be knocking on your door? I'll be heading out today to buy candy.  Then I'll be trying hard to not eat it all by Monday!    What's your tactic for not digging into the candy and eating it before Halloween arrives? Some folks purposely buy stuff they don't like, but where's the fun in that? lol

My friend, Bonnie, has been readying her home for the big day.  I love seeing how Bonnie decorates her dining room hutch for the seasons and holidays.  Come a bit closer and check out her spooky table setting.


Love the orange candlesticks with skeleton candles.  Even the tablecloth is covered with skeletons!


A ghoulishly fun centerpiece!  Let's name him Skelley.   Hope he likes his new nickname.  If he doesn't I'm telling him it was YOUR idea!


Skelley is a little on the vain side.  He placed his image on all the dinnerware for your eating enjoyment.


Here's you place right here.  Won't you sit down, if you dare.  Muwhahahaaaaa


A spider has spun a web to hold your napkin in place.  You may want to use your shirt-tail or sleeve for the evening.  Hahahahahah!


It's getting dark...are you skeered, yet?


Darker still...ooooh.


Wow, Skelley looks a lot more menacing after dark, doesn't he?   I think I'll sit in that chair behind him.  You can sit here in front.  He'd like to talk with you about the name you picked out for him.  ;)


After dinner, let's move into the family room.  You gotta come check out Bonnie's mantel!


Bonnie has bats roosting in her mirror, and we've awakened them with our visit.


Hope they aren't vampire bats!  Yikes!


Bonnie, I'm so glad you are still a kid at heart!  I absolutely loved seeing your home decorated for Halloween.  Thanks for inviting us in!

Click HERE to view additional Holiday Decorating and Tablescapes.

Resources:
Linens & napkin rings - Kohl's, last year
Skull plates - Pottery Barn, last year
Chargers, glasses & Black plates - Marshall's, many years ago
Black & White Checked salad plates -TJ Maxx, this spring
Black wine glasses - Target
Flatware - Either Panache or maybe Ross, years ago
Skull bust and faux Books - Home Goods, last year
Votives - Michael's, last year
Orange candlesticks - Gifts
Skeleton candles - Home Goods

Friday, 28 October 2011

A Blue and White Pumpkin for the Guest Room

There were so many wonderful tablescapes posted for yesterday's Tablescape Thursday!  I got a kick out of all the Halloween table settings--so whimsical and fun!

French Bleu Vintage Giveaway:
The Shopping Spree giveaway from French Bleu Vintage is still underway.  Click HERE to leave your comment to be entered.

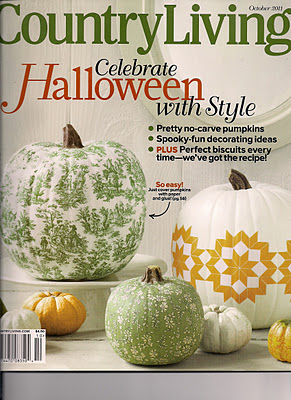
A couple of weeks ago I posted about these wonderful découpaged pumpkins I found in the October issue of Country Living.


That post (HERE) also contained a little tutorial showing how you could découpage a "craft" pumpkin.


You may remember the pattern I chose for my pumpkin was the floral fabric on this cute pillow.


Here's how it looked when finished.  I had so much fun with this one, I really wanted to découpage at least one more pumpkin before Halloween was all gone for another year.


I chose a fabric pattern from the guest room this time.


Can you guess which one?


 I am slightly obsessed with blue and white.  It's just such a crisp, sharp combination.  I love the book, A Passion for Blue and White by Carolyne Roehm.   Do you love blue and white decor, too?  It seems to be a color combination that never goes out of style--a classic color scheme.


For my pumpkin this time, I decided on this Ralph Lauren fabric pattern called, Porcelain.  It's the fabric found in the pillow shams on the guest bed.


I drove back over to the same Office Depot and ran off some copies of one of the shams.  Again, I only used around 6-8 sheets.


Next, I painted the orange craft pumpkin, white.  I didn't want to take any chances on that bright orange showing through the white sections of the paper.  It took two coats of white acrylic paint to cover it fairly well.  I used the same white paint I previously used when I made/painted a patriotic flag for the porch, HERE.


The lighting in the guest room is always a bit tough for photographs since it's on the north side of the house.


So, I took Mrs. Pumpkin out on the porch for a few natural-light photos.  You can really see the true colors out here on the porch.


I really love how it turned out.  The central design that appears several times on the shams is visible in this photo.  It depicts two exotic-looking birdies up in a tree.  I put that pattern on the front and back side of my pumpkin.


Then I just filled in the rest of the pumpkin with the other parts of the design.  This pumpkin definitely took longer than the one I posted about before.  It was tricky matching up this intricate pattern--kind of like putting together one of those puzzles where all the pieces look the same.

You'll find the previous post showing how to découpage a craft pumpkin, HERE.  It's really easy.  Just don't rush--take your time.


I'd still love to découpage something with the graphics from the Pictorial Webster we saw in the Country Living magazine.  I don't think I want it to be a pumpkin, though.  Ummm, I'll think of something.

Have you découpaged any pumpkins this year?  If so, please share a pic on the BNOTP Facebook page HERE.  I'd love to see them!


Links referenced in this post:
Guest Room
Découpaged Pumpkin Tutorial
BNOTP Facebook Page
Patriotic Porch with Flag
French Bleu Giveaway

Saturday, 22 October 2011

A New Use for Those Power Tools

Sharing a few links from past Halloweens here at BNOTP and a new use for those manly power tools.  I love what he did with the Dremel!

Just click on the links to view each post.

Power Tools and Pumpkins:   Power tools make any job easier...even pumpkin carving!


Rat Infestation!  I saw these again this year at Michael's.  They may be my favorite Halloween decorating idea, ever.  I know the real ones aren't cute...but these totally make me smile each time I go up the stairs.


A Halloween table setting with a spider web tablecloth


Sharing three fun templates for carving your pumpkin this year.

Friday, 21 October 2011

Linzer Cookies for Halloween

Beautiful and Halloween-festive tablescapes were linked for yesterday's Tablescape Thursday. Be sure to scroll on down and check them all out. How about a little something to put on top of those table settings?

A couple of months ago I stopped by a local craft store to check out the Halloween stuff and I came across cookie cutters with a Halloween theme.  They were especially made for making Linzer cookies like these.


I've always wanted to try my hand at making Linzer cookies, but I just wasn't sure how.  This Wilton set of cookie cutters makes it really easy.


Here's how they look out of the box.  You just slide one of the Halloween shapes into the center of the cookie cutter to cut the tops of your cookies.  Then you remove it to cut the bottom half.  This set had a cat, pumpkin, owl, witch's hat, bat and ghost.


Linzer cookies traditionally have finely ground almonds in the dough, although from what I've read online, some folks use pecans or walnuts, too.  I used almonds as the directions on the cookie cutter box suggested.


I mixed the dry ingredients together.


Next, I beat the sugar and butter together until fluffy.  Then I added the egg and vanilla extract.


This was the first chance I've had to try the new vanilla extract I bought recently at Williams-Sonoma.  I shared a pic of this extract on the BNOTP Facebook page, HERE  the day I bought it.  I asked if anyone had used it and if it was worth the expense.  Several folks said it was great!


Once the dry ingredients were combined with the butter, egg and vanilla extract, the directions said to divide the dough into two parts, wrap them in plastic wrap and put them in the frig for at least 2 hours.


When I got one out a few hours later, it was way too hard to roll out with my rolling pin.  I zapped it in the microwave for about 12-15 seconds and it softened up just enough to roll it out.


After rolling it out to about 1-8 inch thick...


I began cutting out the tops and the bottoms of the cookies.  This Wilton cookie cutting set made it super easy.   Linzer cookies are a bit like a cookie sandwich.  The bottom is solid but the top has a little cut out.

The dough does need to be well-chilled or it will have a tendency to stick to your cutter.  If the dough begins to get too soft, you can just pop it back in the refrigerator for about 30 minutes.  I didn't have to do that because rolling it out and cutting out the cookies went very quickly.  Once you finish with one section of dough, you can roll out and cut out the second section.  I wonder if this dough will freeze well?  Be nice to freeze one section of dough to enjoy later on.

You can see some of the tops I cut out on the parchment paper on the right side.


After I cut out the tops and the bottoms, I baked them for 11 minutes in the oven.  Then I let them cool.  They are so thin, they cool very quickly.

The recipe called for raspberry jam for the filling between the two cookie parts.  I ended up putting the jam in a bowl and squishing it up a bit more.  That helped the cookies fit together better...no big lumps in the way.


I got so involved in my project, I forgot to take pics while I was putting them together.  But it's super easy.  Just sprinkle powdered sugar on the top part of all the cookies, which is the part with the cut out design.

Next, put a teaspoon of raspberry jam on the bottom half cookie, which is the solid piece with no cutout.  Then gently press the top half with the cut out design, down onto the jam.  So easy!  Believe me, if I can make these, anyone can!


These are scary delicious!  Maybe it's that awesome vanilla extract.  Or, it could be the two sticks of butter I mixed in with all that sugar! Ha!  Just call me Paula for today. ;)

Now I want to find some Linzer cookie cutters with Christmas designs.

Have you ever made Linzer cookies?  Do you have a favorite recipe you use when you make them? Please share in your comment. I definitely want to make these again...maybe for Christmas and Valentine's Day.

You'll find additional Halloween and holiday decorating ideas HERE.


Recipe for Linzer cookies:

Ingredients:
2 cups all-purpose flour
2/3 cup finely ground almonds (2ounces)
1/4 teaspoon ground cinnamon
1 cup (2sticks) butter, softened
2/3 cup granulated sugar
1 egg
1/2 teaspoon vanilla extract
1/2 cup seedless raspberry jam
Confectioners' sugar )optional)

Directions:
In a small bowl, combine the flour, ground almond and cinnamon.  In a large bowl, beat butter and sugar until light and fluffy.  Add the egg and vanilla extract to the butter/sugar mixture and mix well.  Add the flour mixture to the butter/sugar mixture and mix only until incorporated.

Divide dough into 2 sections and press into small disks, about 1 inch thick.  Wrap separately in plastic wrap and refrigerate 2 hours or until firm enough to roll.

Preheat over to 350 degrees.  On a floured surface, roll out one section of dough to 1/8 inch thick.  Keep the other section of dough chilled in the refrigerator, in the meantime.  Cut half of the dough using the round cutter with your chosen insert...this will be the top half of your cookie.  Cut an equal number of round bottoms to go with the tops you've cut.  Transfer to parchment paper lined baking sheets.

Bake cookies 10-12 minutes or until light golden brown.  Cool on the cookie sheet for 2 minutes, then remove the cookies from sheet and cool completely.  Turn over the bottom cookies and spread with about a teaspoon of jam.  Dust the top halves (the section with the cut-out) of the cookies with confectioners' sugar.  Carefully sandwich the cookies together.

Make about 20 cookies.